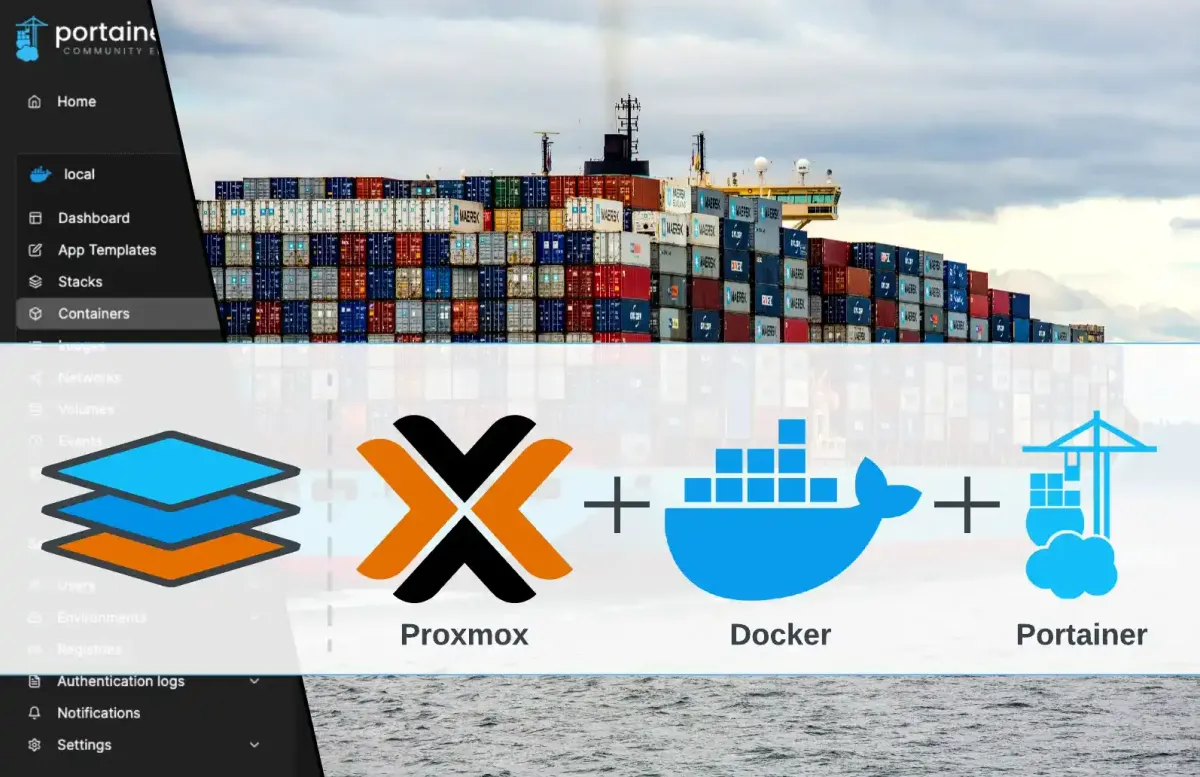
The fastest installation of Docker and Portainer on Proxmox VE
This guide walks you through the installation of Docker on a Proxmox VE server, highlighting key steps like setting a static IP and creating backups. Ideal for both beginners and experienced users, it aims to simplify the process and ensure a smooth setup for your containerized applications.

Introduction
Hello. Let's call this the foundation of foundations, because I see that I will refer to this guide more than once.
Virtualization and containerization go hand in hand in #homelabbing. I constantly see how these things closely intersect in practical tasks.
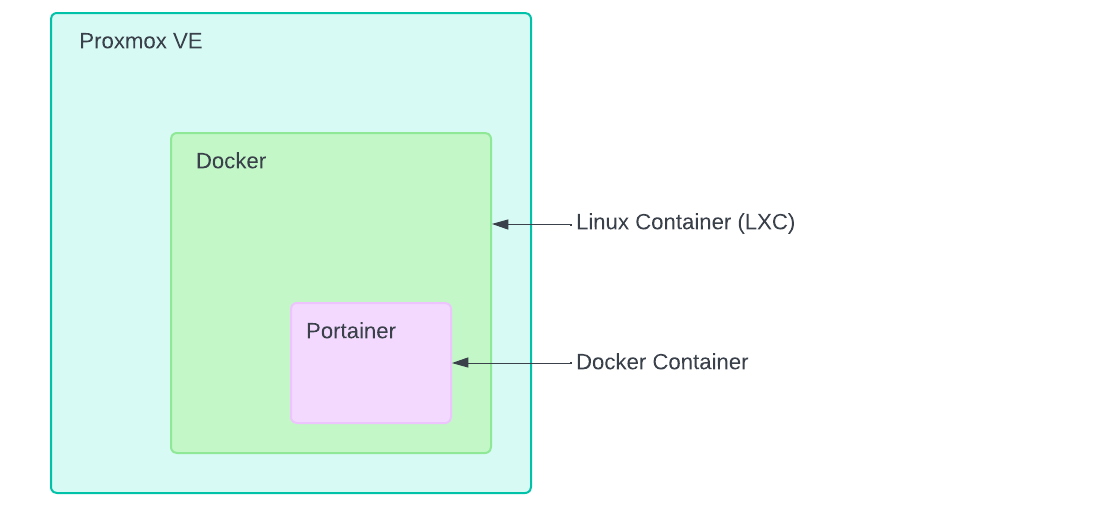
For ease of understanding, I'll draw you a diagram that shows that in Proxmox VE, you need to create a Linux container (LXC) with Docker, and then inside it, run a container with Portainer.
If we were to go fully manually and step-by-step, it would take more time, but I'll guide you along a shortcut, so make yourselves comfortable. Let's begin.
Installation
For the installation, we need nothing more than the Proxmox VE server itself, where everything will take place. We will also use one of the Proxmox VE Helper-Scripts, namely Docker LXC: https://tteck.github.io/Proxmox/#docker-lxc
In general, we have already become familiar with Proxmox VE Helper-Scripts in this article, where there was a quick overview of the existing scripts. I recommend taking a look.
 Volodymyr Lavrynovych
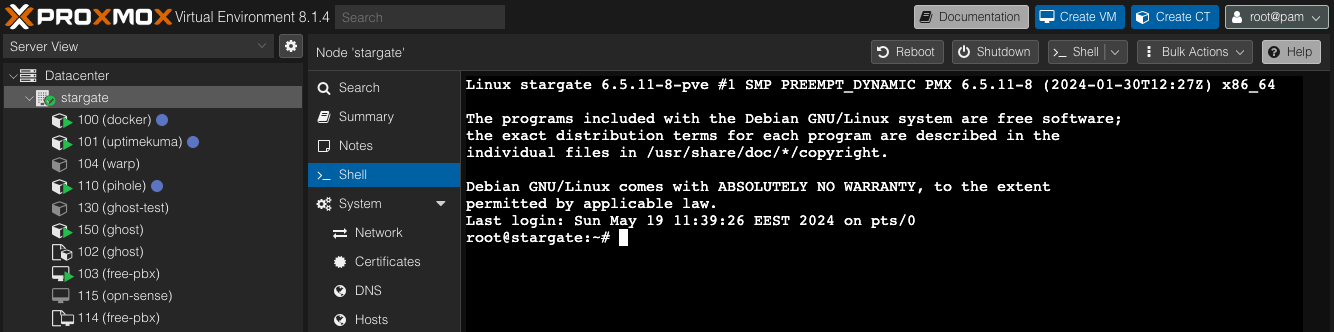
Step 1. Open the Shell in Proxmox VE
Step 2. Copy the command and execute it in the Shell
Open this link in a separate window: https://tteck.github.io/Proxmox/#docker-lxc and copy the command to install Docker LXC as shown in the image below.
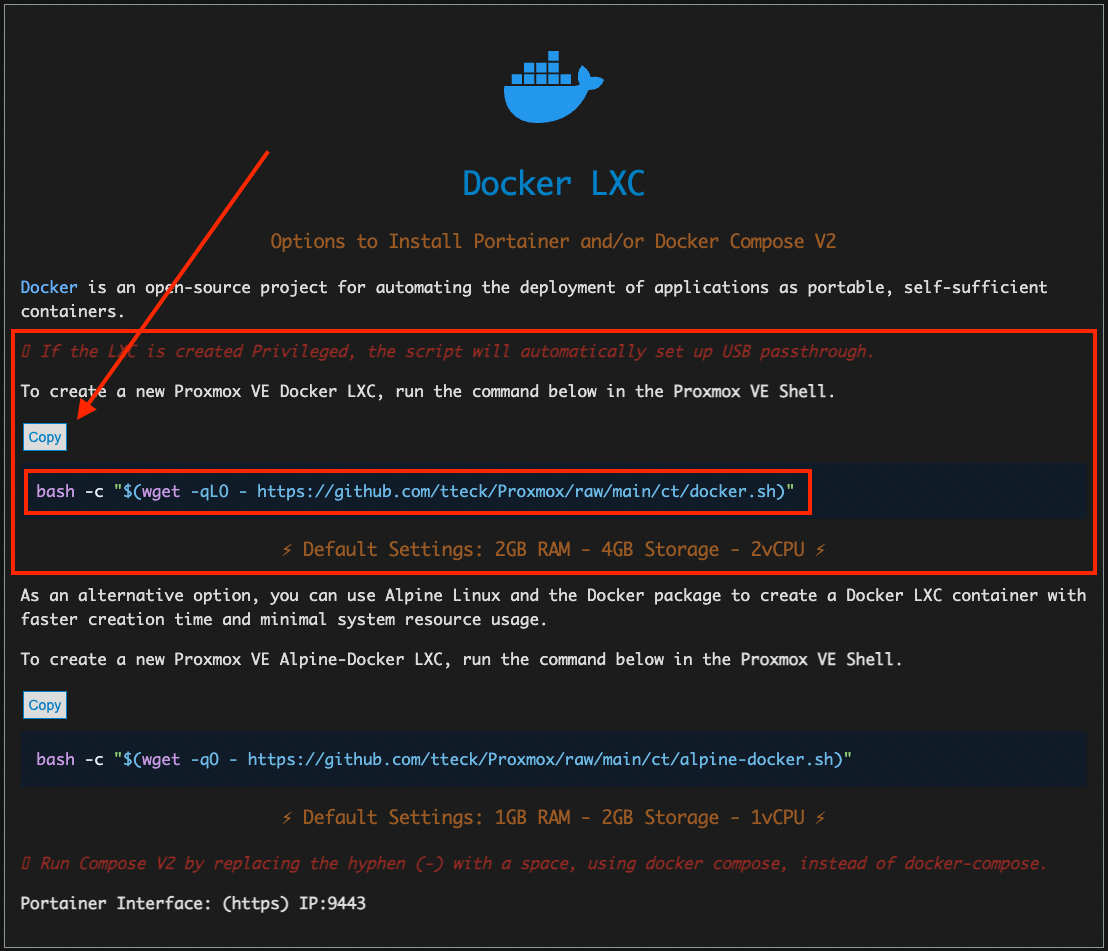
Here is the command:
bash -c "$(wget -qLO - https://github.com/tteck/Proxmox/raw/main/ct/docker.sh)"
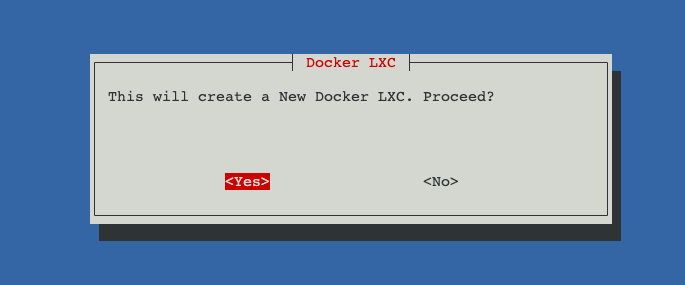
Paste it into the Shell and execute it. It will automatically start a dialog. Immediately agree that we want to create a new Docker LXC.
Tips
I want to leave the tips I wrote in the article about helper scripts, as I find them relevant here, especially if you are doing these steps for the first time.
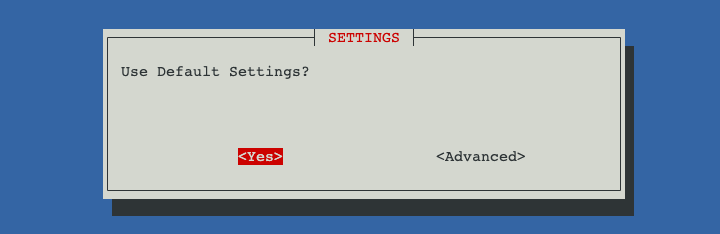
Step 3. Choose Standard Settings
The following settings will be applied automatically: 2GB RAM - 4GB Storage - 2vCPU. You will be able to change the number of cores and the amount of RAM later, but to increase disk space, you will need to make adjustments.
The Advanced mode will prompt for many parameters for configuring the new container. However, this is more complex and time-consuming. You can choose Advanced mode only if you are confident in your actions.
Step 4. Wait for Completion and Confirm the Need for Portainer and Docker Compose
In the image below, you can observe how the installation process will be displayed. It will take some time, but don’t stray too far, as you will need to first confirm the installation of Portainer and later Docker Compose.
Note that with the fully automated installation, network parameters were reduced to using DHCP. This means you will not have a static IP address. However, we will fix this later.
Nevertheless, you will still see the current IP address in the console, such as 192.168.10.136 in my example.
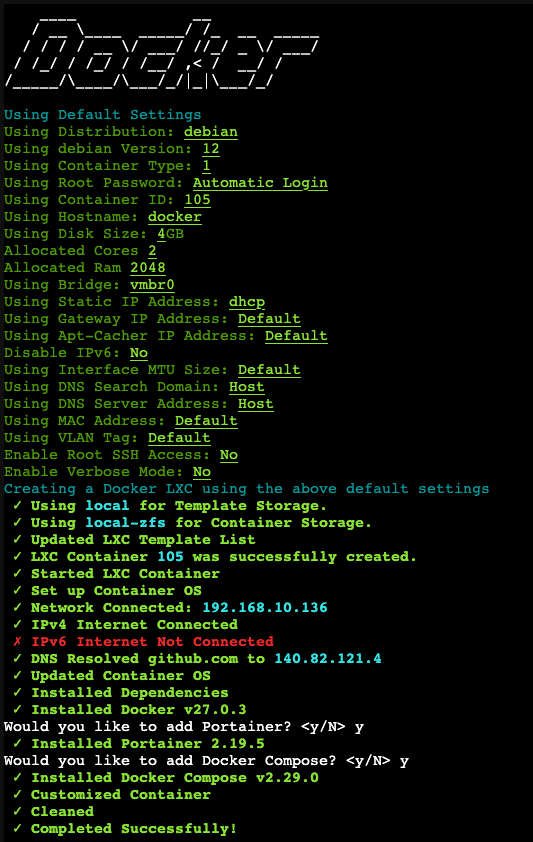
During the installation, the process will be halted twice, and it will require you to enter "y" and press Enter. Look at the white text lines.
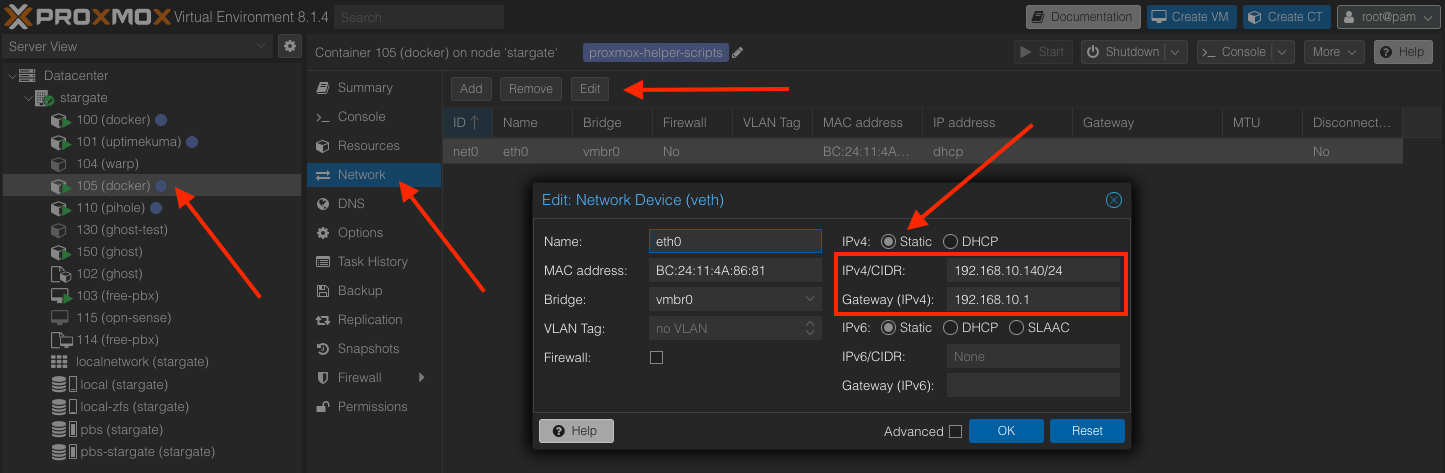
Step 5. Configuring a Static IP Address (Optional)
To make it easier to find your new server later, I recommend setting a static IP address in the LXC container's network settings through the Proxmox VE interface.
Of course, there are many other ways to do this, such as setting it up in the router settings or configuring it at the level of your UNIX system (Debian in our case). However, the quickest and simplest method to understand, and probably the most convenient, is always to configure it directly in the container itself. With many containers, it will be easy to track which one is on which address just by looking at the network settings.
Step 6. Check the Availability of Your Portainer
In the previous step, I set a static IP address of 192.168.10.140, and we will also need port 9443, on which Portainer is running. As a result, we have: https://192.168.10.140:9443/. In your case, the address might be different depending on your network settings, so use your own.
Here’s what you should see. This is the Portainer start screen, and this is enough to confirm that everything is working. I recommend not entering a password yet and instead moving on to the next step to create a backup.
Step 7. Create a Backup (Optional)
When everything is set up and working, it’s a good time to create a backup. This can serve as a starting point in case of errors with container creation, so you don’t have to go through all the steps described above again.
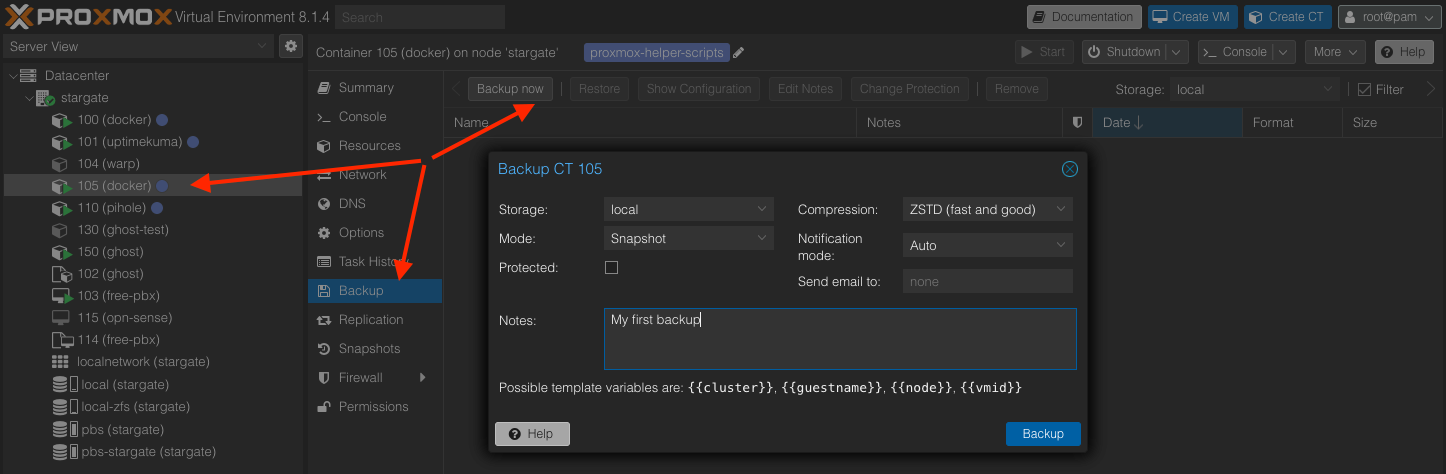
You can learn more about how to set up Proxmox Backup Server with file storage on Synology NFS in a separate article:
Volodymyr Lavrynovych
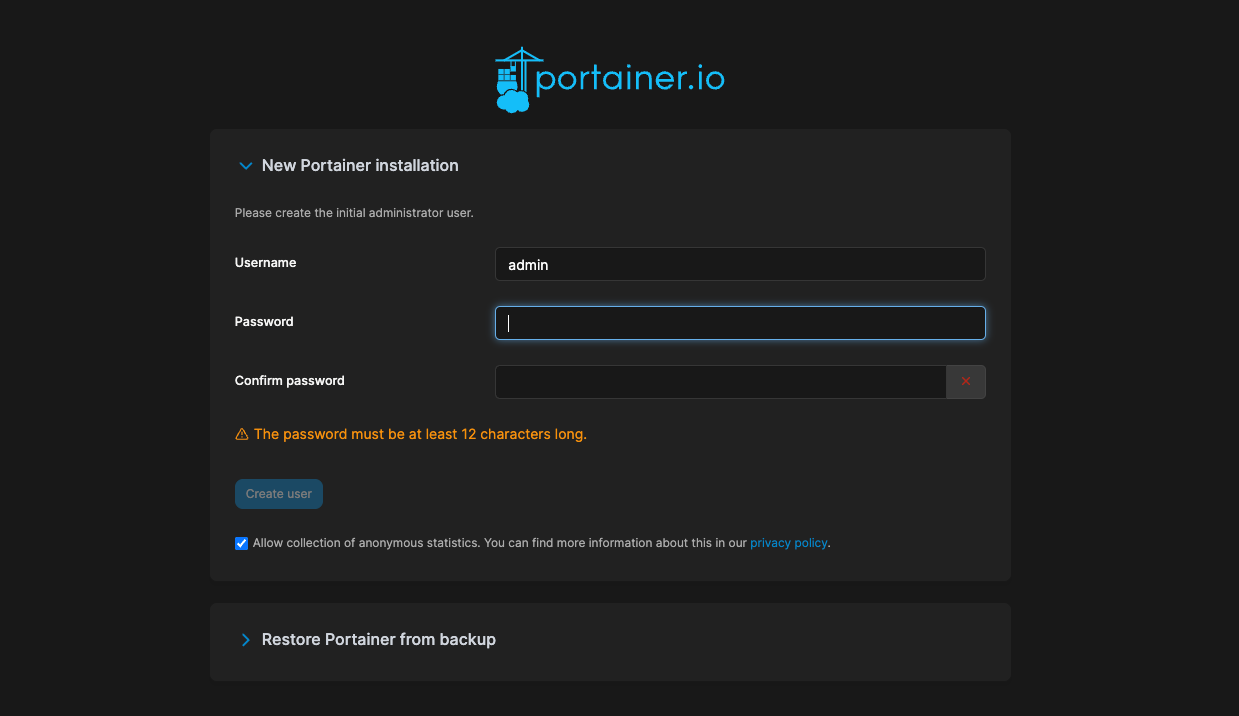
First Login
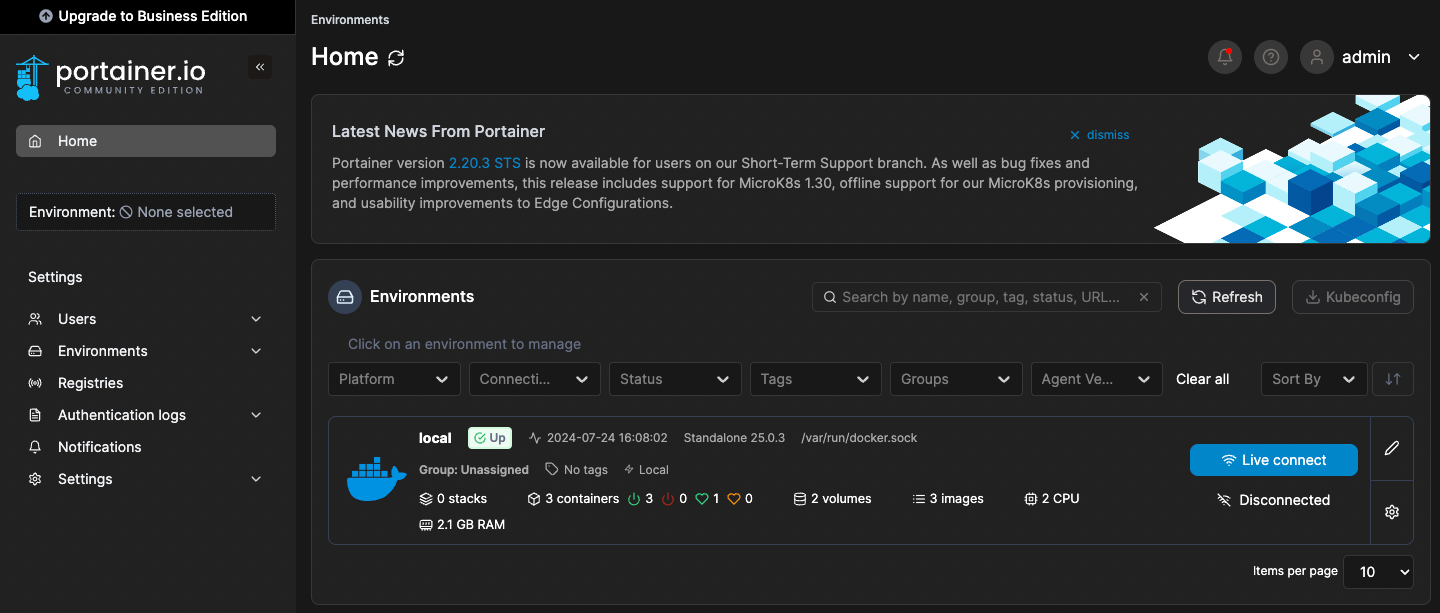
After a successful installation, go back to the Web UI of your Portainer at https://192.168.10.140:9443/ (from Step 6) and set a password for the administrator. You should then see an interface like this.
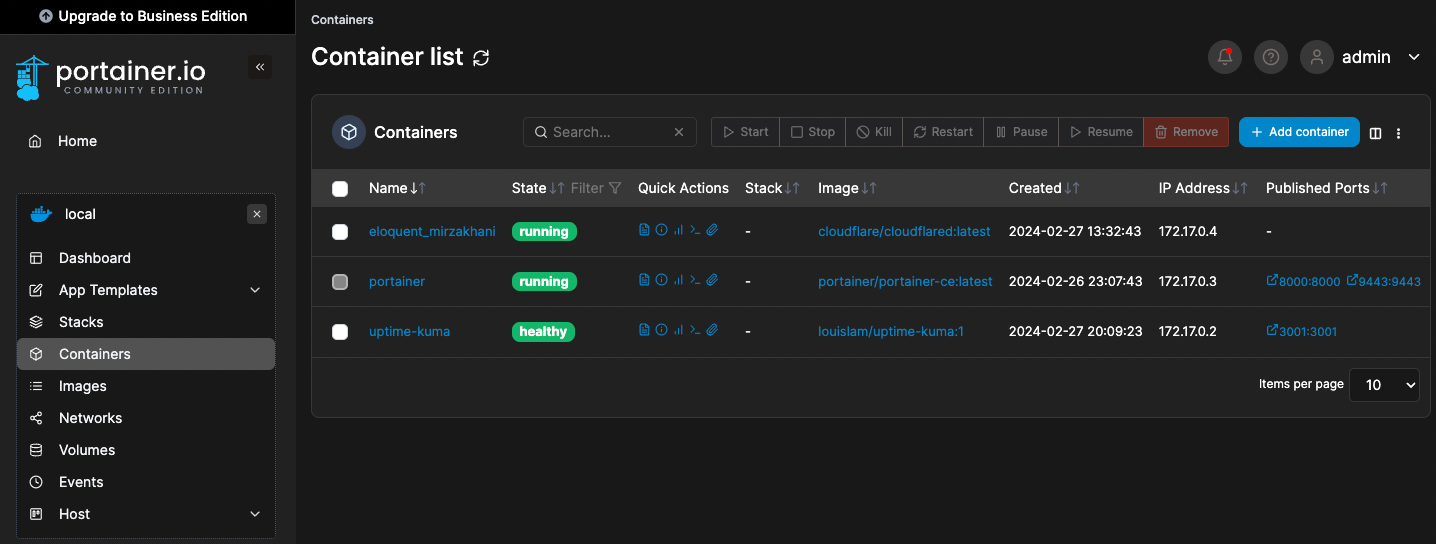
After launching several containers, you will see something similar, where one of the containers in the list will be Portainer itself, as it runs in Docker just like all the others.
Conclusions
The installation process should take up to 15 minutes in total. We have simplified the number of steps as much as possible if your goal is to run Docker on a Proxmox VE server for specific tasks.
For experienced users, I recommend choosing the Advanced mode for configuration and specifying the parameters necessary for your specific tasks. Alternatively, you can skip these scripts altogether and go through the entire process from OS setup to the manual installation of Docker, Portainer, and Docker Compose, which will take a bit more time but provide more control over the process.
A successfully configured Portainer is available on port 9443 (https). Its capabilities deserve a separate story, and in this article, we have achieved the goal with minimal time and effort.
The two optional steps during the installation phase are personal recommendations based on experience. A static address always makes more sense for a home network, especially when you need to frequently access services. A backup of the newly configured container will save you time
Don't Miss Other Articles on Home Lab (Docker, Proxmox)
Dive deeper into the world of home labs with more guides on Docker, Proxmox, and beyond. Explore practical tips, step-by-step tutorials, and expert advice to enhance your projects. Check out my other articles and take your home lab to the next level!
Volodymyr Lavrynovych Volodymyr Lavrynovych
If you're interested in starting your own blog, check out my guide on how to set it up from scratch. It covers everything from choosing a platform to creating engaging content. Get started on your blogging journey today!
Volodymyr Lavrynovych