Cloudflare Tunnels: Expose Self-Hosted Services Safely
I will show you how to open public access to any internal service. Proxmox and Docker will helps us. Interested? This article provides a step-by-step guide on connecting your domain to Cloudflare and setting up Zero Trust to secure your website. Learn how to activate and configure your tunnel

Introduction
Before we begin, it would be helpful to explain in simple terms what we are going to do. Imagine you have a home server and have launched your website or blog on it. It's only accessible within your local network, but you want to share it with friends or access it yourself when you're not at home.
In general, for people to access your server, they need to know the address — that's the simplified version. Complex IP addresses are replaced with domain names for ease of use and memorization. Each domain name is directly linked to a specific IP address.
In this article, I'll explain how to link your home server's address to a domain name available on the internet and how to provide access from outside to your internal network.
We'll do all of this using the Cloudflare platform with its free services.
What Problems Does It Solve?
This article will address the following questions:
- How can I use my NAS when I'm not at home?
- How can I share my Minecraft server with a friend?
- How can I host my blog on my own server?
- I want to watch my Plex when I'm on the go.
In other words, whenever there is a need to access resources hosted in a private network, we can use this approach.
What Are the Advantages?
I considered several different approaches, and this one appeals to me the most because setting up a Reverse Proxy seemed more complex, and in terms of security, there is a greater risk of making mistakes. With Cloudflare, you get a wide range of high-quality and, most importantly, secure services for free. Cloudflare acts as a proxy, ensuring that your real IP address is never visible.
Both a Reverse Proxy and a Cloudflare tunnel provide access to network resources from the outside, but they implement this in slightly different ways.
Of course, if access is only needed for yourself, a VPN or a more modern solution like Twingate will work. However, in the world of self-hosted services, there are so many interesting things that you'll definitely want to share them with family or friends—having a simple link would be ideal in such cases.
Comment
Before we begin, I want to note that the complexity of this article lies in the number of steps and systems involved. I don't want to intimidate you, but in brief, you'll need to purchase the cheapest domain, have a home server with Proxmox, install Docker and Portainer on it, register with Cloudflare and transfer your domain under its management, launch a tunnel as a container in Docker, and then set up public access to your private services. This is quite a task in terms of both time and concentration. For convenience, I have described some of the steps in separate articles.
To motivate you, I want to add that many of the things described below were not available for home use not too long ago and were a privilege of businesses as technologies. Some of these services are still paid and quite expensive today. However, our costs will only be $1 for purchasing a domain (although a free one could be chosen as well).
Operating Principle
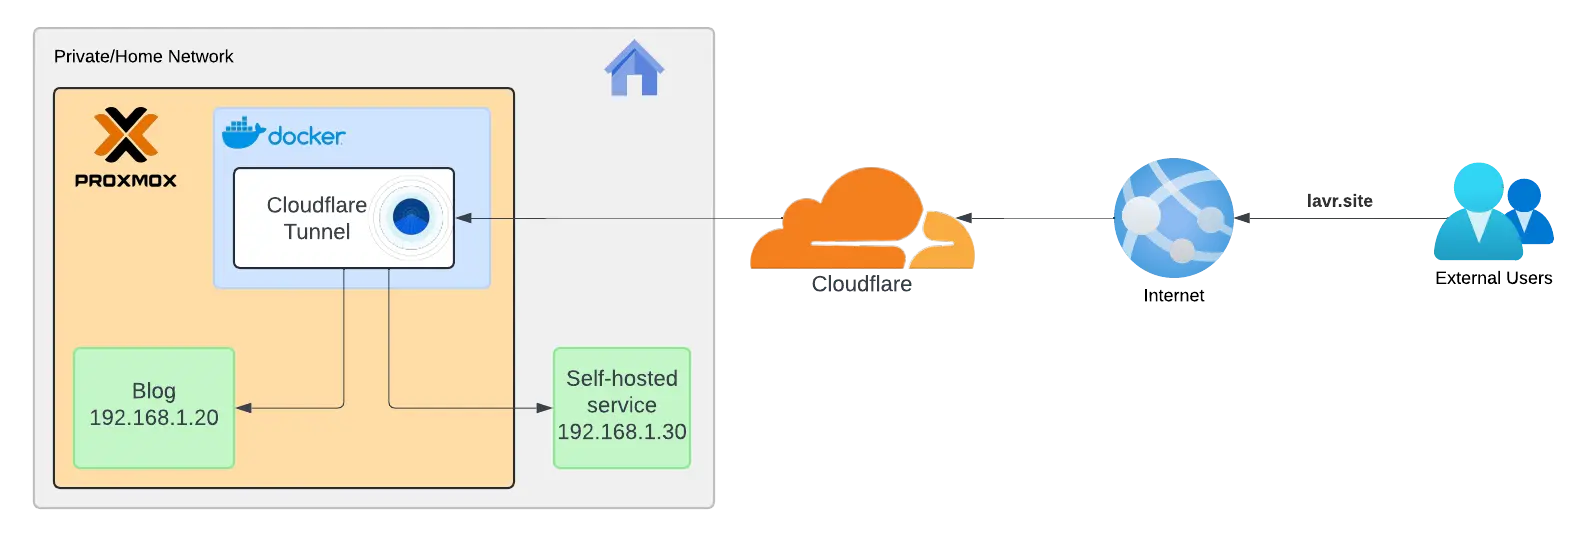
When external users request a domain name, such as lavr.site, they will be directed to the Cloudflare service, which will then forward the request through a Cloudflare tunnel. This tunnel will be launched as a container in Docker. Docker, in turn, will be run as an LXC container in Proxmox VE, located within our home network. The tunnel will know the location of the required service/blog/website in the home network and, having access to it, will redirect the request accordingly.
In this scenario, the tunnel acts as a bridge between the external world and the internal network. It provides access only to a specific list of services, ensuring the security of the home network.
For clarity, I will draw a diagram.
From the description above, we can immediately note that we will need:
- A Cloudflare account
- A domain name
- Docker running continuously in the home network
- Any service we want to make publicly accessible
Cloudflare Websites - Connecting the Domain
The first step is to transfer your domain under Cloudflare's management. For this, you will need to have your own domain.
How to Purchase Your Own Domain
You can read about how to purchase your own affordable domain here:
 Volodymyr Lavrynovych
I purchased my domain from Namecheap, and the domain cost $1. I described this in detail in the article mentioned.
Add Your Domain
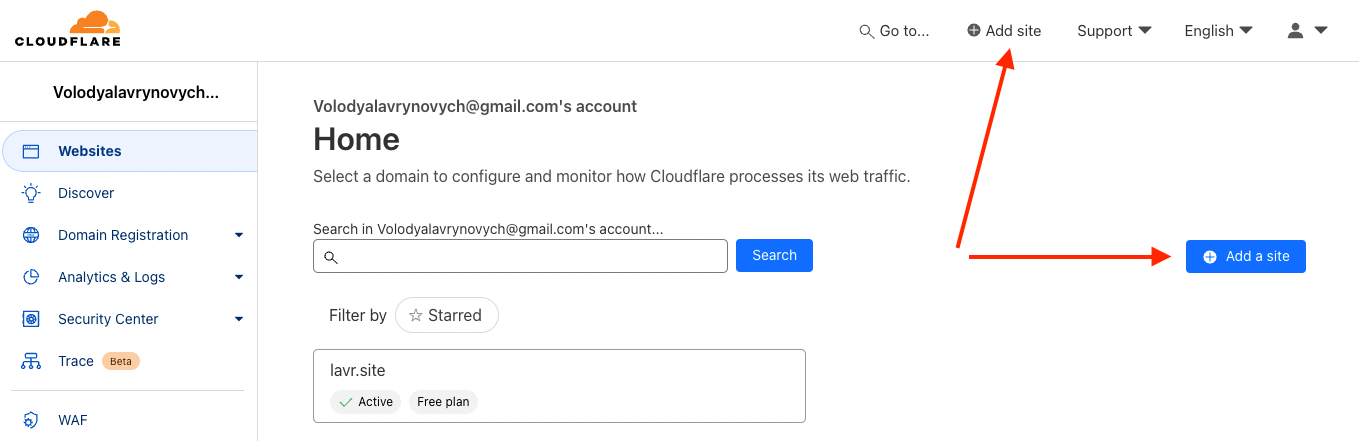
With your domain in hand, you need to add it to your Cloudflare account. Click on Add site.
Complete the Domain Setup, which consists of 5 steps
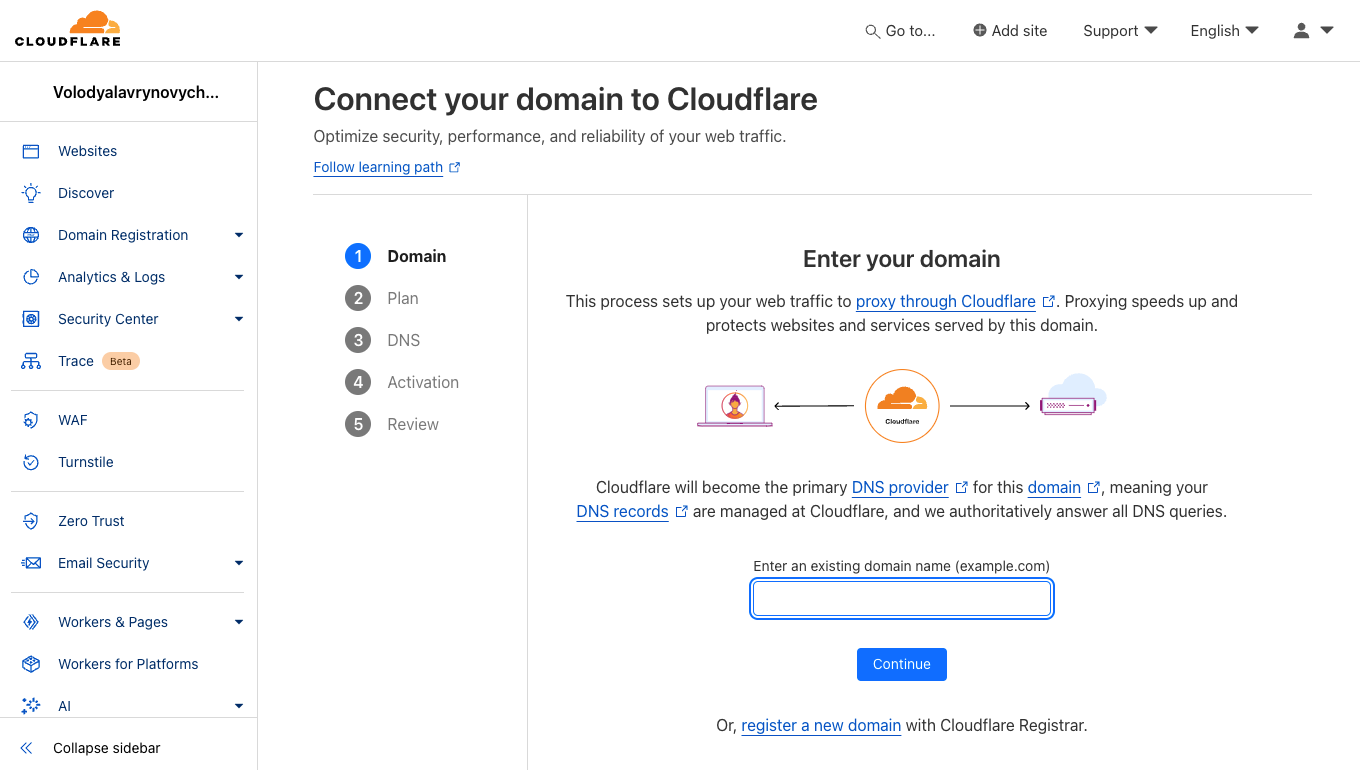
Step 1. Enter Your Domain
Enter the domain you purchased and start the process of connecting it.
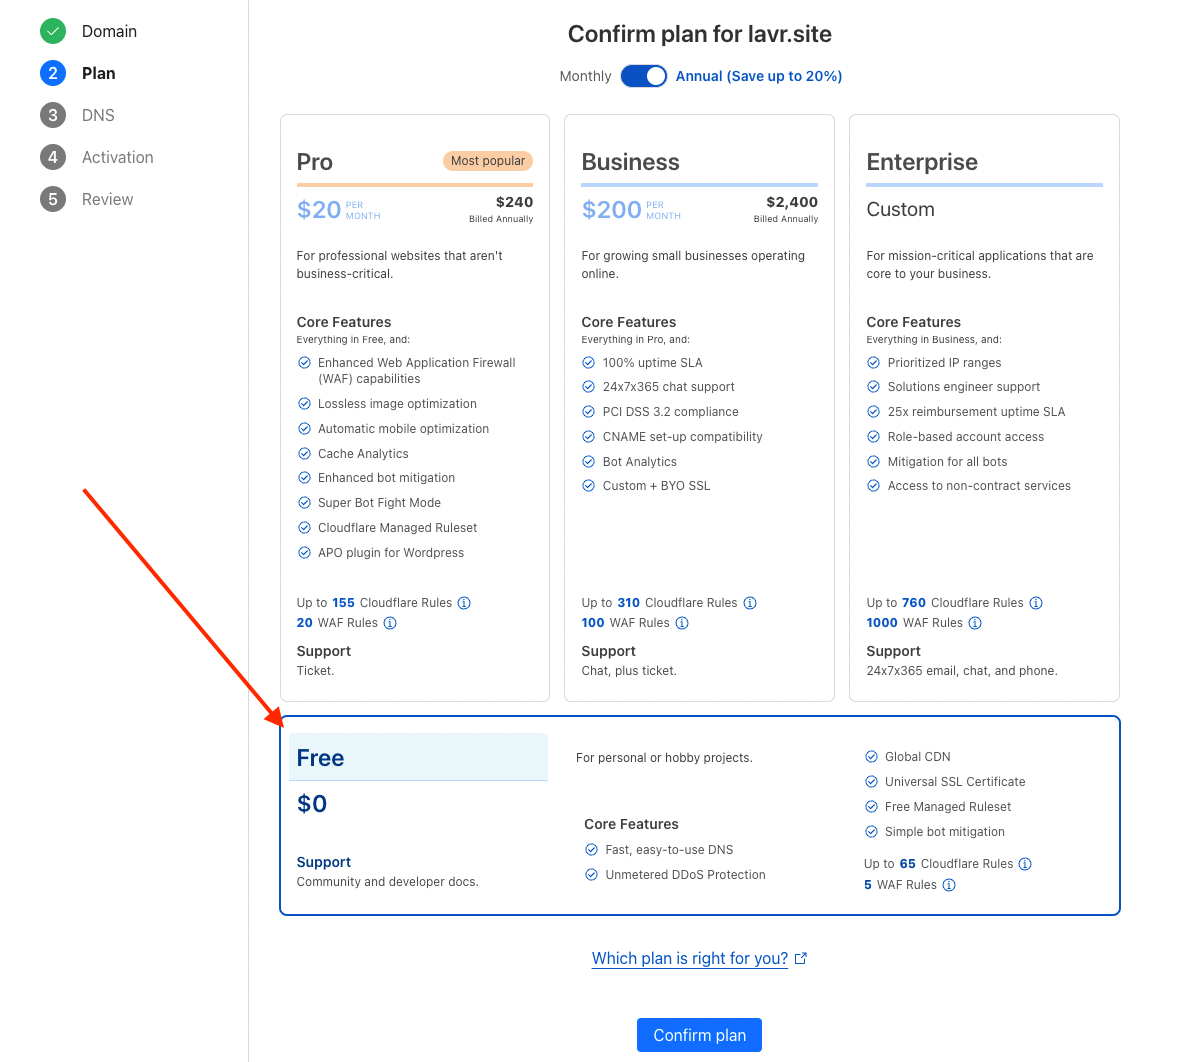
Step 2. Choose a Plan
In our case, the free plan will be sufficient.
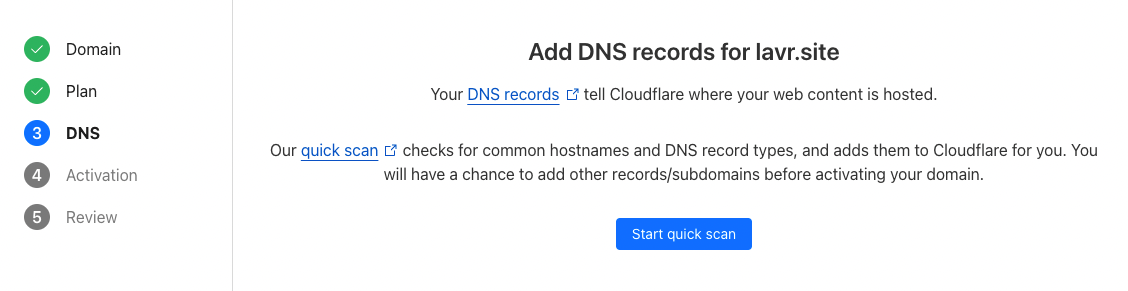
Step 3. DNS Settings
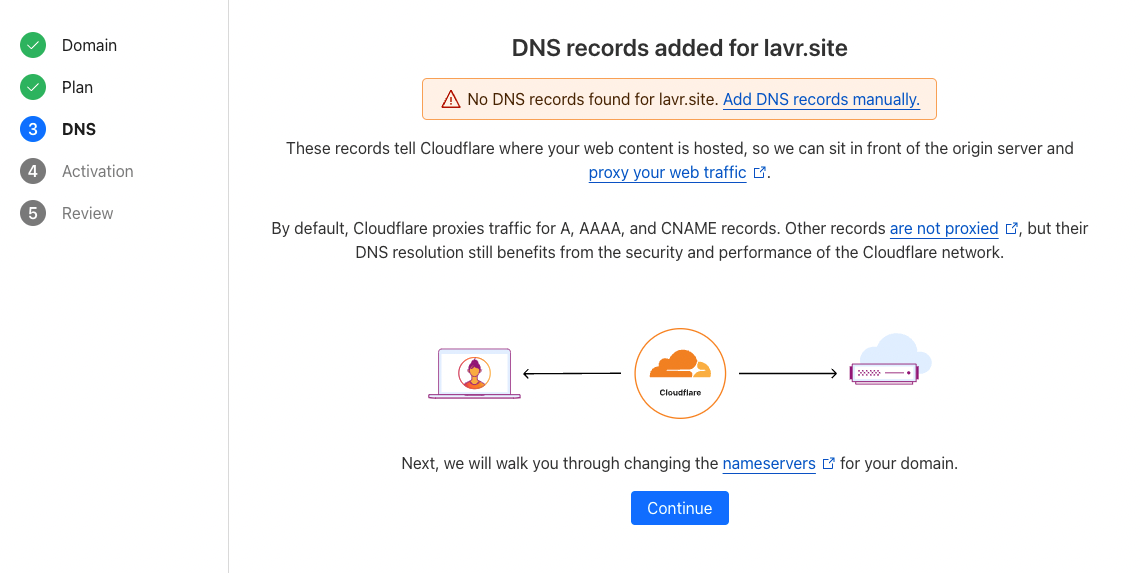
Initially, there will be an attempt to automatically detect your domain's DNS records after clicking Start quick scan.
Regardless of the result, you will be prompted to update your nameservers.
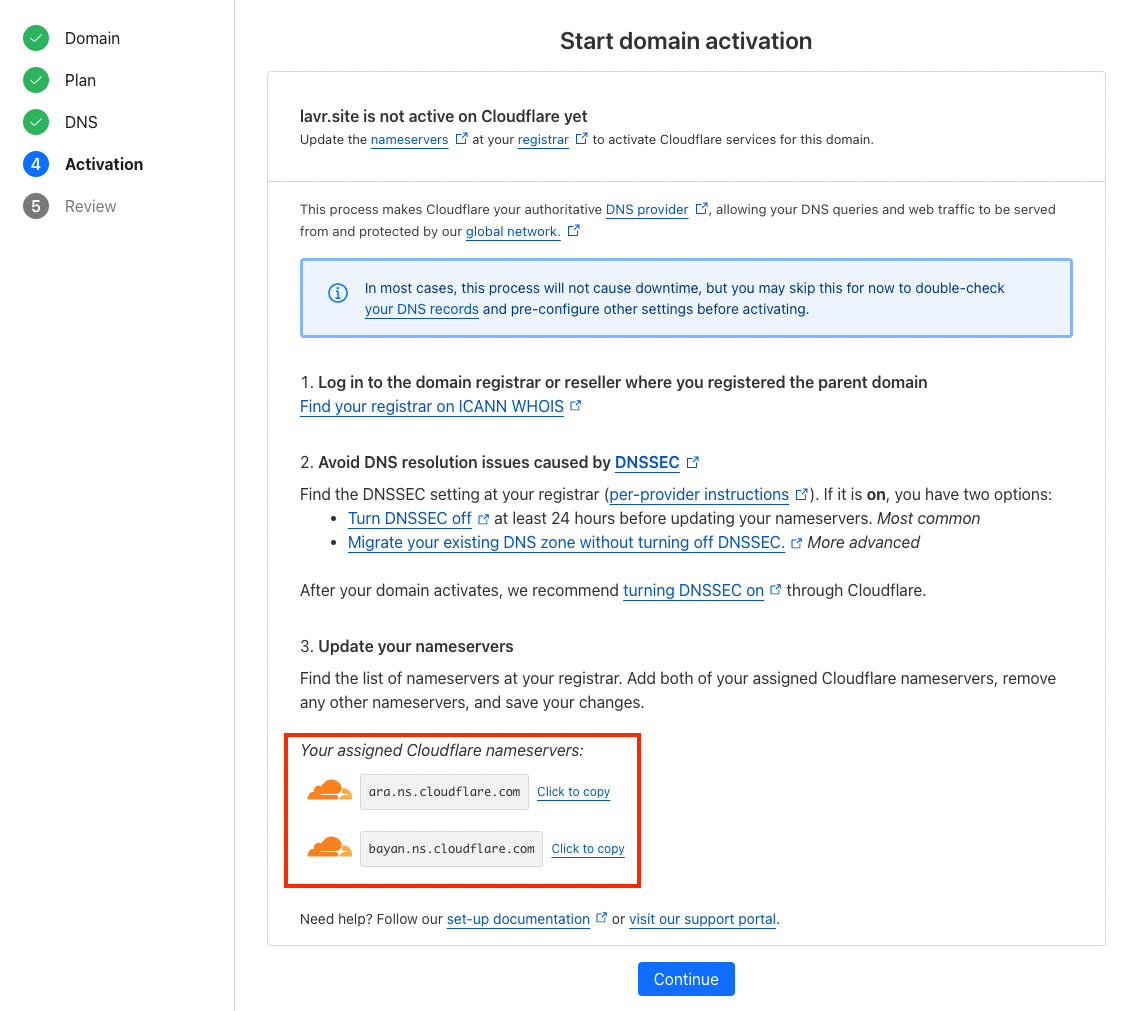
Step 4. Activation (with nameserver update)
To allow Cloudflare to manage your domain, you need to transfer control by changing your nameservers. The image below will provide detailed instructions on what you need to do. The nameservers you need to use are highlighted in red.
Transferring the Domain
Transferring a domain is generally a straightforward task, but when you do it for the first time, various questions may arise. Each domain registration platform strives to simplify this process by providing documentation with clear examples.
The platform I chose, Namecheap, is no exception. The link below provides detailed instructions on how to change the nameservers to those provided by Cloudflare.

Step 5. Review and Wait for Activation
After changing the nameservers, you will need to wait up to 24 hours. However, as Cloudflare notes, this often happens more quickly. In my case, my domain was successfully activated within 1 hour.

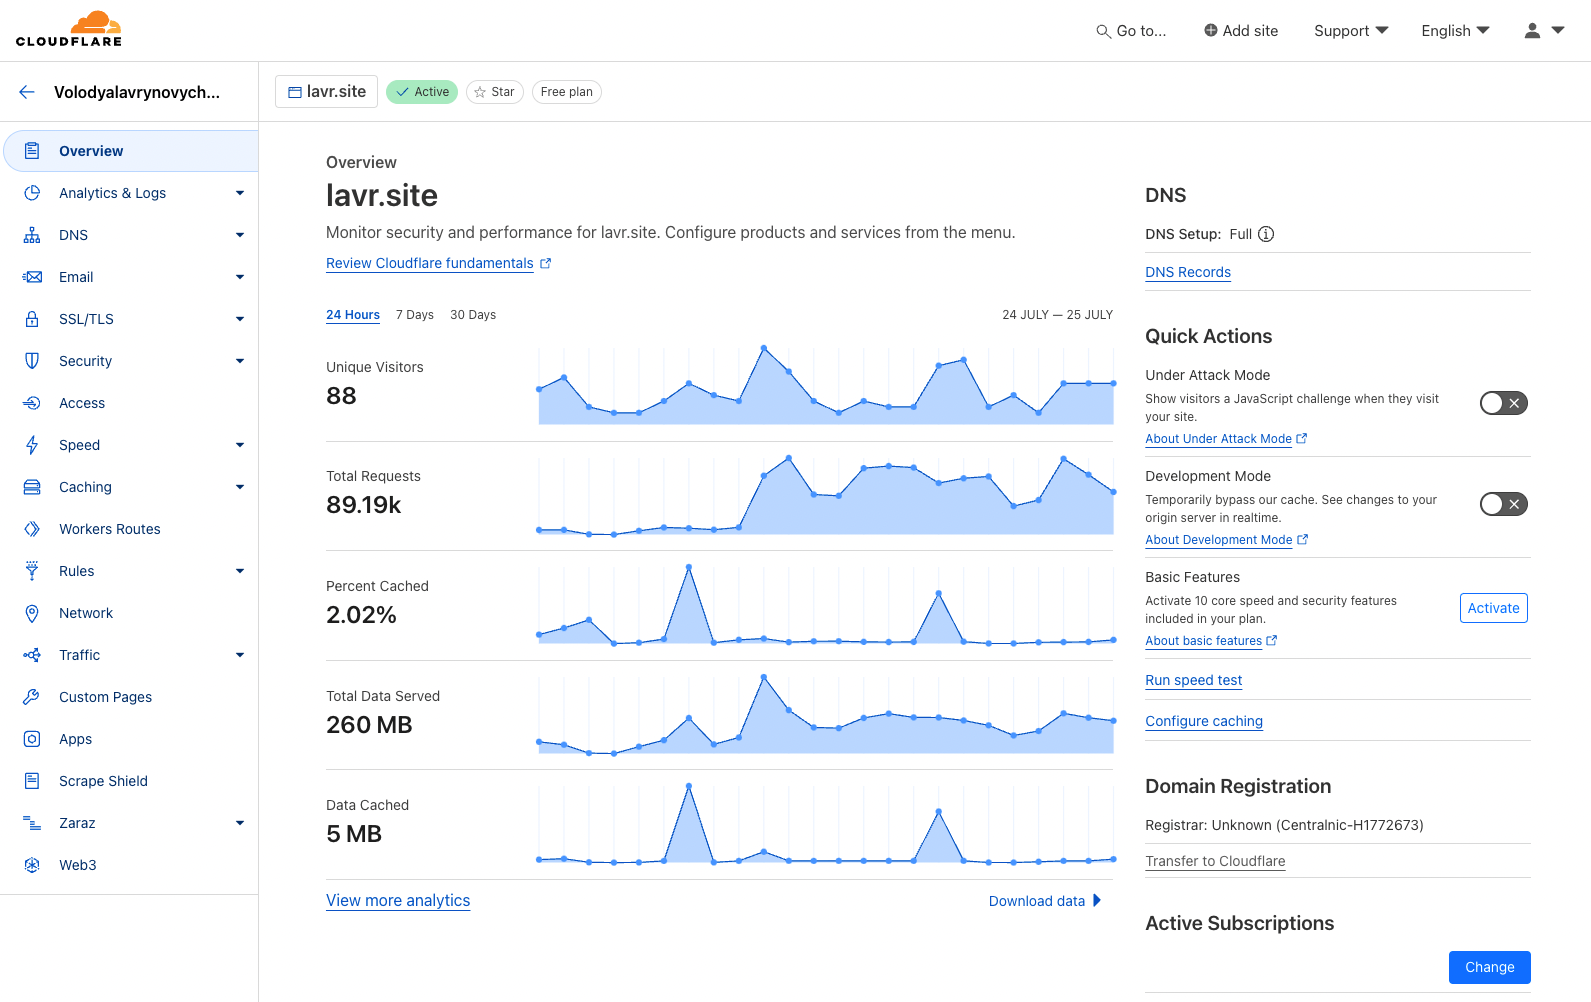
After activation, when you open your domain's page in Cloudflare, you will see that usage statistics will start to appear. Most likely, it will be empty at first. You will also find many interesting settings on the pages, but for this particular task, I would advise against modifying them.
Cloudflare Zero Trust - Starting the Tunnel
And now we are halfway through. Let’s check. At this point, you should have a domain purchased from some platform and transferred under management in Cloudflare Websites, where the domain should be active. If so, let's move on!
In the second part, we will need Docker to start the Cloudflare tunnel. Once we do that, we will quickly move on to configuring the tunnel itself.
Creating the Tunnel
To start the tunnel, you will need to navigate a complex path. The tunnel must be running in your local network and operating 24/7 if you want constant external access to your services. This is only possible with a computer or server that is continuously running.
I am somewhat of an advocate for Proxmox VE, so my explanation will involve it. I have a server at home with moderate power consumption, running Proxmox VE with a variety of containers, one of which is Docker. This setup is convenient. I highly recommend it. I partially described the hardware in the article about starting a blog. For those interested, feel free to take a look.
Volodymyr Lavrynovych
I also strongly recommend checking out the official documentation to familiarize yourself with the principles, terminology, and other details.

Step 1. Start Docker
It doesn't matter how you achieve this, but the simplest way for us to start the tunnel is to use Docker.
It's great if you already have experience with Docker and a working setup. However, if that’s not the case, I’ve prepared a separate guide where you can install Docker and Portainer on a Proxmox VE server step-by-step, with minimal time and effort. This should take approximately 15 minutes.
Volodymyr Lavrynovych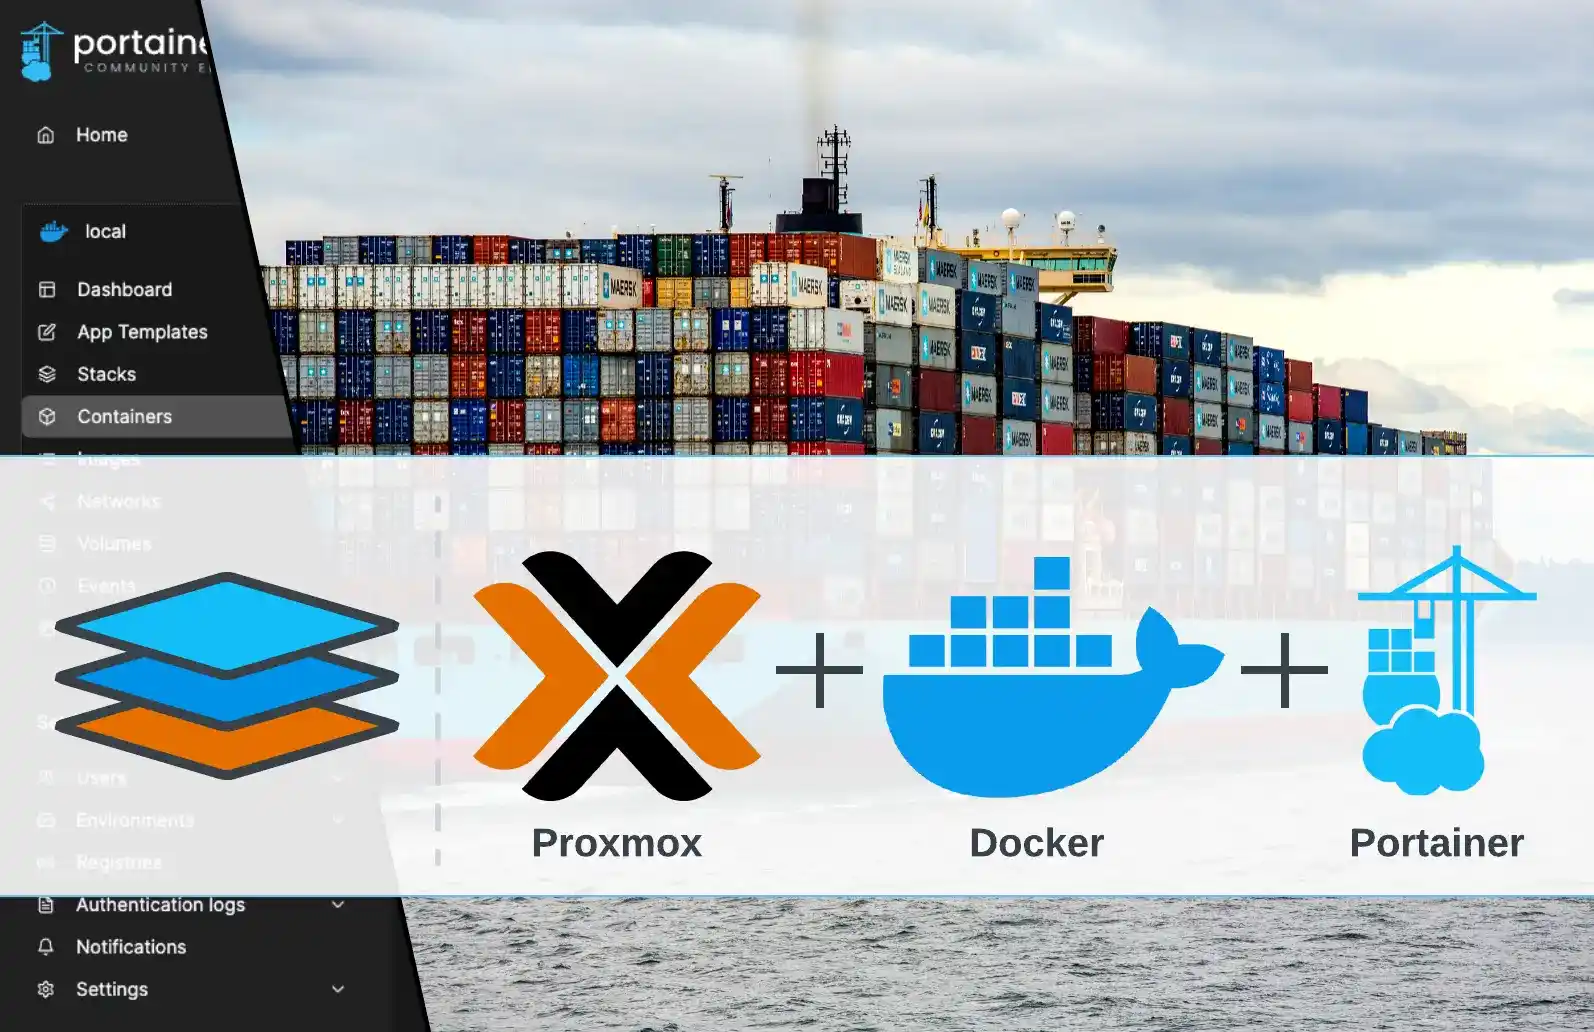
Step 2. Go to Zero Trust Networks
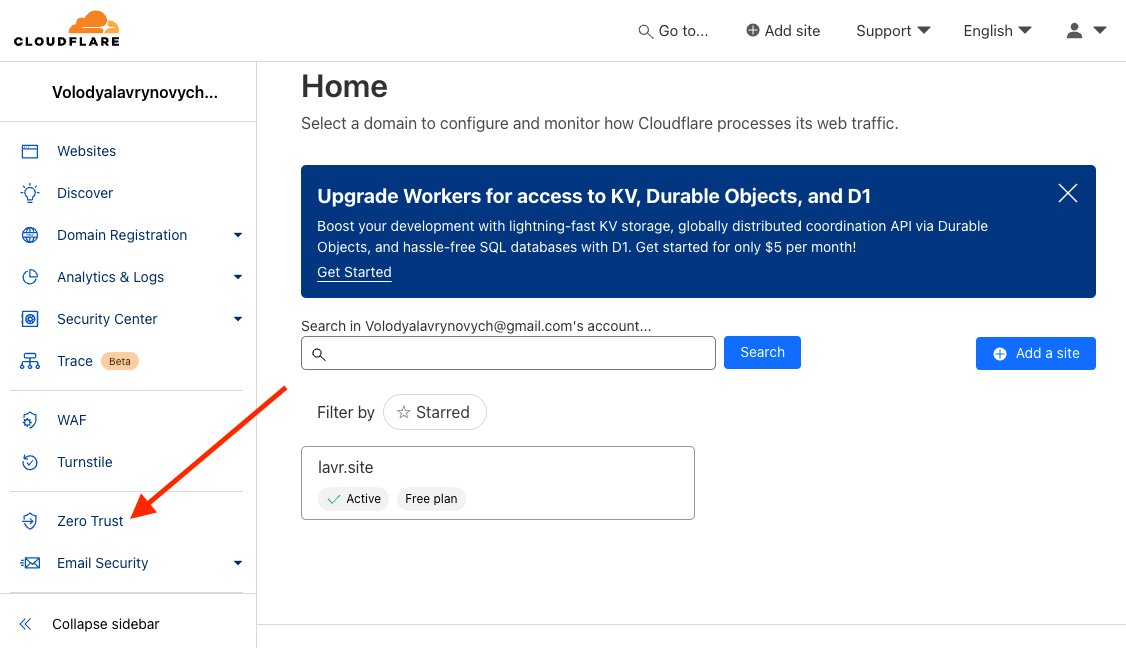
Return to the main page of your Cloudflare profile and open Zero Trust.
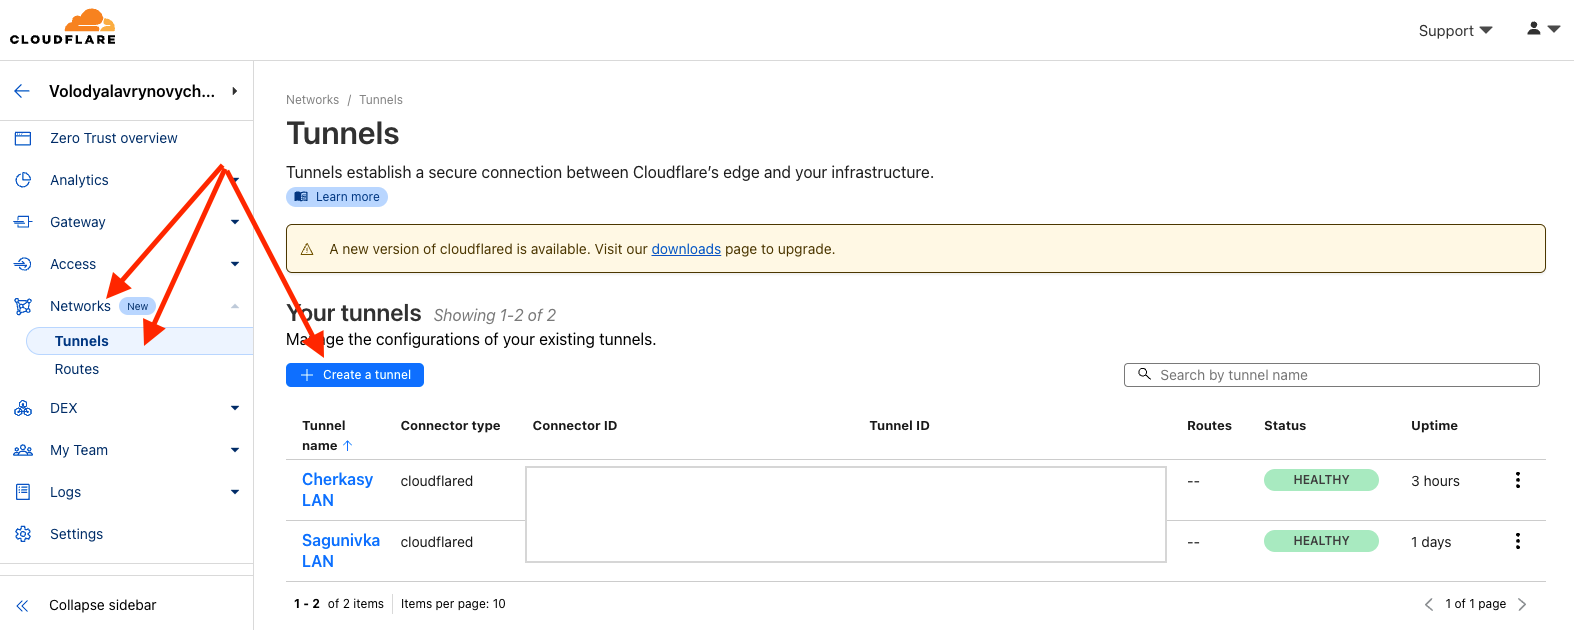
Go to Networks -> Tunnels and click on Create a tunnel.
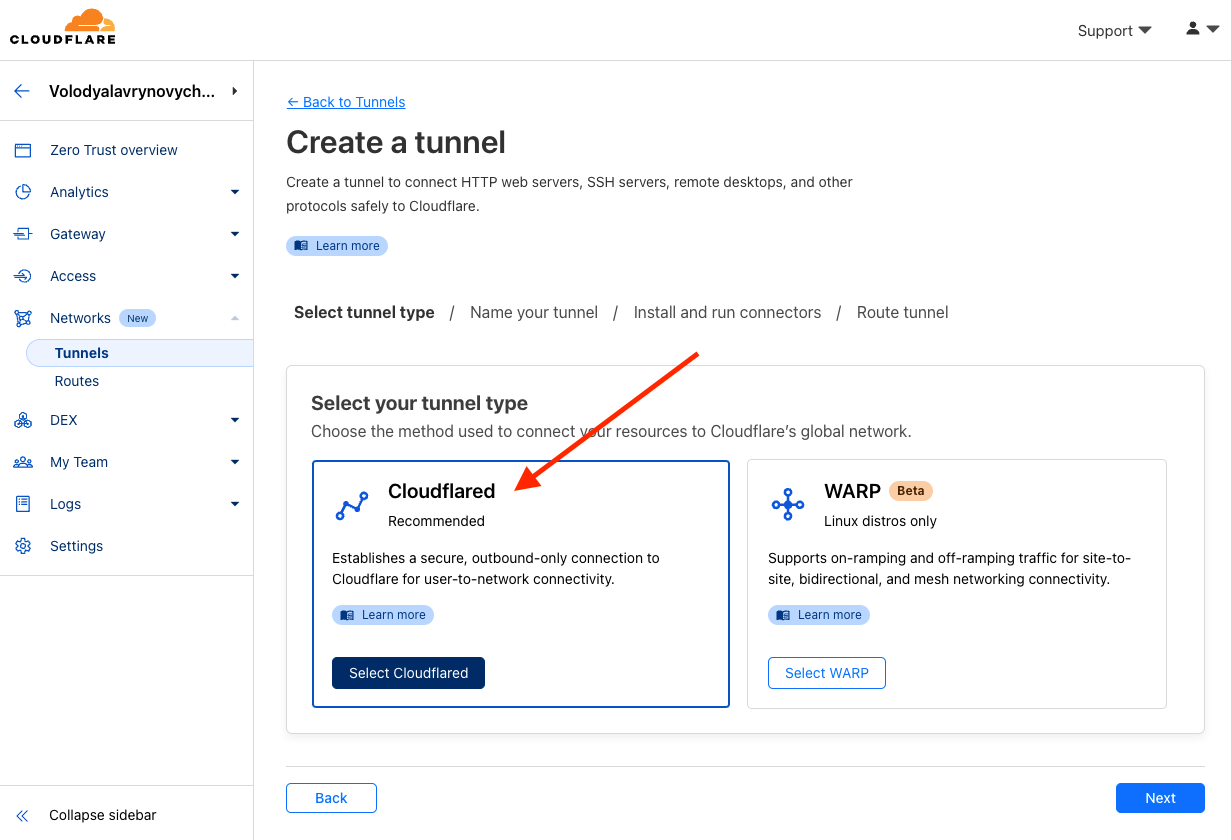
Step 3. Choose Type
Among the two options, we need Cloudflared because WARP is slightly more complex and, as noted, requires only Linux distributions.
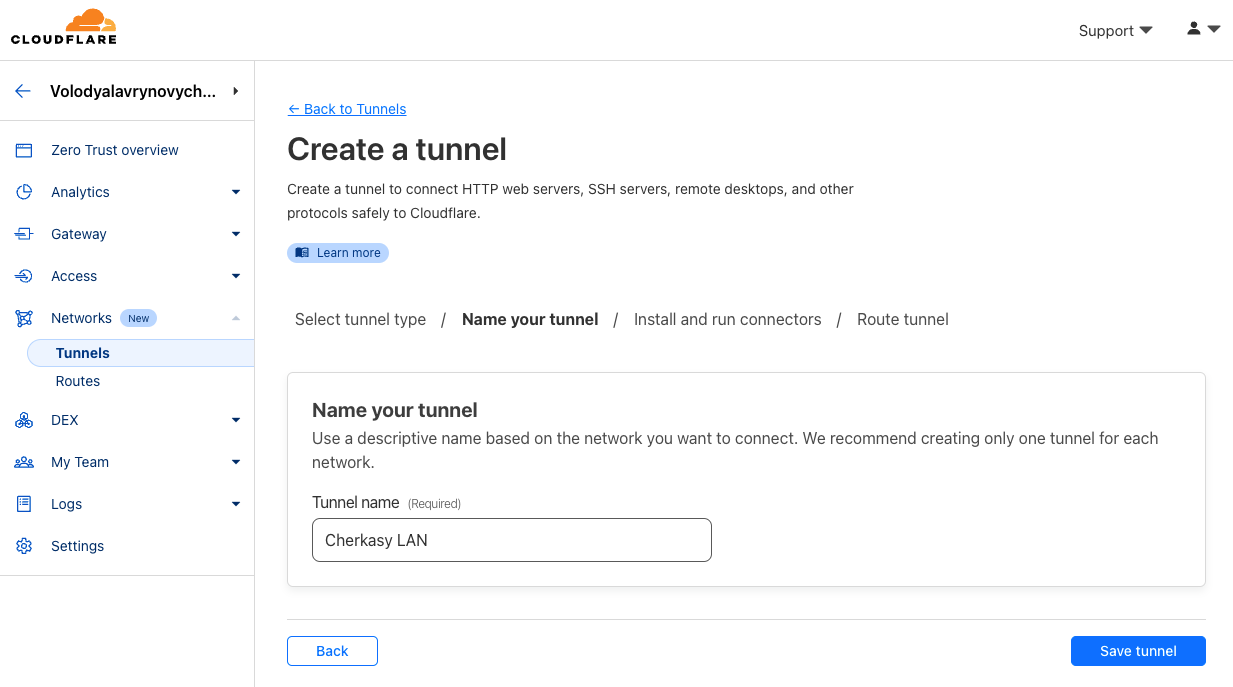
Step 4. Set a Name
I highly recommend choosing a name based on the location. It could be a city or street, but it should immediately convey which network it refers to.
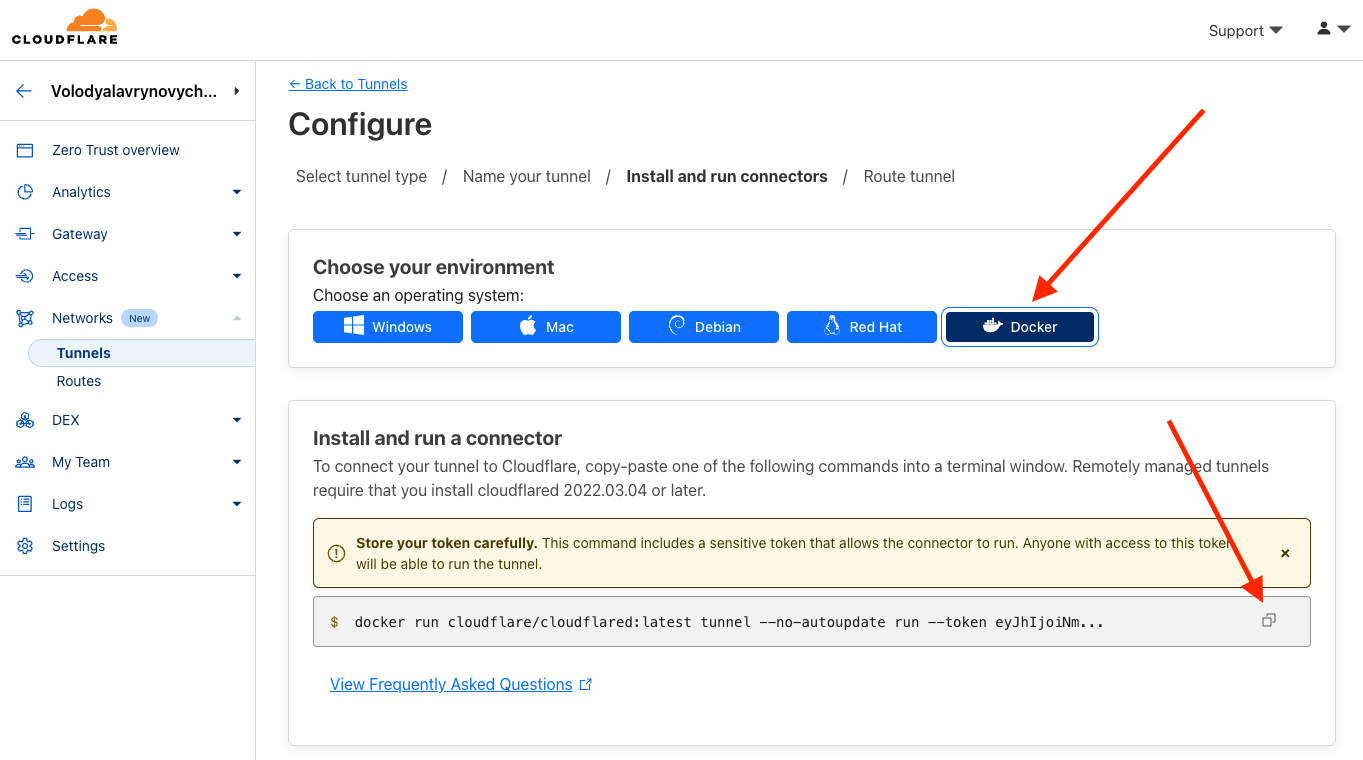
Step 5. Copy the Command
Switch to Docker and copy the command to start the container.
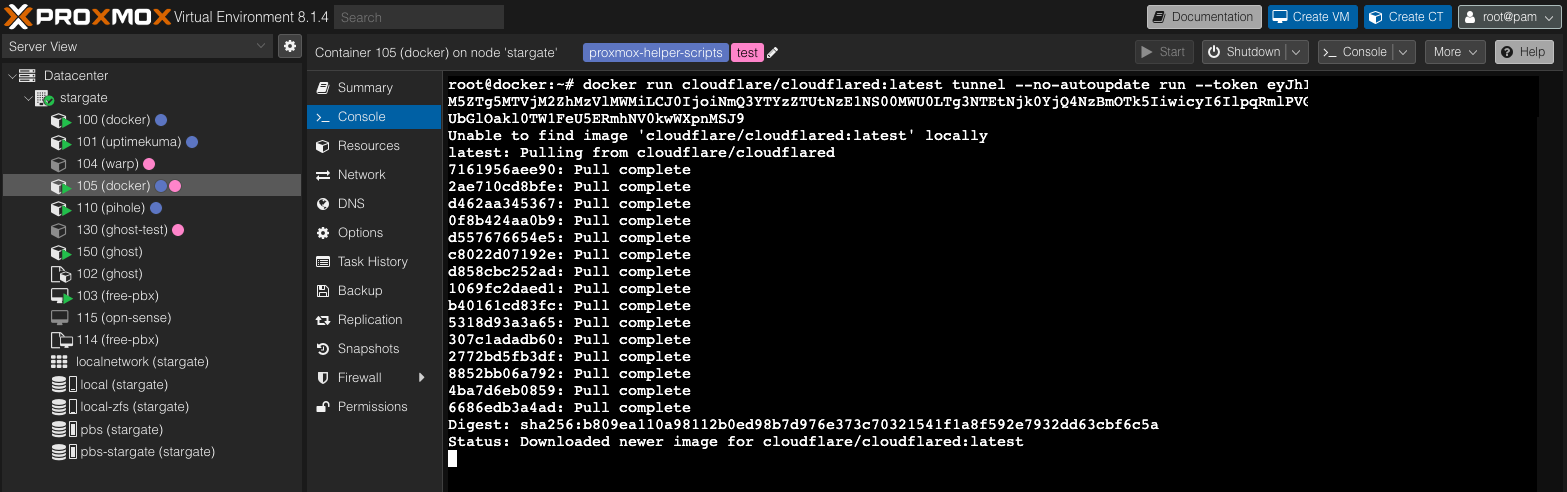
Step 6. Execute the Command
Go to the Console of your Docker LXC in Proxmox VE (from Step 1), paste the copied command, and execute it. Wait for the process to complete.
Step 7. Verify the Container Installation
To start, you can go to the installed Portainer to check that the container has been successfully started.
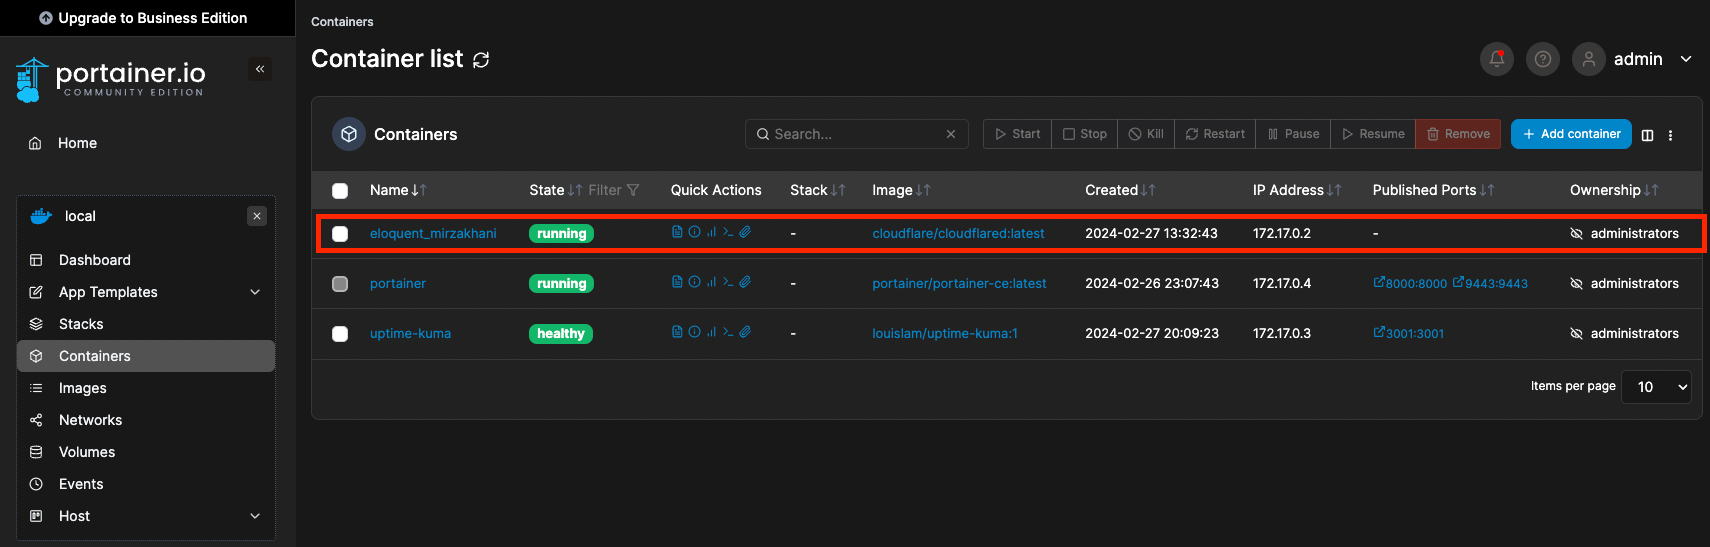
Note that the Cloudflare tunnel container does not have open ports, as we, as users, will not be communicating with it directly. It simply exists and operates in the background.
Now, check the connection in Cloudflare. You should see a Healthy status.
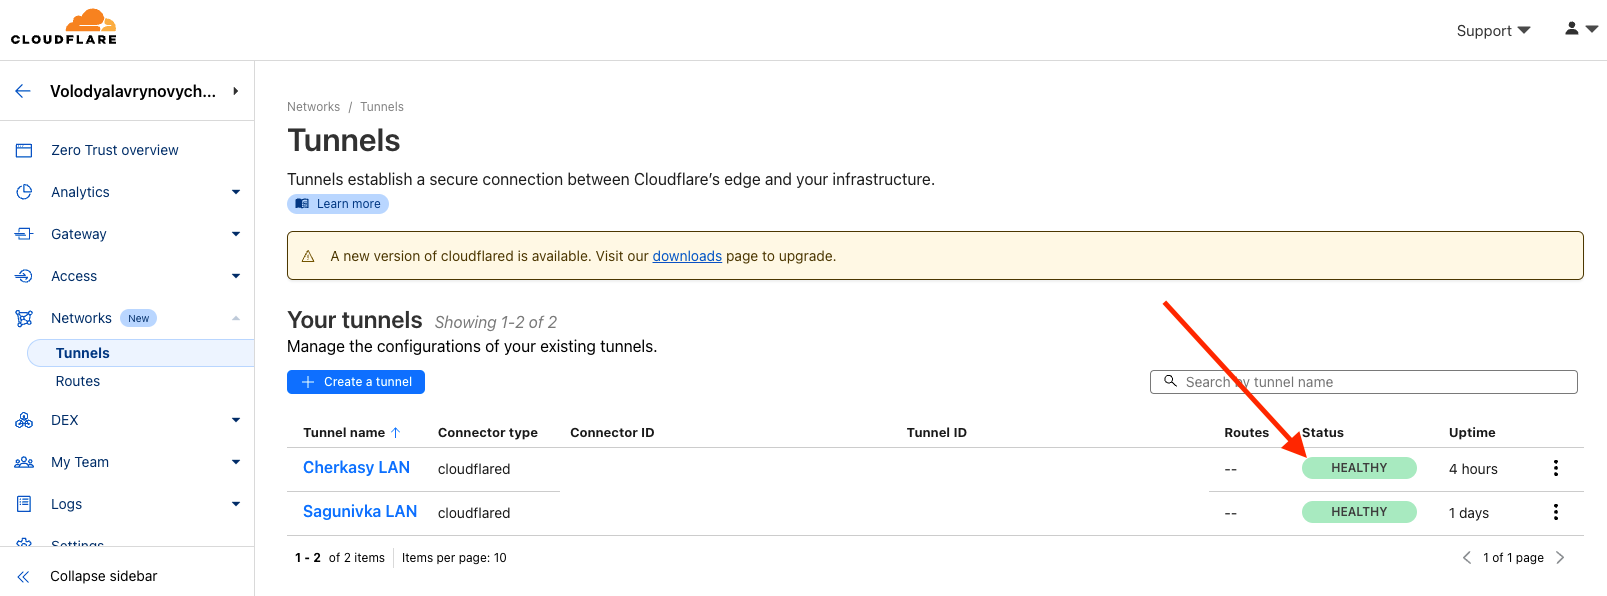
If everything is as described, then congratulations! This is a significant achievement, and we are smoothly approaching the culmination.
Configuring the Tunnel
The essence of configuration is to map (bind) internal network servers to the domain or subdomains. Each tunnel acts like a tunnel providing secure and restricted access to specific resources in your home (private) network.
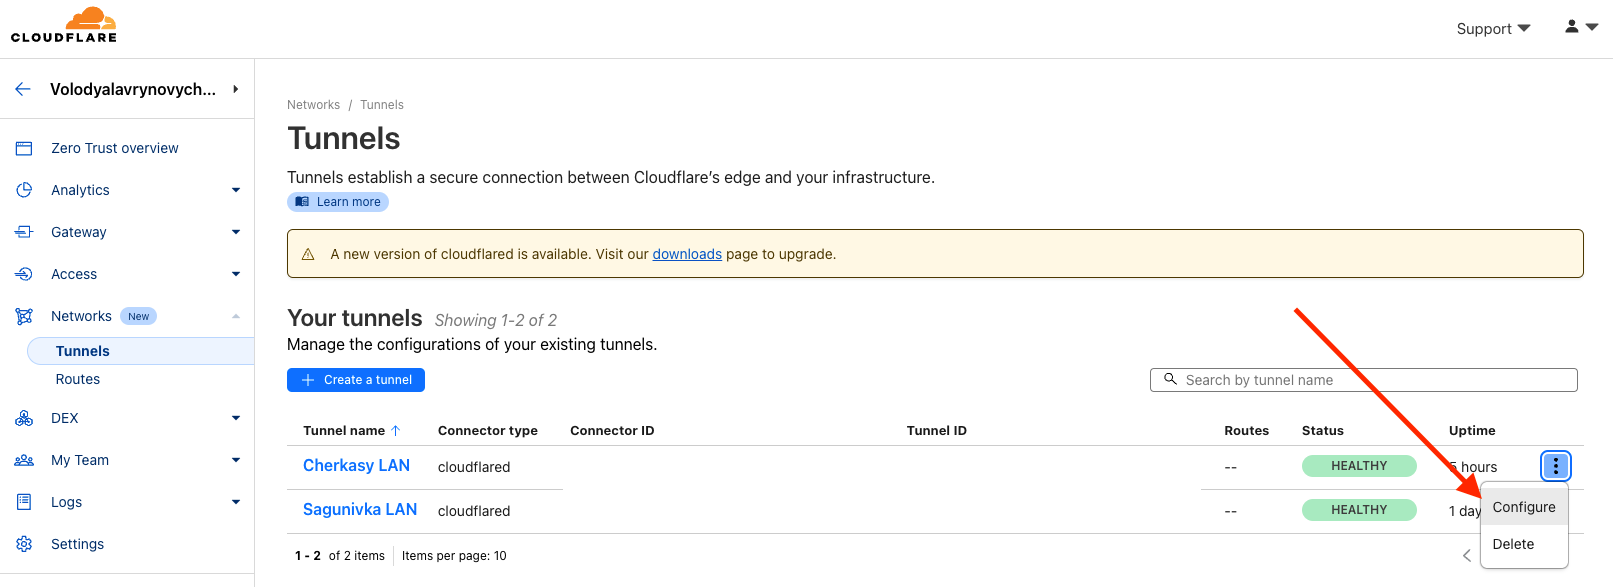
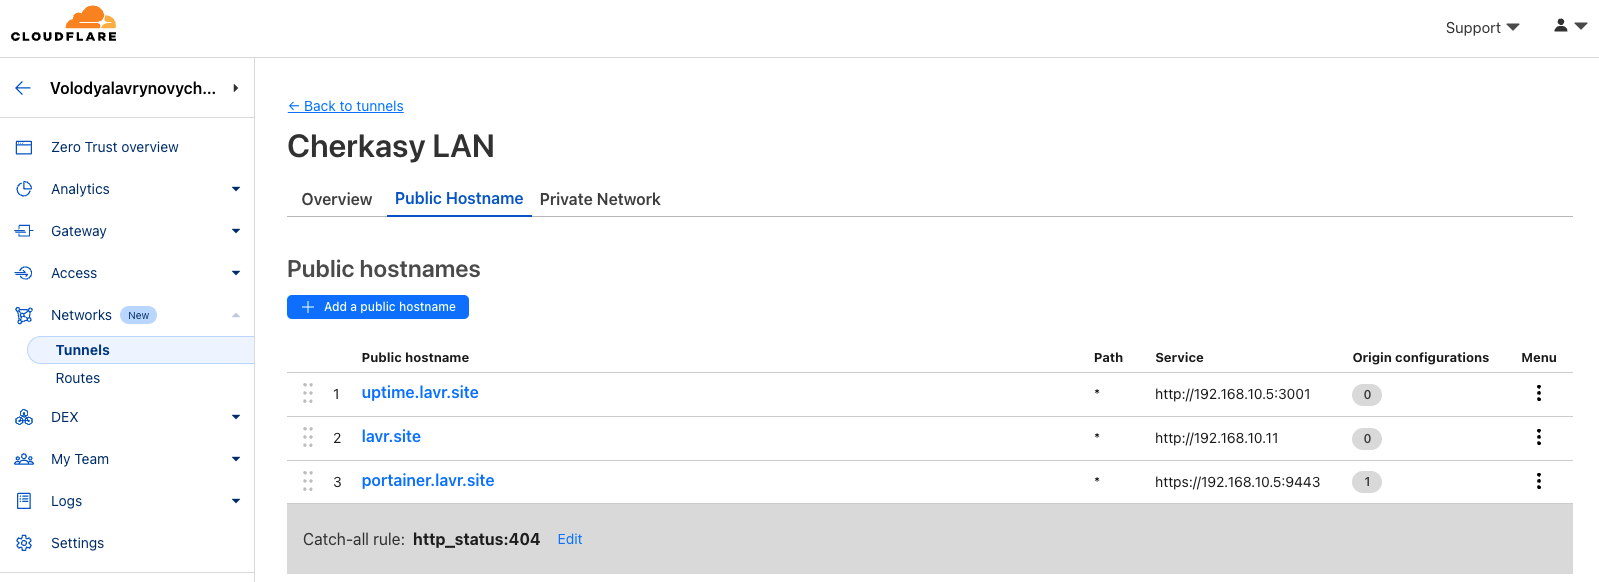
Step 1. Go to Tunnel Settings
Navigate to the list of tunnels and click on Configure to start the setup.
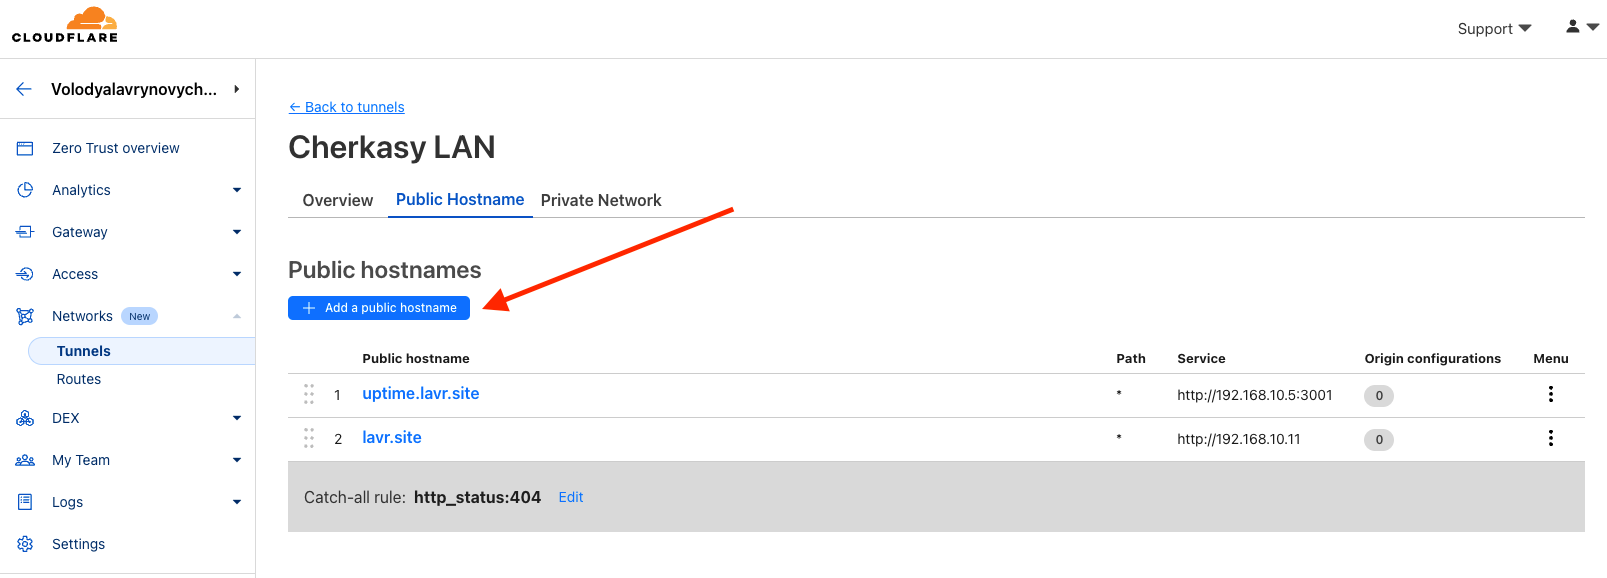
Open the Public Hostname tab and click on Add a public hostname.
You may notice that I have successfully added two services—Uptime Kuma and this blog.
Step 2. Fill in the Required Details
For example, let’s add my Portainer. We have our own domain, lavr.site, but I have already used it for my blog. Therefore, we will use subdomains.

Step 3. Save Changes and Check
After saving, the new entry will be added to the list. You can always return to edit the settings if needed.
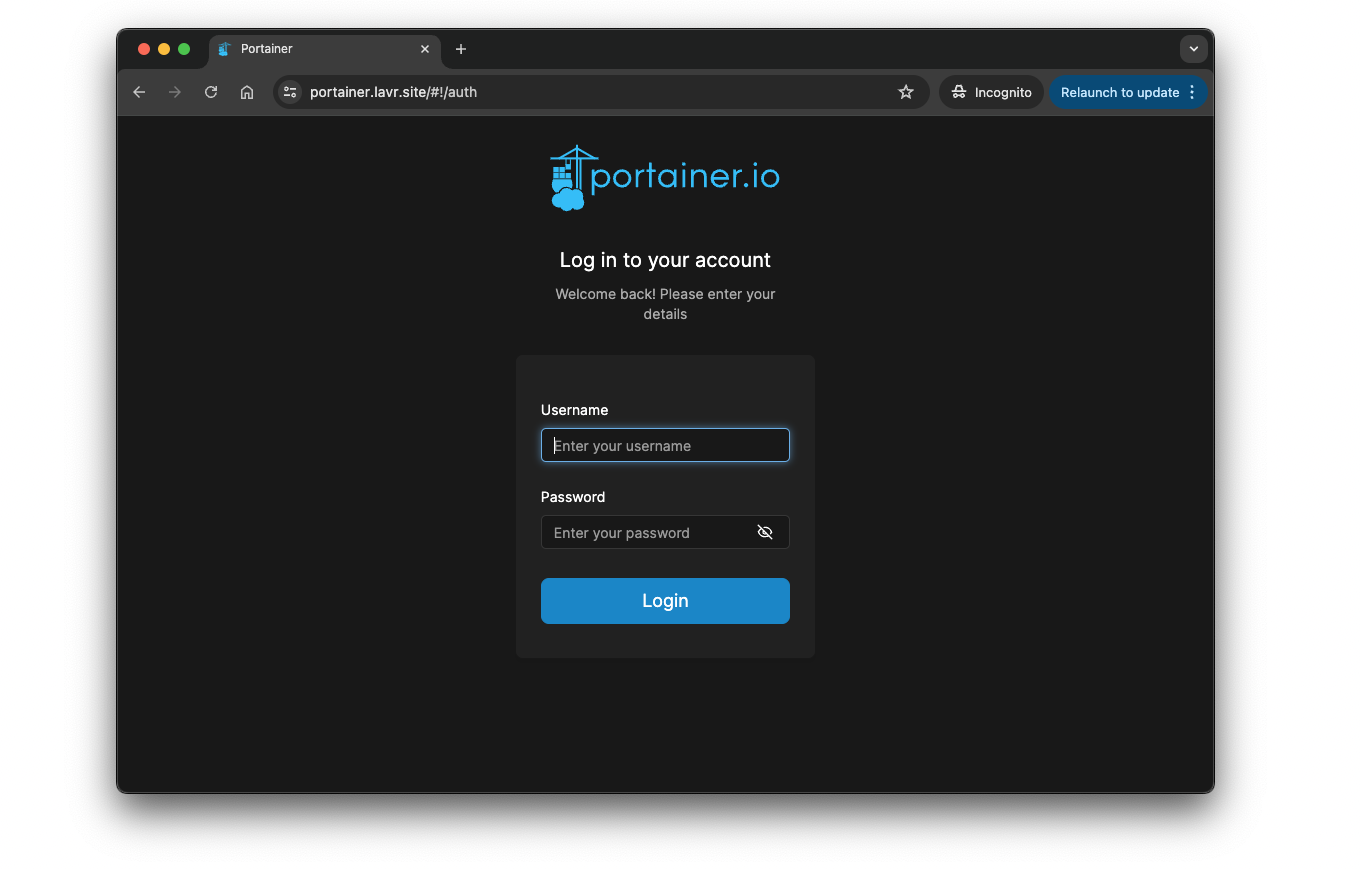
If everything was done successfully, when you try to open portainer.lavr.site (or your address), you should see the login page for your Portainer, which is hosted at your home.
By adding other services in a similar manner, whether it's Plex or your NAS, you will enable public access to them. Anyone can visit the specified address and use your services.
Conclusions
I hope everything worked out for you. Congratulations! Now you can publicly host your self-run services like a true homelabber.
An example of a working service I can provide is Uptime Kuma, which monitors my infrastructure: https://uptime.lavr.site/status/homelab. Isn’t that convenient? And this is just a small fraction of what you can host at home.
I wouldn’t underestimate the importance and power of Cloudflare for the homelab community. They’ve truly put in the effort to provide quality and interesting services that make life easier for enthusiasts like us.
The steps described above are not simple. Configuring everything took a fair amount of time. If it took more than one evening and several cups of coffee, that's perfectly normal.
The first part of the domain setup is quite declarative, but it required some waiting. The second part, about the tunnel, is more technical and required focus.
In conclusion, remember to periodically check for tunnel updates—they need maintenance from time to time, but it's not difficult. Also, always approach the need to open access to services with caution. The internet is a very aggressive environment, and no one is immune to hacking attempts. Strong passwords and SSL traffic encryption from Cloudflare should minimize risks.
Thank you for visiting. I hope you found it useful and interesting. Keep developing and moving forward, and I’ll help you whenever I can.
Other Materials Used in the Article
Volodymyr LavrynovychVolodymyr Lavrynovych