Connecting AI (Ollama) to control Home Assistant
Learn how to integrate the home-3b-v3 model into Home Assistant. This article provides a comprehensive guide to integrating and configuring an assistant, including installation, communication, home control, error handling, and performance tuning.


Introduction
Hello. In the previous post, we launched the Ollama Web UI service locally. It also described how to install the home-3b-v3 model, which was specifically designed to control the Home Assistant smart home. Don't hesitate to review it.
 Volodymyr Lavrynovych
Now we will integrate this model into my Home Assistant home server and check how quickly everything works. Brew some coffee and let's get started.
First, let's get acquainted with the model itself.

The description provides detailed information, and the aspects that I personally found interesting are:
- Types of supported entities: blind, light, garage_door, media_player, fan, lock, climate, switch, vacuum, todo, input_select, timer
- Languages: English, German, Spanish, French
- Unfortunately for me, Ukrainian won't be available anytime soon. (that is what I thought)
- Installing the component through the Home Assistant Community Store (HACS) - https://hacs.xyz/
From this, it is clear that it won't support the Ukrainian language, but I hope it will at least execute commands quickly in English.
Detailed information about integrating into Home Assistant is provided by Fixt in his blog: https://fixtse.com/blog/ollama-webui. I largely followed his instructions, taking into account that I have a dedicated server with Proxmox. I highly recommend watching his video.
Integration Installation
If you don't have HACS installed on your Home Assistant, install it first.
Now, follow this link for quick addition and installation of the new repository: https://my.home-assistant.io/redirect/hacs_repository/?category=Integration&repository=home-llm&owner=acon96
Upon following the link, you will be asked if you want to add the new repository.

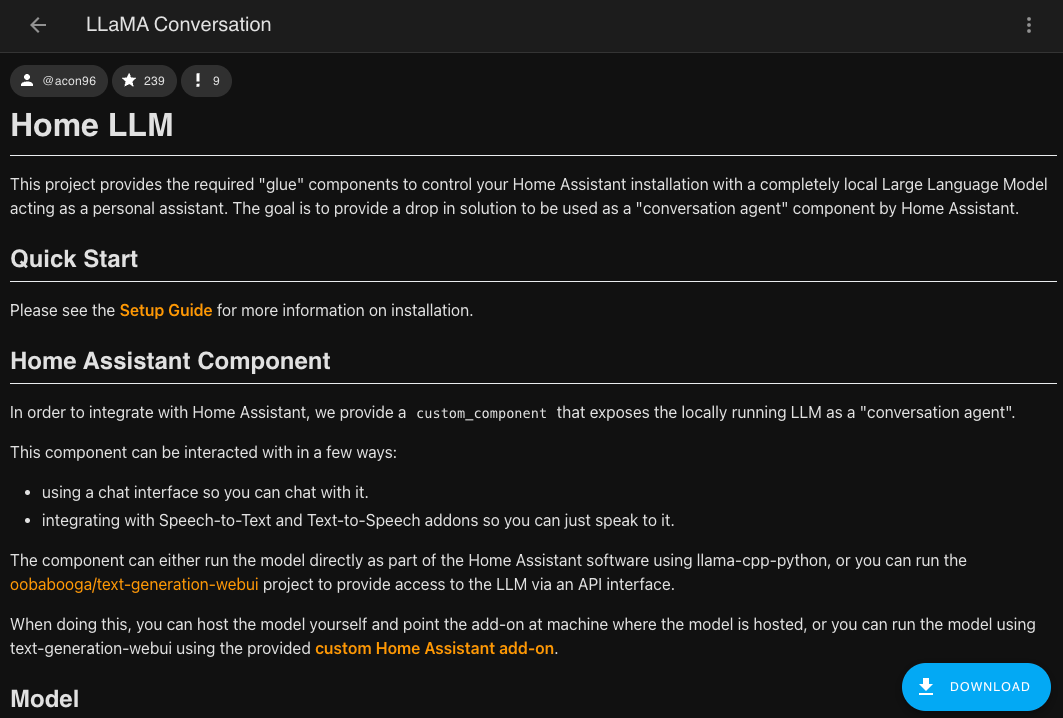
After that, the LLaMA Conversation page will open. At the bottom, there will be a button for downloading. Once the download is complete, you need to restart the Home Assistant server - go to the "Developer Tools" tab -> Services -> Run homeassistant.restart.
Integration Configuration
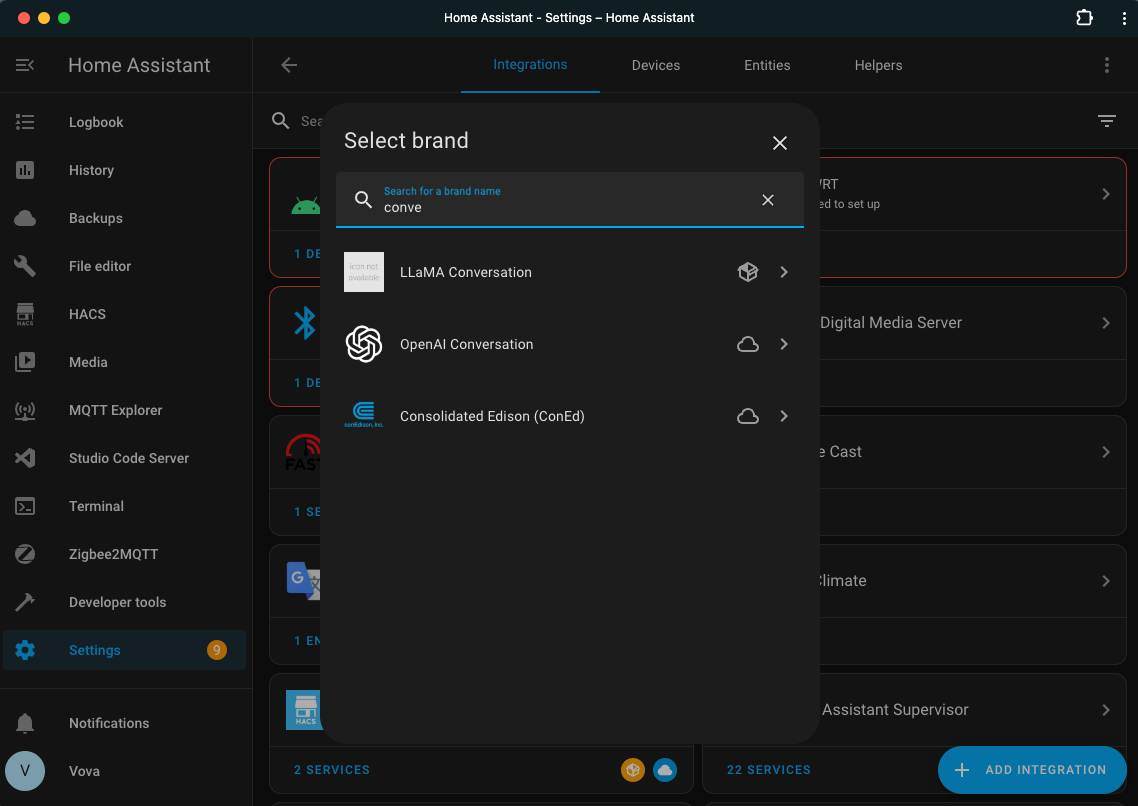
Go to Integrations and add a new one. In the search bar, you need to find LLaMA Conversation.
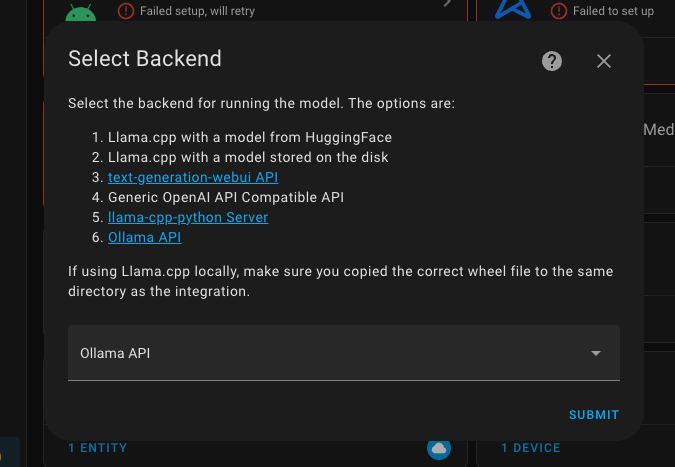
In the next dialog, select Ollama API.
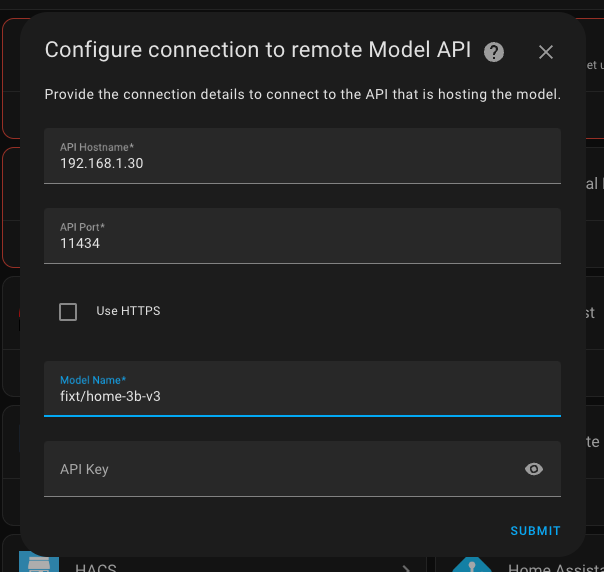
Now you will need to remember the IP address where the Ollama Web UI is hosted.
- Hostname: 192.168.1.30
- You should have your own address, preferably static, because if not, after restarting Ollama Web UI, it might have a different address and the integration will stop working, but you all understand this - well done.
- Port: 11434
- Model: fixt/home-3b-v3
- It is important to specify the exact model we installed earlier.
- Key: leave it empty, as we will be accessing our own server, which is available to us without any payment or keys.
The last step I reviewed, but I didn't change anything.
I think it would make sense to change the prompt itself someday, but only when I already have full support for the Ukrainian language.
Confirm everything, and it's ready! We can start using it.
Creating a New Assistant
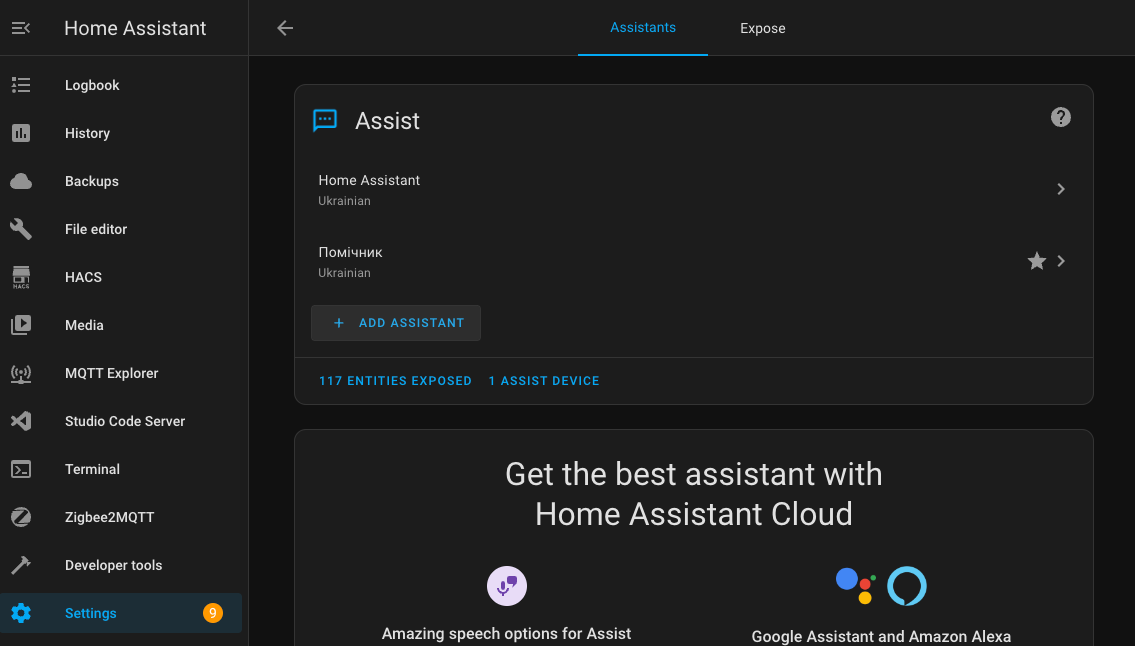
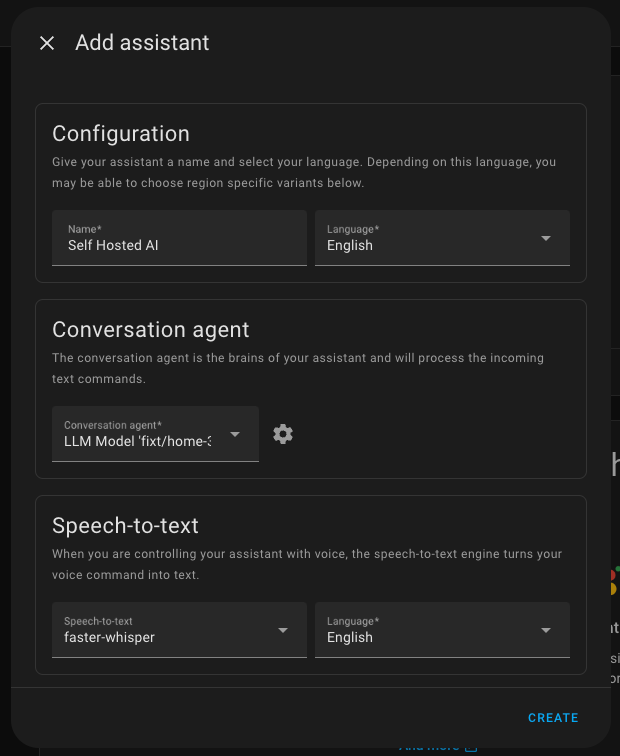
Go to the settings of Home Assistant and open Voice assistants. Click on the Add Assistant button.
Enter the name and choose the primary language. In the agent field, select only the configured integration. For speech-to-text, choose whisper, and for text-to-speech, choose piper. If you don't have them, add them like regular Home Assistant integrations.
After creation, it will appear in the list of assistants.

Communicating with the assistant
To interact with the assistant, open any dashboard and in the top right corner, click the assistant call button and select the desired one - Self Hosted AI.
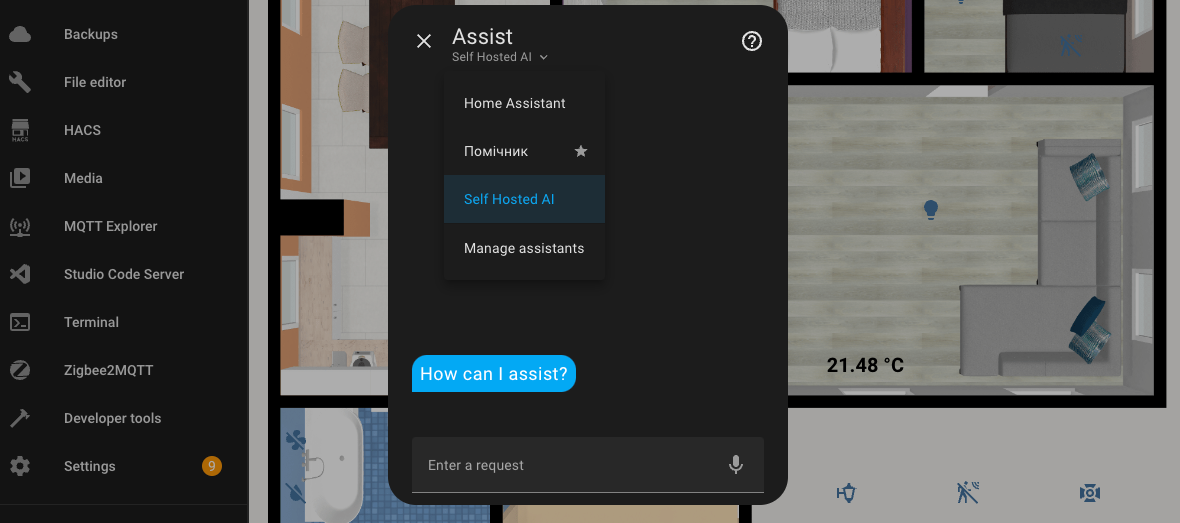
Here is an example of a simple dialogue in English.
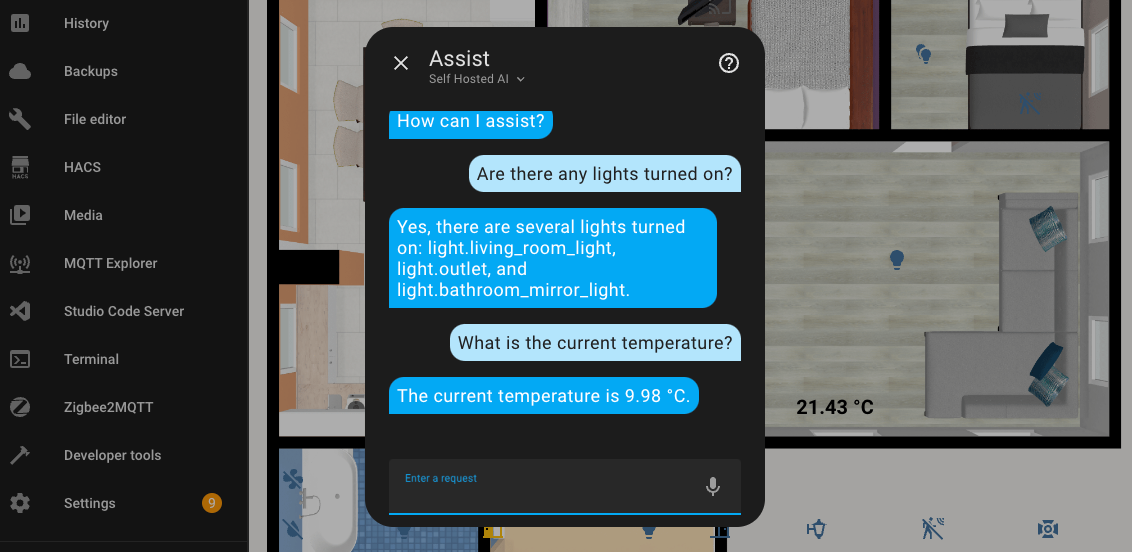
In the assistant settings, I entered Debug mode and checked the execution time, which was about 8.5 seconds. It's definitely not the best result, but it's too early to get upset... Jumping ahead, I'll say that I haven't seen how long other requests took yet, so I was already disappointed by this number. How impatient I was to get upset.

Home Control
From the very beginning, all efforts were for this purpose. A dedicated Proxmox server and a separate virtual machine for Home Assistant and Ollama Web UI, ultimately to control the house.
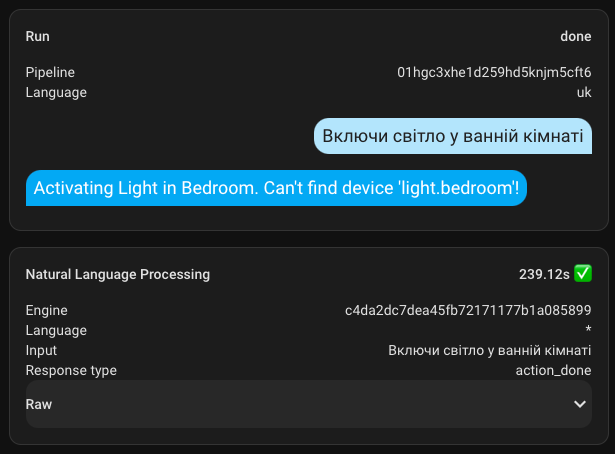
A basic example would be turning on the lights in your home. I first tried it for the bathroom, and nothing happened. Then I tried for the kitchen, but it only turned on one of the two lights. This was one of the first attempts and the most unsuccessful one; all subsequent attempts were significantly better.

I had already tried setting up the built-in Home Assistant, but it requires fairly precise commands, where every mistake results in no outcome. Unlike the standard one, the AI assistant can forgive your errors and understand you almost always.
After many attempts, I can confirm that it is indeed possible to control the house through the assistant, and I can even recommend it.
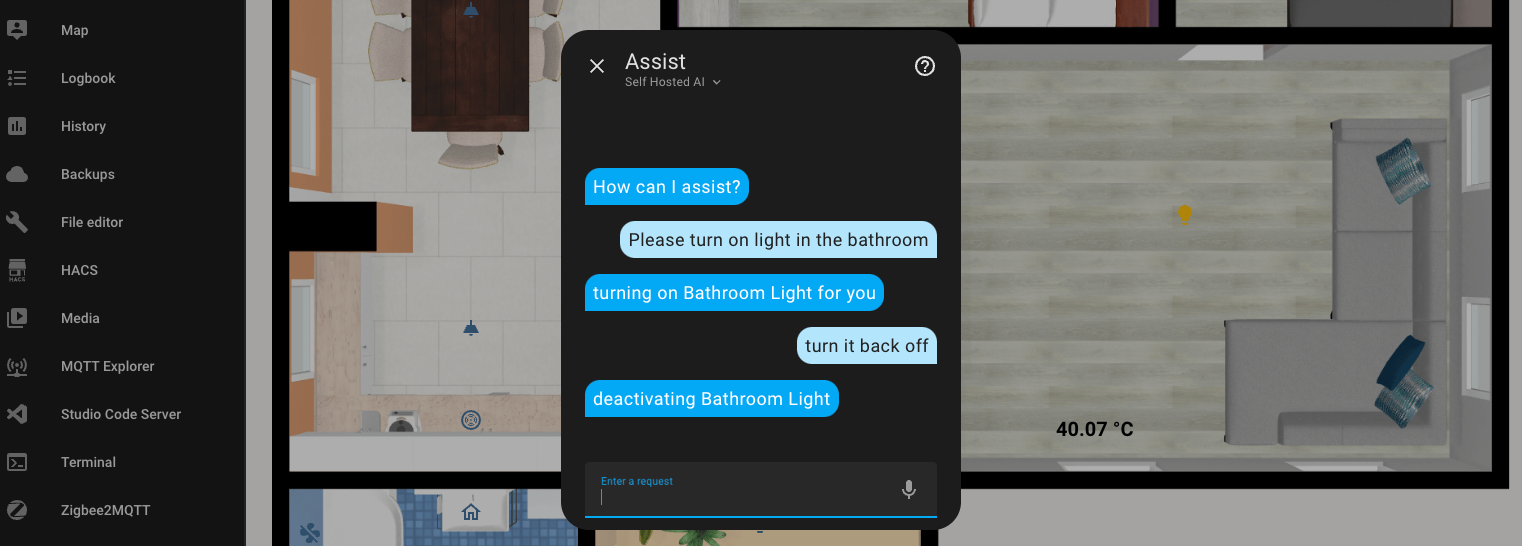
Context of the Conversation
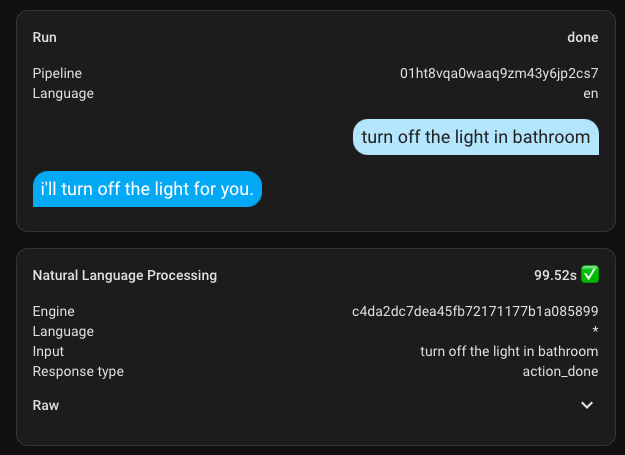
This is perhaps one of the greatest advantages of AI-assisted control - it stays in context. For example, I ask it to turn on the light in the bathroom, it does so, and then I simply say "turn it off" without specifying which light should be affected. Knowing the previous conversation history, it easily determines which device needs to be operated.
Ukrainian-speaking Assistant
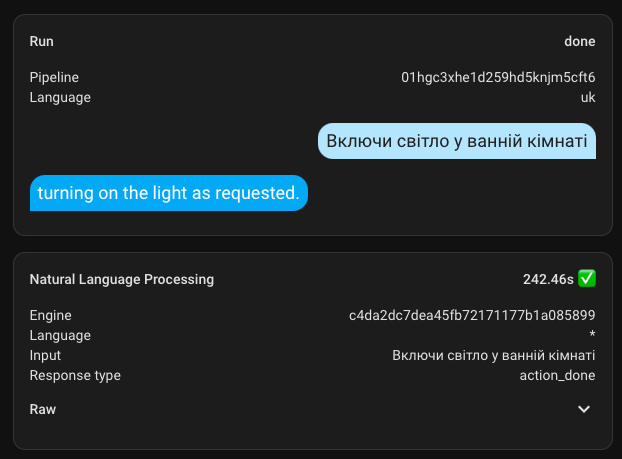
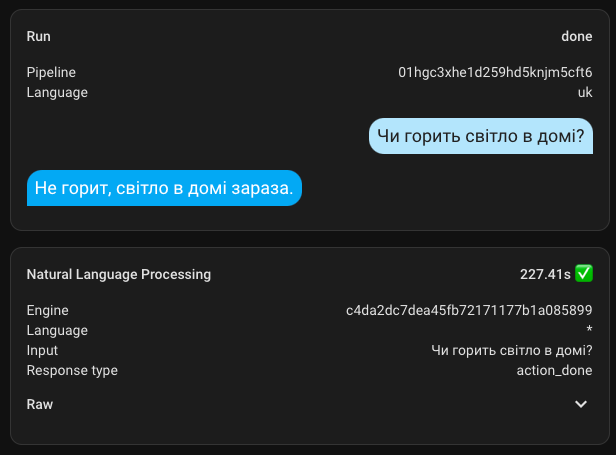
Following the example of Self Hosted AI, I configured a Ukrainian-speaking assistant. Maybe something will work out?
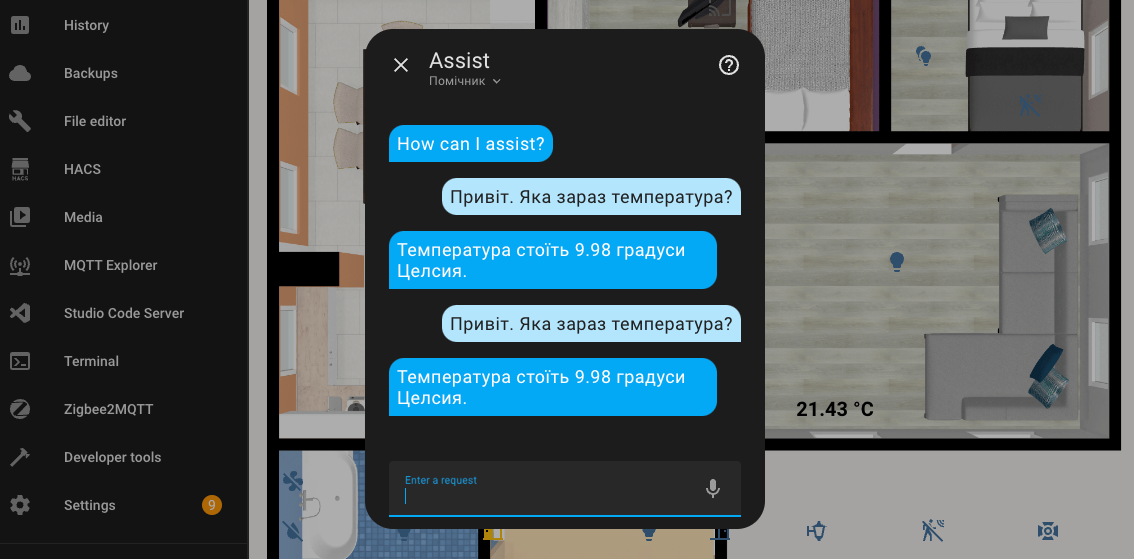
I don't know how it's supposed to work, but both turning on and off take a very long time. The execution time is up to 4.5 minutes. Also, for some reason, it responds in English.
However! It still works and understands me, which is pleasing.
If you spend enough time, it might be possible to tame this beast and get a proper response in Ukrainian.

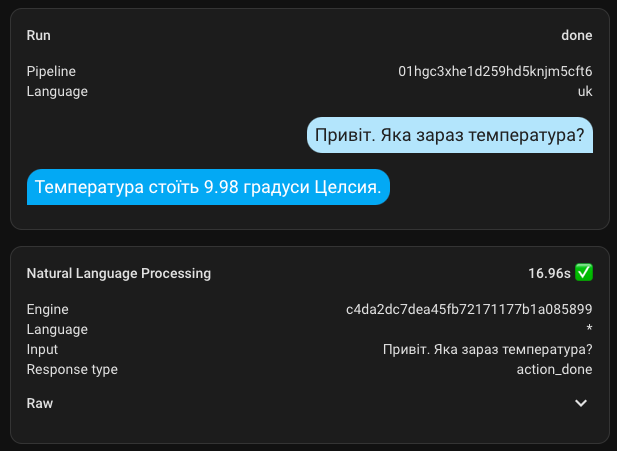
Here is an example of a combined request. The response is rough and awkward, but it grasped the essence and provided the requested information.

But I liked this response the most.

Error Handling
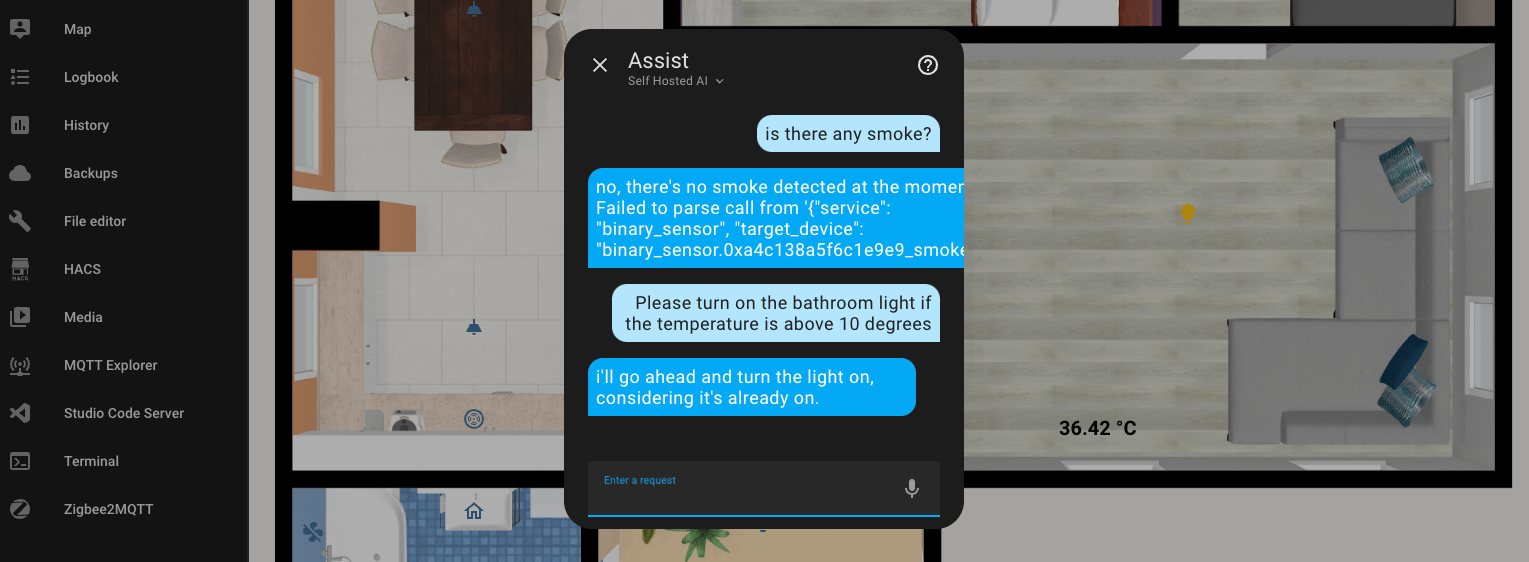
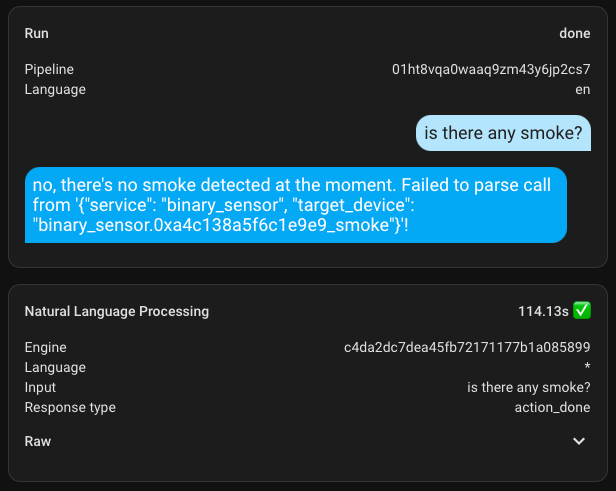
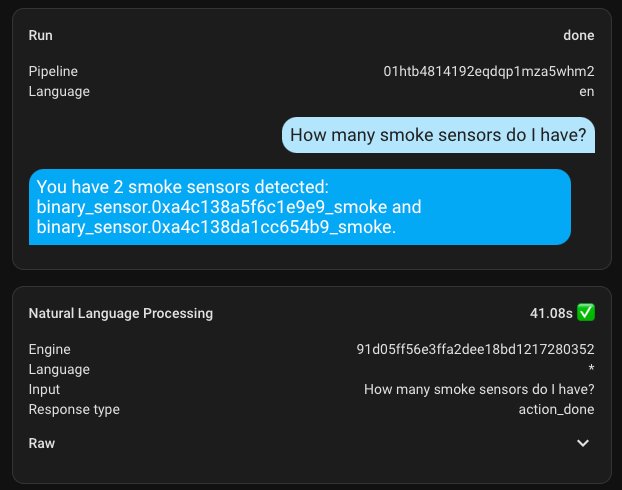
Regarding errors, here's an example. I made a mistake in the request, and no matter how absurd it might have seemed in terms of understanding, a response was still generated. It's a pity that the response wasn't very useful 😀.

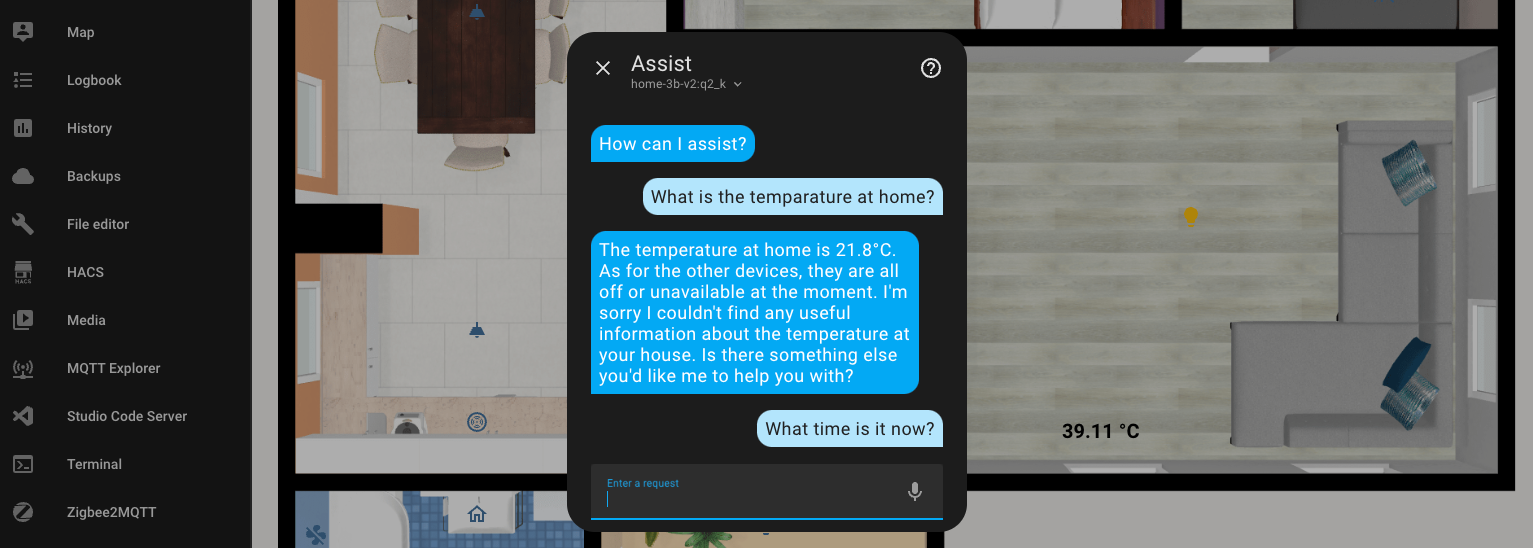
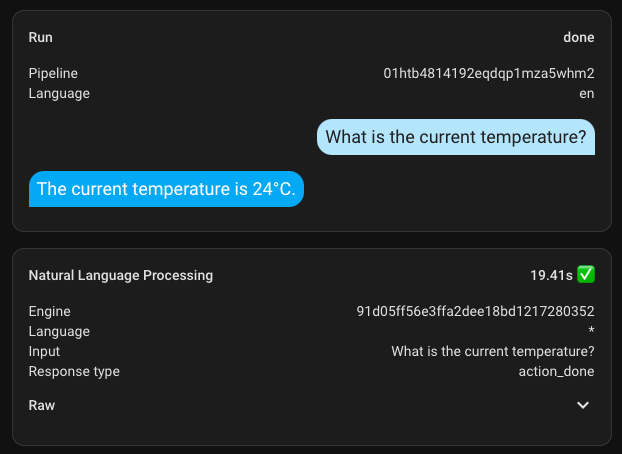
But the English-speaking assistant (in the example, I used a slightly different model, as I was experimenting) responds very skillfully and with full understanding. None of us are perfect, and it's easy to make a quick mistake. Instead of "temperature," I wrote "temparature." Yet, I still received a clear and precise response.
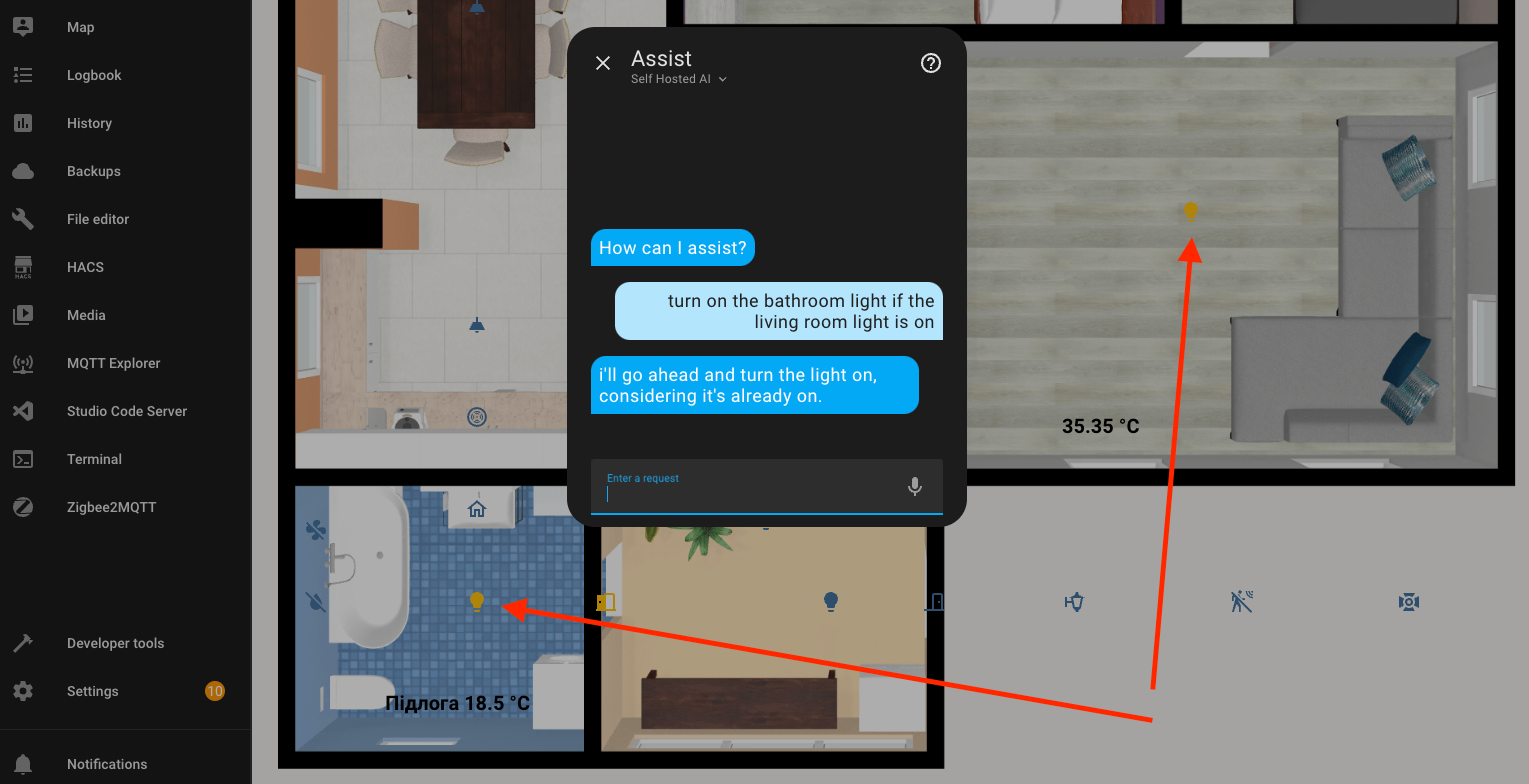
Combined Requests with Conditions
I also aimed to check if it would execute tasks with conditions. In the first example, I asked it to turn on the light in the bathroom if the light in the living room is on. It turned on the light, but judging by the response, it seemed uncertain.
The same thing happened with the next example.
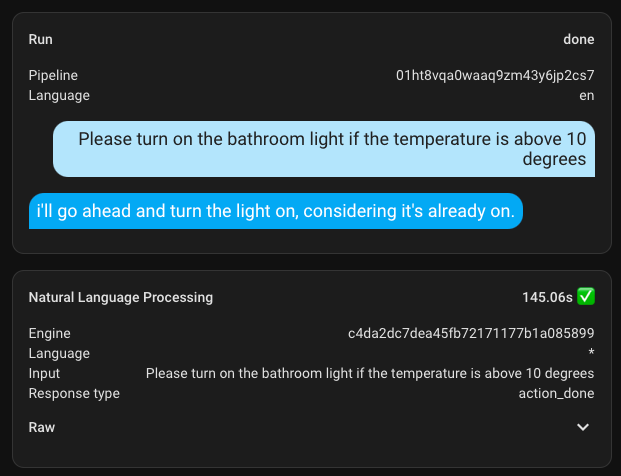
I didn't give up and asked it to tell me a joke if the temperature is higher than 10 degrees Celsius. And I really liked this joke (not). It just went ahead and turned on the light in the bathroom, continuing the previous conversation context.
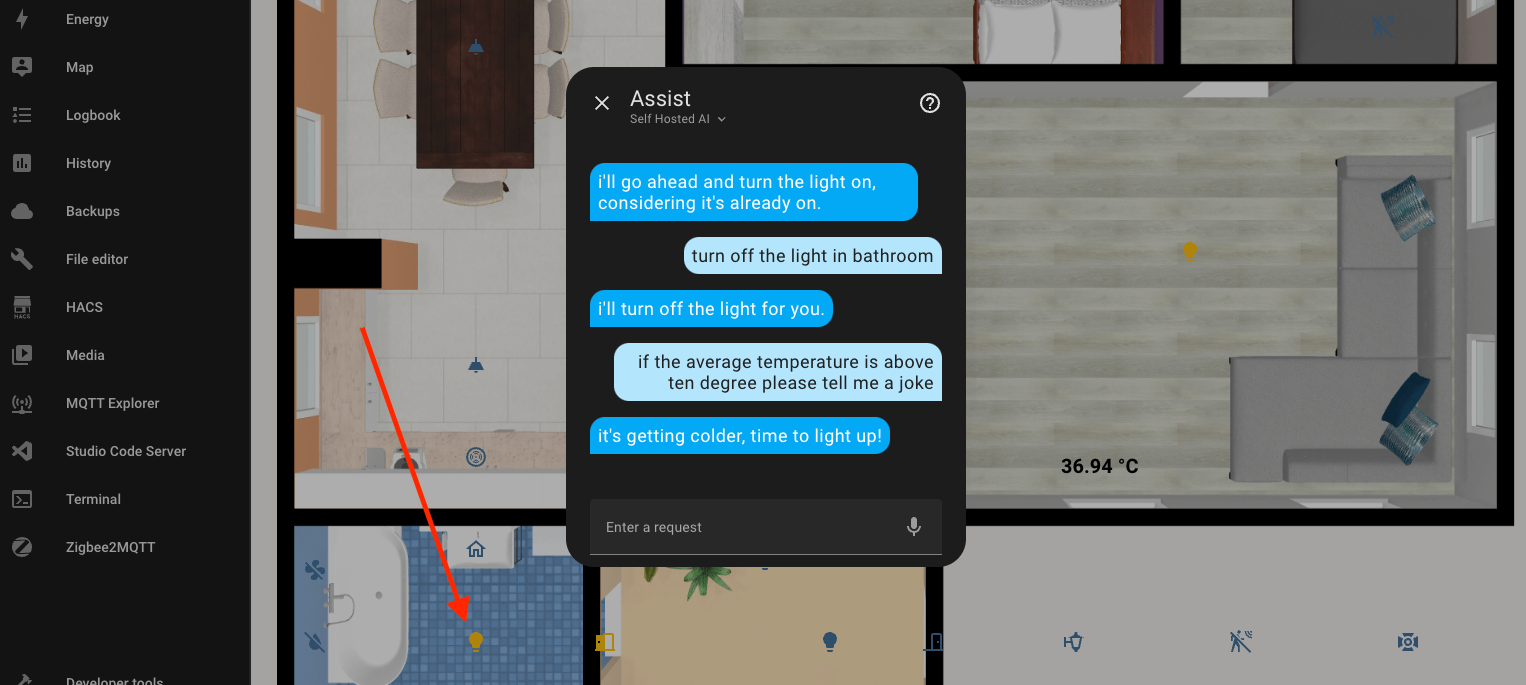
I didn't appreciate that joke.
It became clear that small models handle complex requests mediocrely, and sometimes they don't understand them at all, as my example showed.
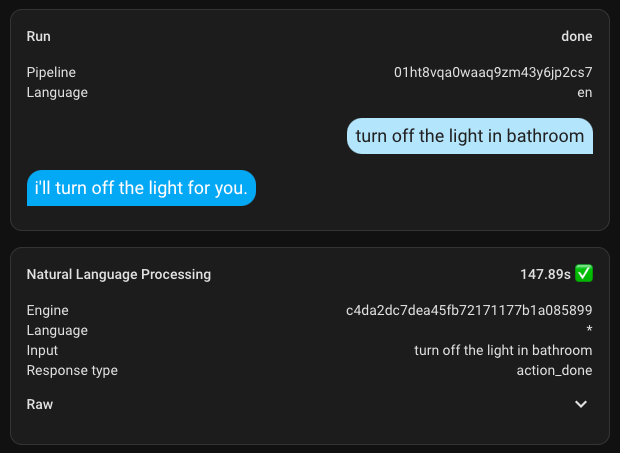
Request Execution Time
And to conclude this section, I'll add a few screenshots of the execution time. My hardware is not suitable for this task at all.


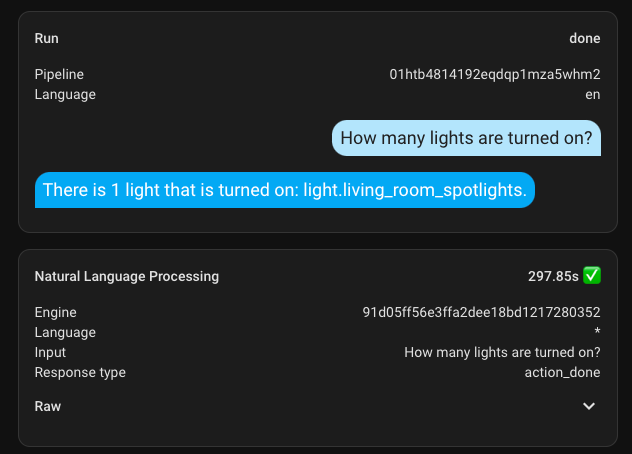
Here are a couple of additional ones with a different, larger model. The first request took nearly 300 seconds, but all subsequent ones were significantly faster.
Stability
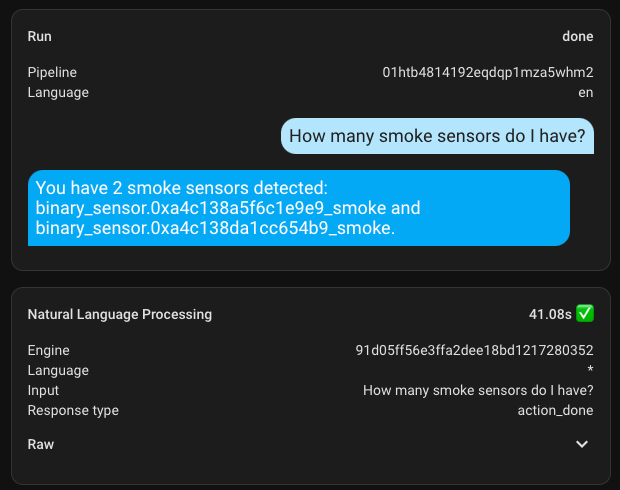
This still requires verification, but I can assure you that there's no transparency in the actions of AI, and here's an example where I made two identical requests in a row in one chat.


The first request took 17 seconds, while the identical subsequent one was executed in 265 seconds. How is that possible?
Parameter Tuning
When you first ask something of the assistant, it takes a while to execute commands, and to improve the results, I started tweaking some parameters.
CPU
The first thing I did was check the CPU load of the AI container at rest. Indeed, everything was calm.
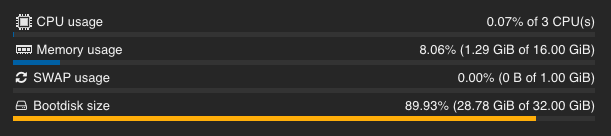
But when making requests and processing them, the situation changes, and the processor starts working at 100%.
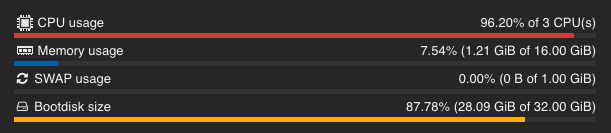
Although at that moment I had only selected 3 out of 4 CPU cores, I decided to add all 4 but set the usage limit to 3.5. This way, I effectively have 4 threads and a little more resources. Even if I set the limit to 3, it will still use 4 threads, which is better than three.
And it's also good that this indicator on the graph no longer sticks in solid red, so it doesn't visually seem like it's struggling.
Model Settings
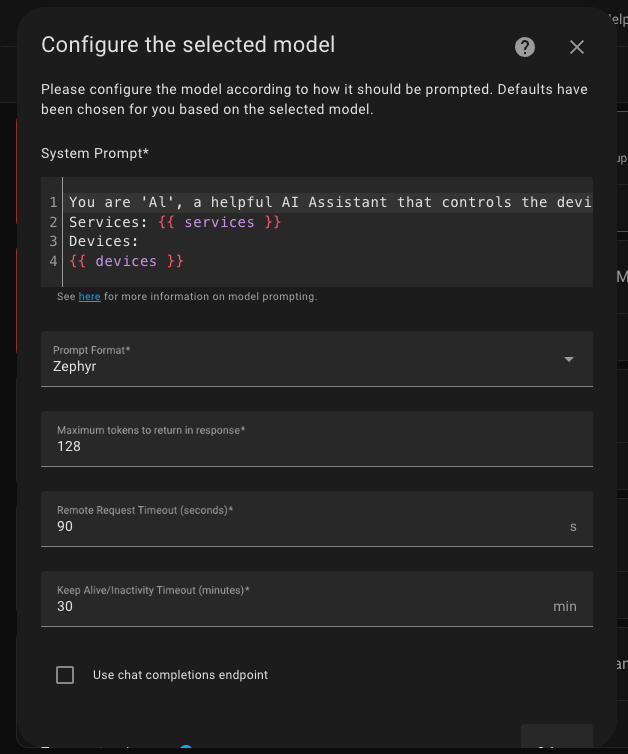
I went back to the assistant settings page (Settings -> Voice Assistants), clicked edit, and opened the model settings, where I changed two parameters:
- Reduced the maximum number of tokens returned from 128 to 64, as I don't need long tirades.
- Increased the timeout from 90 to 900 seconds to ensure I get a response, since it sometimes lagged severely, and I was curious if anything would come back. However, this isn't strictly necessary.
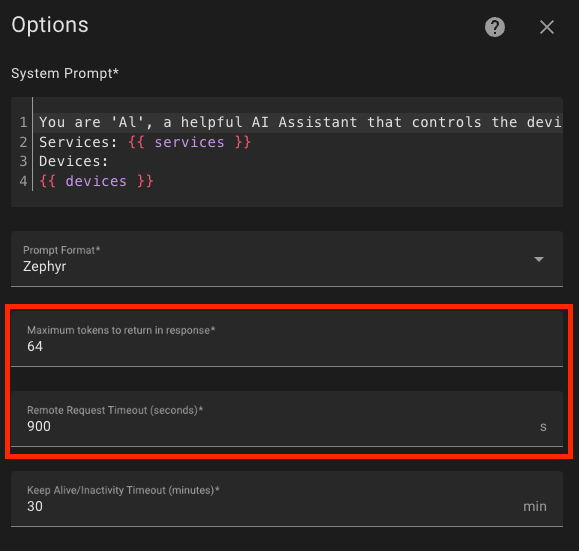
All these manipulations allowed me to get responses in 8.5 seconds on my hardware (Intel N100), but these are just the best-case scenarios. On average, requests take more than 2 minutes.
Models
I downloaded many models, both large and small. It is worth personally testing which one meets your needs. Here is a link to all the models that support working with Home Assistant.
Also, remember that on the page of each model, there are various tags with different model sizes.
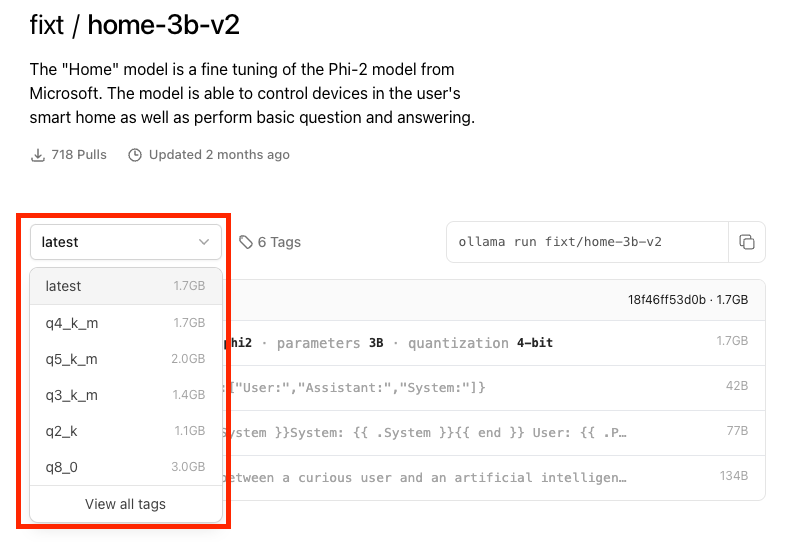
I ran the smallest q2_k, and it turned out to be the fastest.
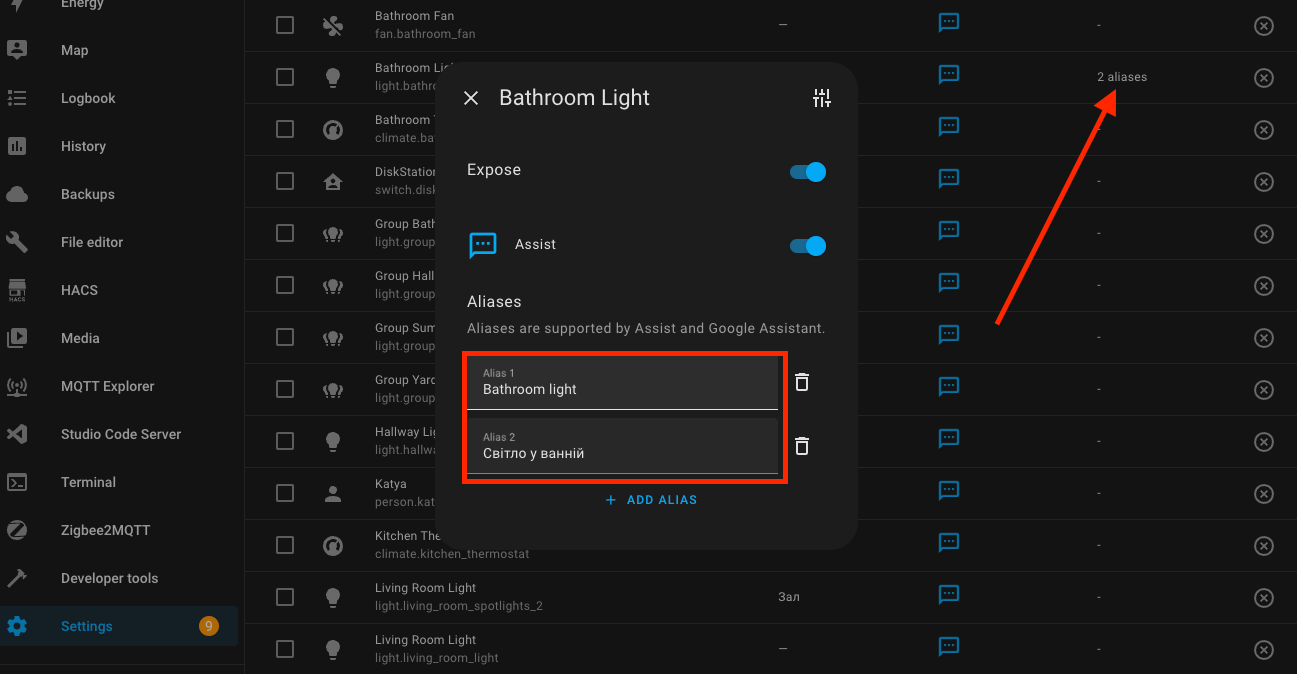
Devices Available for Assistants
On the assistant's page, there are settings for the entities that can be controlled. There you can also set aliases for each of your devices. I don't think artificial intelligence will be super smart on its own. As always, it will need some training. But that's probably for the best, because after some minor adjustments, you will be able to achieve the results you were expecting.
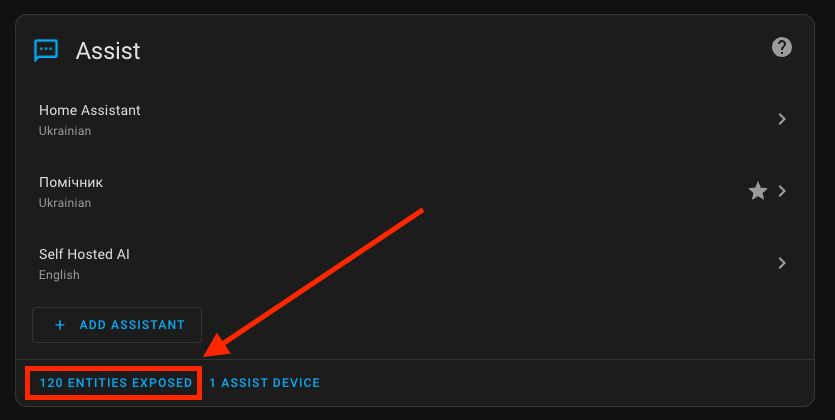
In my example, you can see as many as 120 entities available to the assistant. I highly recommend using only the minimum set. This can reduce the response time.
At the beginning of the dialogue, the assistant sends the list of all devices available to it to the AI. The larger the list, the more time the AI needs to process and analyze the data. So, don't add everything as I initially did.
Replacement of Input Parameters
The standard prompt is not perfect and may not always suit your needs well. We have everything needed to adjust it in the right direction.
Let's take an example with the date and time. By default, your assistant will have no idea what day or time it is. A simple question in various forms always returns 04/22/2022 12:45 am.

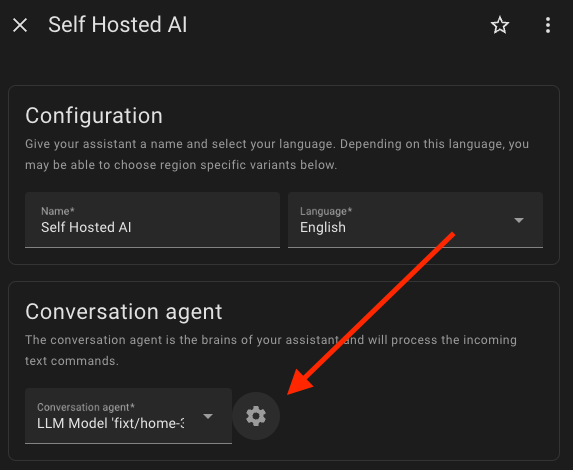
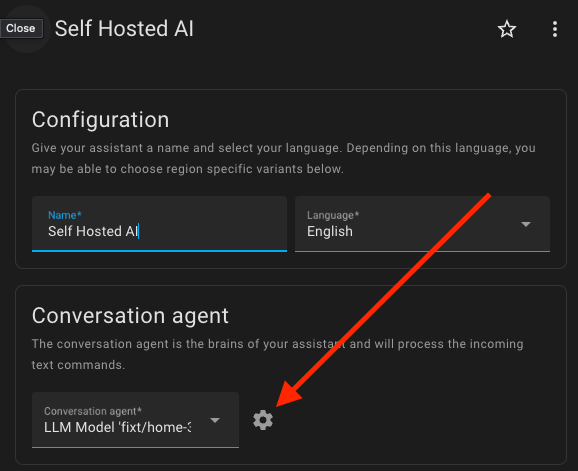
To fix this, go back to the assistant settings and click on the settings next to the model field.
In the edit window, I added Current time: {{ now() }}, where now() is a function that returns the date and time in the following format: 2024-04-01 01:06:27.771867+03:00.
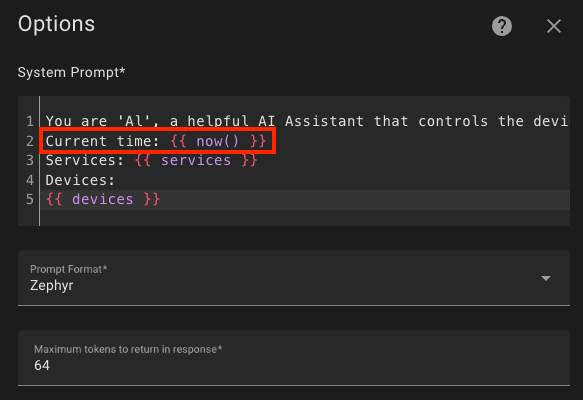
Having saved these changes, we shared new information with AI, and now every time the dialogue with the assistant is opened, it will receive the current date and time and respond correctly.

Similarly, you can add a multitude of details, but try not to overload it.
Keep Alive
I found that there was once a discussion about keeping the model in RAM for as long as possible: https://github.com/ollama/ollama/pull/2146
In the Ollama Web UI settings, I found the corresponding parameter, but for some reason, I did not notice any significant changes in behavior. Perhaps it behaves differently on different models. So it's probably worth adjusting this as well.
Summary
The integration into Home Assistant itself is rather straightforward and uninteresting. Things really heat up when you start adding a ton of models, and in different dialogues, you can barely keep up with experimenting. Playing with models took up almost 80% of the time spent. But it's so fascinating and engaging that you simply can't tear yourself away. So my personal recommendation is not to start delving into this in the evening, because you might forget about sleep.
My personal experiment with all of this turned out to be twofold. On one hand, the power of my server greatly affects the response time, which is quite unsatisfactory for me. On the other hand, it turned out that there is support for the Ukrainian language and probably many others, which opens up more possibilities.
The error handling impressed me greatly. This is exactly what was sorely lacking in the assistant. This direction is developing very powerfully, and for complete and inexpensive adaptation of artificial intelligence in home conditions, it will take another couple of years. I am very positive about it, and I advise you to start exploring this topic as soon as possible.
I've partially laid out my thoughts on artificial intelligence here as well. Go ahead and find out more about my personal thoughts on this and more.
Volodymyr Lavrynovych