Proxmox Helper-Scripts
An overview of Proxmox Helper Scripts, featuring popular and favorite scripts, along with guidance on how to run them effectively.

Introduction
Hello. I want to share with you a very useful resource that helped me a lot when I first started exploring Proxmox VE.
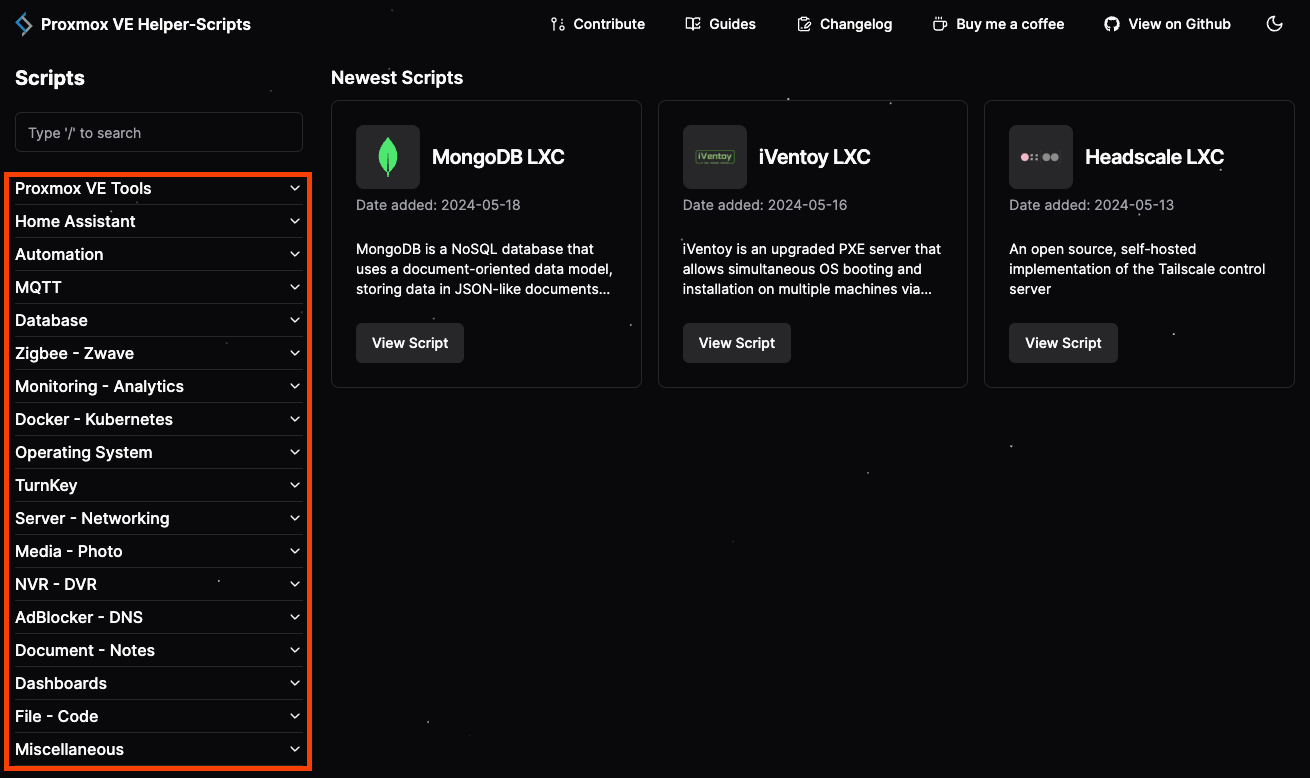
Here is updated UI

I would like to thank the author https://github.com/tteck in advance, who recently updated the design of the resource and continues to support and develop it, adding more new scripts.
Guides
A highlight of the recent update is the section with user instructions, where they use https://helper-scripts.com/ to describe everything in great detail and step by step.
It was from such an instruction that I began my acquaintance with this resource. It was an article by Derek Seaman about Home Assistant: Proxmox VE 8.2 Quick Start Guide, which primarily discussed how to resolve certain issues after installing Proxmox VE and quickly create a container with Home Assistant.
I understand that there will now be an attempt to organize most of these instructions in one resource to clearly show how to use the scripts in practice.
I hope that over time there will be more instructions and they will be of higher quality, but even now you can find many tips and answers to your questions there. Check it out and explore...
Scripts
Scripts are essentially the main part of the resource, and there you will find a multitude of interesting and possibly new containers that you can deploy yourself. All of them are well-organized and categorized.
How to Run?
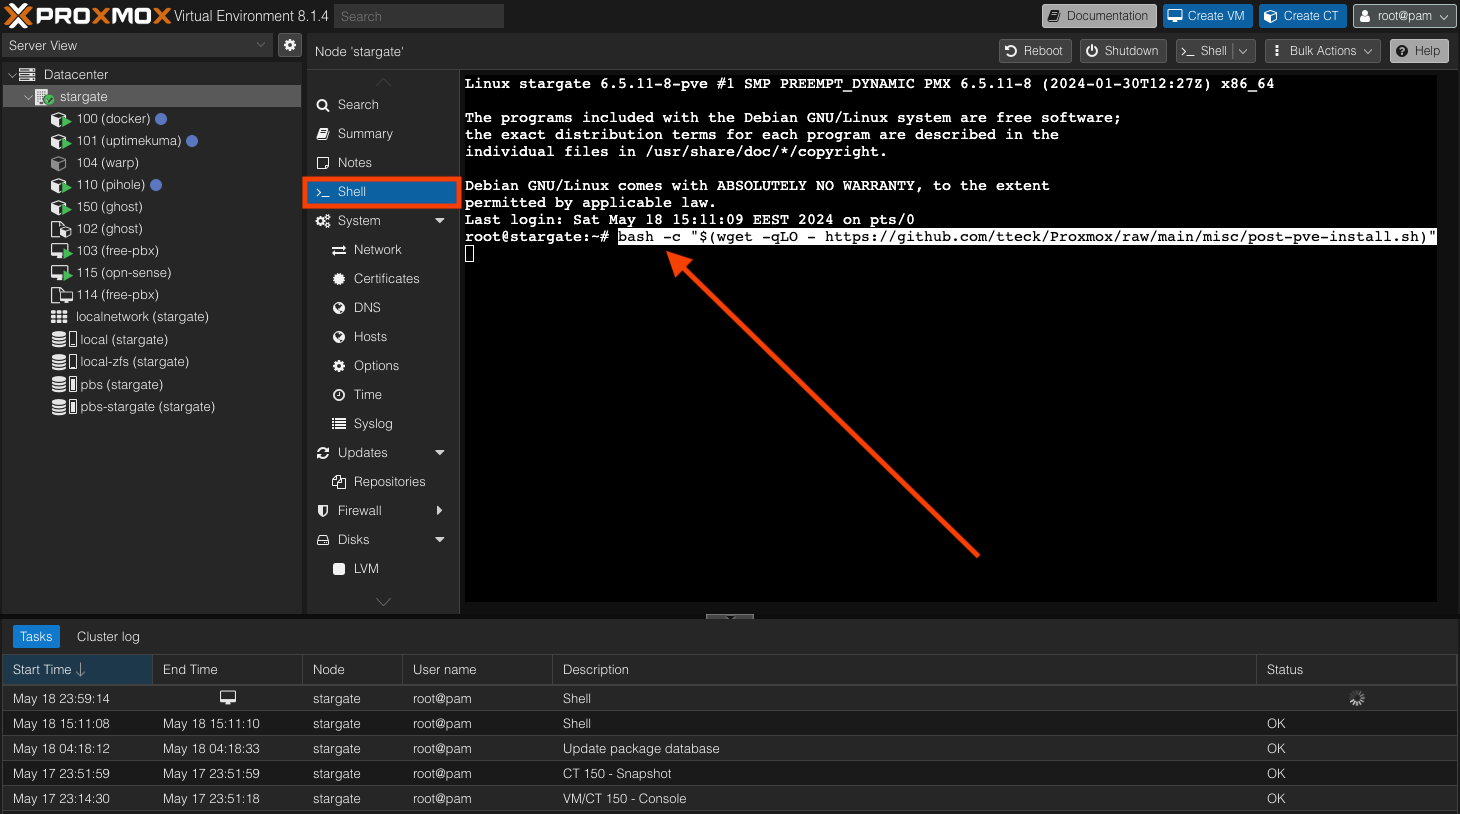
It's very simple:
- Open the Shell on your Proxmox VE server.
- Copy the desired script and execute it.
- Follow all the survey steps.
- Wait for the execution to complete.
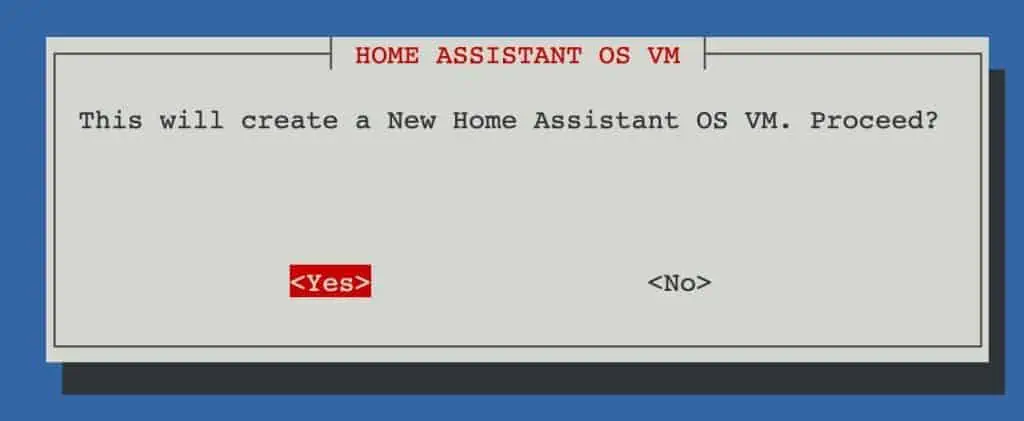
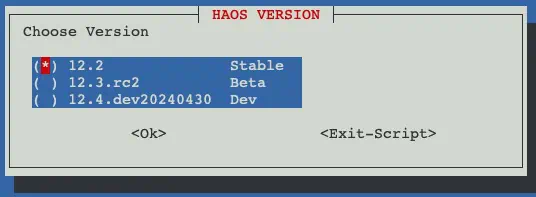
Each script is unique, but most of them have similar survey steps regarding the container name or network settings. I'm confident that after going through them a few times, you'll be able to confidently run all subsequent ones. Just be attentive.
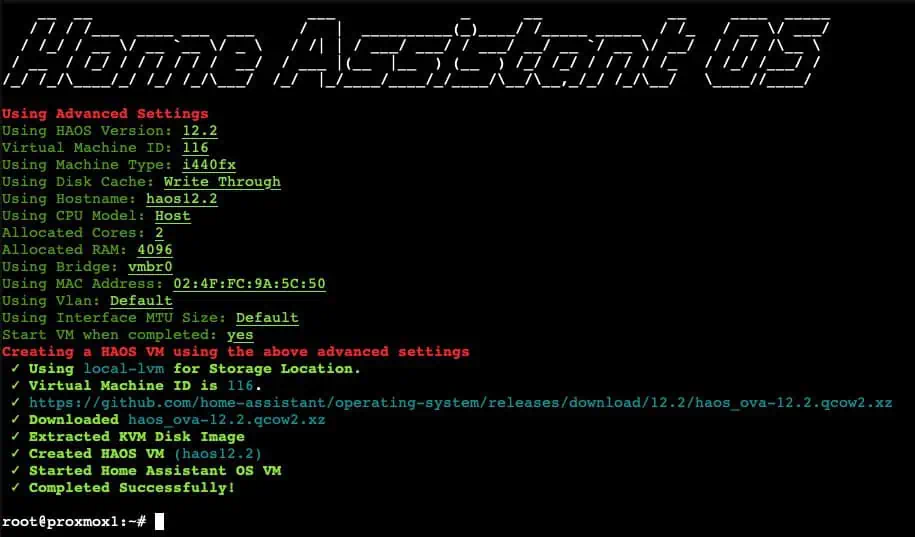
Tips for Working with Scripts
In the heat of excitement, I've often found myself rushing or accidentally closing Proxmox windows. There have also been times when I tried to run a script without even connecting the server to the network cable, or after reconfiguring (or moving) the network. So these tips are worth noting to avoid such situations.
Proxmox VE Tools - Post Install
Some of the first scripts I recommend applying, especially for Proxmox servers, are found in the Proxmox VE Tools category. I specifically suggest paying attention to the ones listed below. Particularly noteworthy is the "Post Install" script, both for Proxmox VE and Proxmox Backup Server - don't overlook them.
- Proxmox VE Post Install
- Proxmox VE Processor Microcode
- Proxmox VE CPU Scaling Governor
- Proxmox VE Monitor-All
- Proxmox VE Host Backup
- Proxmox Backup Server Post Install
Popular
After browsing YouTube, you'll quickly realize that most bloggers configure similar services, among which you'll almost always find these beauties:
- Home Assistant OS (VM) - Smart home. One of the most extensive open-source projects today.
- Docker (LXC) - I'm not sure if the most famous container deployment project needs a description.
- Nextcloud (LXC) - Your own cloud for file storage. An alternative to iCloud and Google Drive/Photos with additional features.
- Plex Media Server or Jellyfin Media Server (LXC) - Personal media servers for movie libraries.
- Pi-Hole or AdGuard Home (LXC) - Ad blocking, and even a bit more.
- Grafana (LXC) - Monitoring platform with a very nice interface.
- Homebridge (LXC) - A cool adapter for various gadgets under the Apple HomeKit protocol.
- Nginx Proxy Manager (LXC) - Nginx reverse proxy.
My favorites
Popular services I would complement with my favorites, which honorably take their place in my home.
- Proxmox Backup Server (LXC) - a backup server that integrates easily with Proxmox VE.
- I've already described my experience setting it up in the Proxmox Backup Server & Synology NFS article.
- Uptime Kuma (LXC) - the coolest and simplest monitoring system, with the ability to create publicly accessible dashboards.
- Pi-Hole (LXC) - besides ad blocking, it has a DHCP server in its arsenal and just looks nice.
- Dashy (LXC) - the home page of your homelab.
Interesting
There are also those that, due to their specificity, are not needed by everyone but may interest connoisseurs.
- Zigbee2MQTT (LXC) - a well-known Zigbee protocol project. It's typically installed as an add-on in Home Assistant.
- Frigate (LXC) - a modern NVR with AI support for facial and object recognition. Integrates nicely with Home Assistant.
- Trilium (LXC) - a local personal notebook with a bunch of features.
- Actual Budget (LXC) - personal accounting.
- Mariadb or MongoDB (LXC) - the two most popular databases for home services like Grafana or Home Assistant.
Conclusion
Proxmox Helper Scripts simplify the installation and configuration of a wide range of services, but it's not a comprehensive collection of everything in the world of self-hosted and homelab setups.
These scripts significantly streamline and accelerate the installation of services, especially in terms of network settings and other individual aspects. I really appreciate the simple yet effective interface reminiscent of the 90s. There's a certain charm to it.
Don't overcomplicate things that others have simplified for you. Focus and spend your time more efficiently where your path requires more effort.
I see that the Proxmox Helper Scripts resource continues to be updated and developed, which is good for popularizing Proxmox in home environments for enthusiasts like myself.
Wishing everyone fast internet!


