Self hosting AI - Ollama Web UI
Today we will launch an artificial intelligence (AI) and host it on our own server located at home. Access to the AI will be through a web interface like most self-hosted services.


Prerequisites
We will be running everything on a local Proxmox VE server, which I've already set up for a while. For Ollama, we'll need Docker, which is easiest to run on any Linux OS. I've chosen Ubuntu without any prerequisites. Feel free to substitute with what works best for you.
On my Proxmox server, there's already a container running Docker, but it's for smaller services. When deciding how to run Ollama, I also decided to isolate it from other self-hosted services for better control over backups, updates, and allocated resources.
Here's what we'll need:
- Proxmox VE: Virtualization server
- Ubuntu LXC template: For the Linux container
- Docker: For running Ollama, link to Docker
- Ollama: It's an open-source tool for locally running LLM, including Mistral and Llama 2. Ollama website
Container Preparation
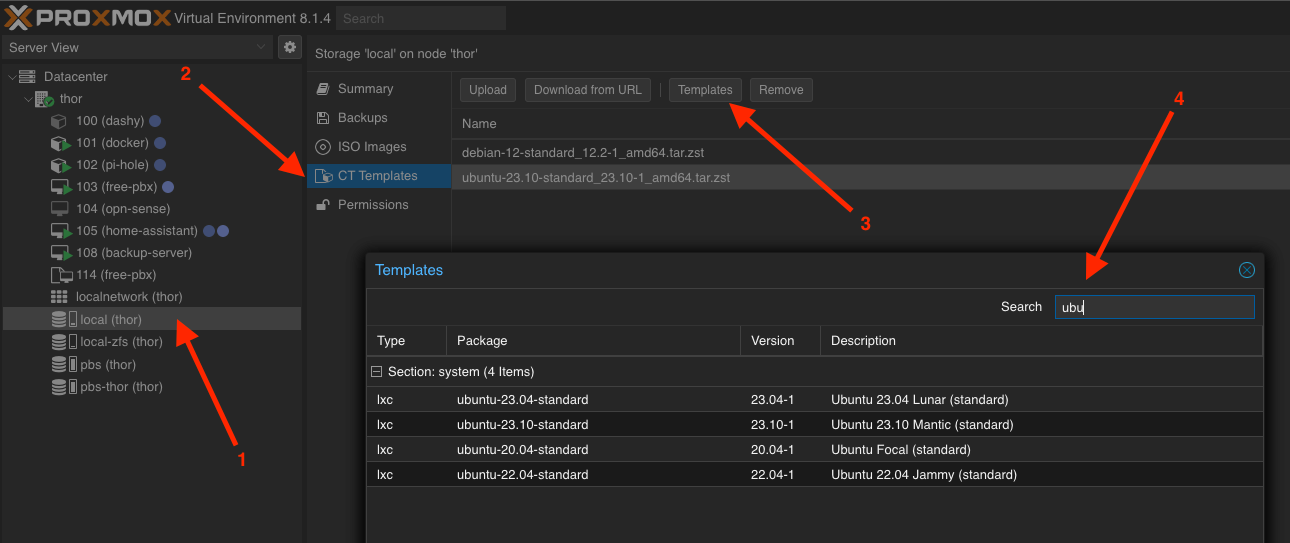
To prepare the Linux container (LXC) for launching in Proxmox, we need to download a prepared template. Here's how to do it:
- Open your Storage/disk, typically you'll have one named 'local'.
- Select CT Templates.
- Click on the Templates button.
- In the search field in the window, enter 'ubuntu'.
- Choose the desired version (I chose 23.10) and download it.
Creating a New Container
Now that we have a template for creating a new container with Ubuntu 23.10. In the top right corner, click the Create CT button and fill in all the necessary information. Let me guide you through it step by step.
Step 1: Set the Hostname (any name) and enter a password, which will be needed later for logging into the console as the root user.
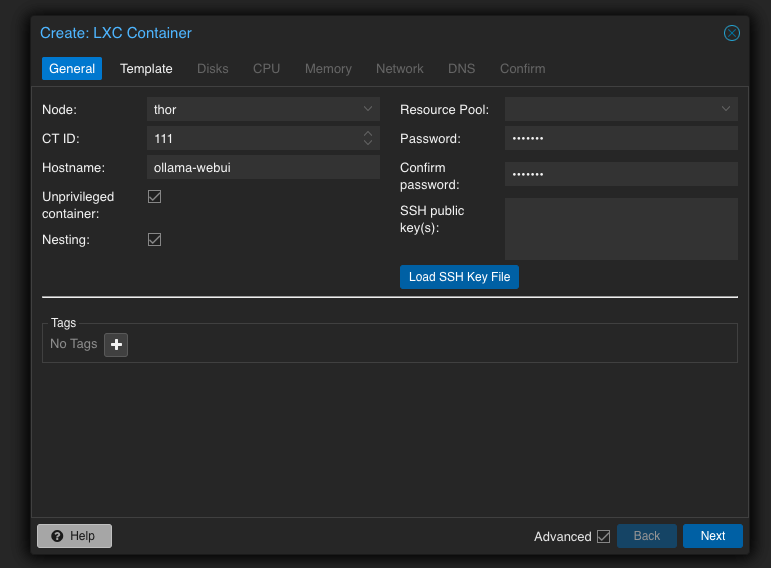
Step 2: Choose the previously downloaded template.

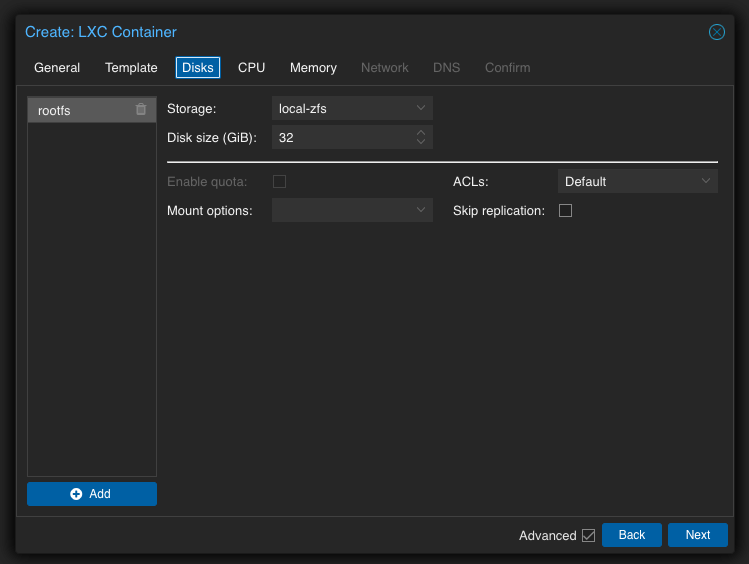
Step 3: Set the size of the system disk.
I chose 32 GB because I wanted to experiment with various models. Depending on your needs, you may reduce this parameter to 16 or even 8 GB.
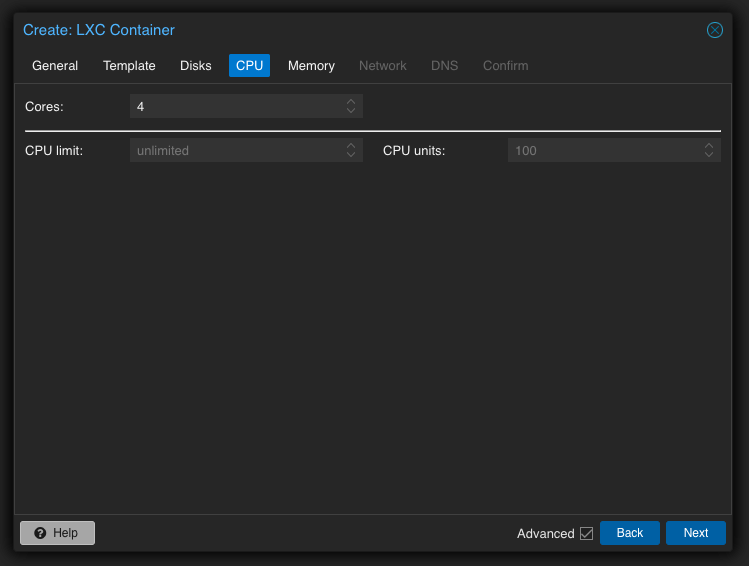
Step 4: Choose the number of CPU cores to be utilized.
If your server is powerful and/or aims to allocate all resources to AI, then select the maximum number of available cores. I have only 4 cores available, so I chose all of them. However, I'll mention in advance that later I reduced it to 3 to ensure I never monopolize all resources from other services running in separate containers on the same Proxmox server.
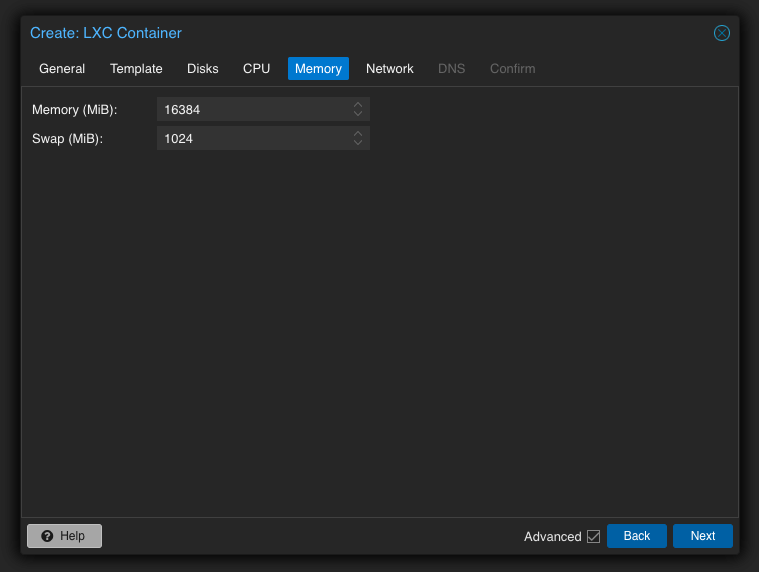
Step 5: Allocate a generous amount of RAM.
I set it to 16 GB to have room to maneuver because I have plenty of it, but in practice, I saw it using only up to 1.5 GB during loading.
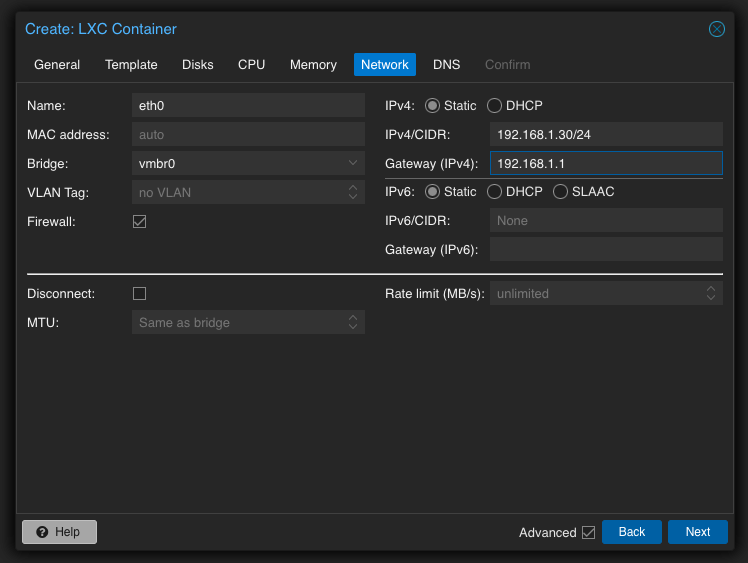
Step 6: Configure the network.
Typically, for services I want to keep for a long time, I assign a static address, as in this case. Note that the format specified is IPv4/CIDR, which requires you to specify the network mask using a dash, such as /24 in my case and in most cases. For the Gateway, specify the address of your router.
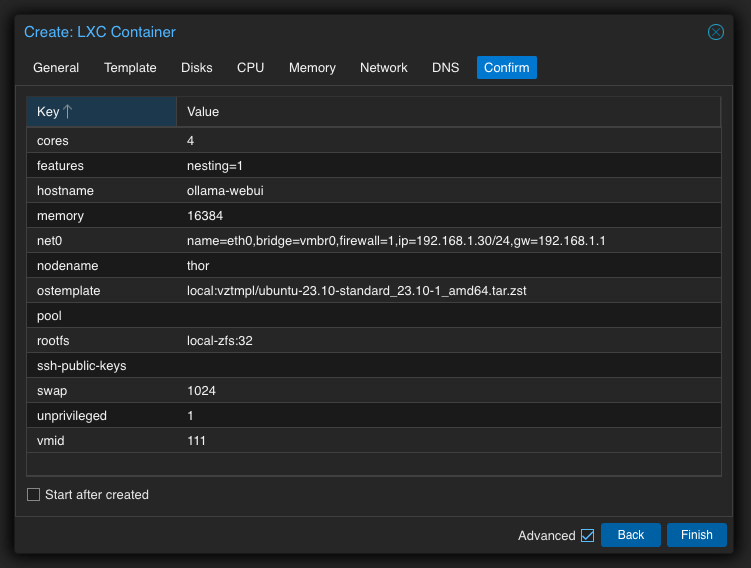
Step 7: Skip DNS and verify and confirm.
At this step, you can also check the box next to "Start after created" to automatically start the container once it's created. Otherwise, you will need to start it later using the "Start" button. There's no difference.
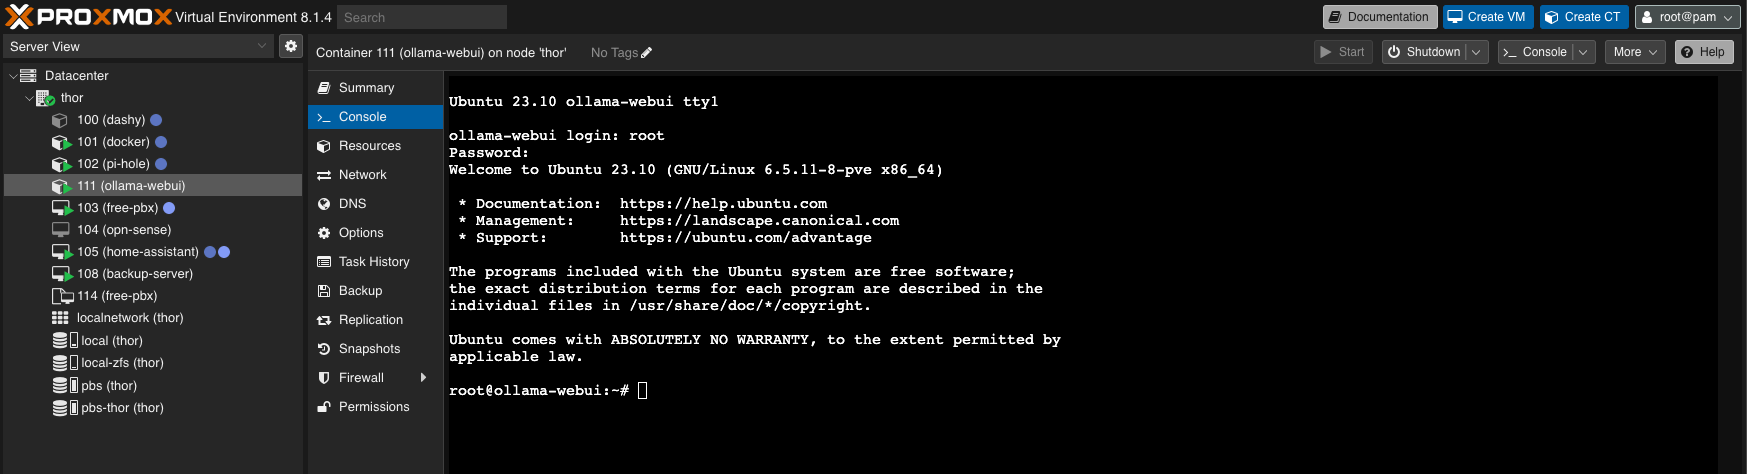
Step 8: Launching and connecting to the container.
Once the container is created, it will appear in the left panel with the name you specified. Select your container and go to the Console tab.
Since my container is already running, the Start button is inactive, but now you know where it is.
Once the console is loaded, it will prompt you for a login. For containers, it's always root, and your password is the one you specified in the first step.
Once everything is entered correctly, you will see a similar result.
Now you're ready for the installation of everything else.
Installation
Before starting the installation, it's advisable to update all packages, and we'll also need curl because it's not included by default in Ubuntu.
sudo apt update
sudo apt upgrade
apt install curl
Installation of Docker
After executing the following commands, you will have a fully functioning Docker installed, where you can host not only AI but other applications as well, although that's not our focus today.
curl -fsSL https://get.docker.com -o get-docker.sh
sudo sh get-docker.sh
sudo usermod -aG docker $USER
newgrp docker
If everything went smoothly, you should have access to the following commands for verification:
docker -v
docker ps
Installation of Ollama WebUI
I want to mention in advance that the version we are considering within this guide will only utilize CPU resources, meaning it's the CPU-only version.
However, if you have a GPU, I recommend checking out the following links:
But let's continue and download the docker-compose.yaml file.
wget -O docker-compose.yaml https://raw.githubusercontent.com/fixtse/blueprints/main/docker/docker-compose-ollama.yamlTo start, execute:
docker compose up -d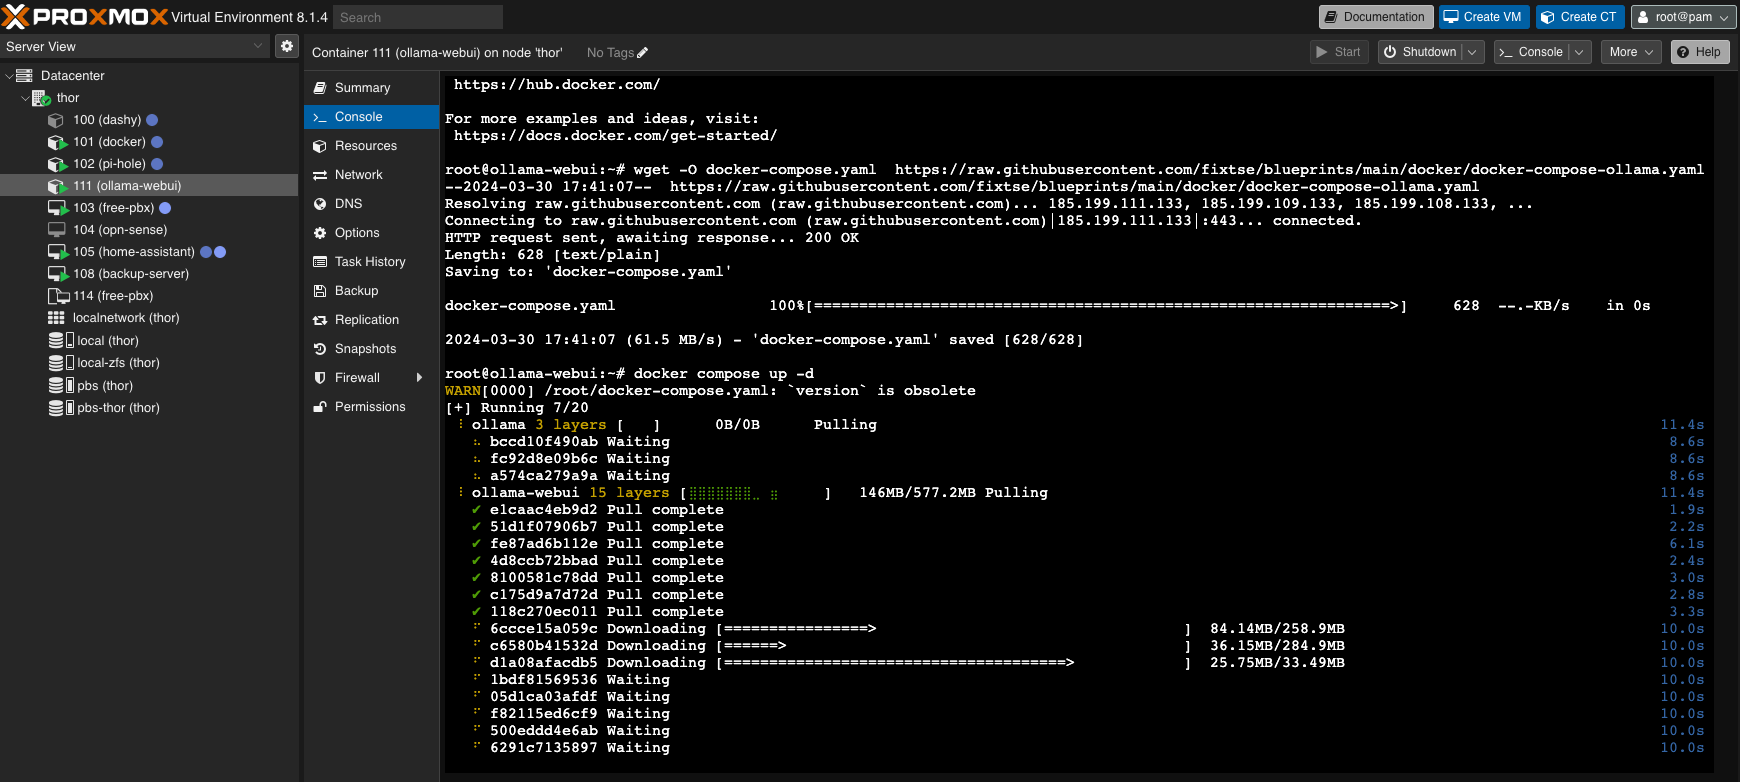
For updating when needed:
docker compose pull
docker compose up --force-recreate -d
Ollama Web UI
Our container is fully configured and ready to work. After restarting the container in Proxmox, Docker will automatically start, including the Ollama Web UI.
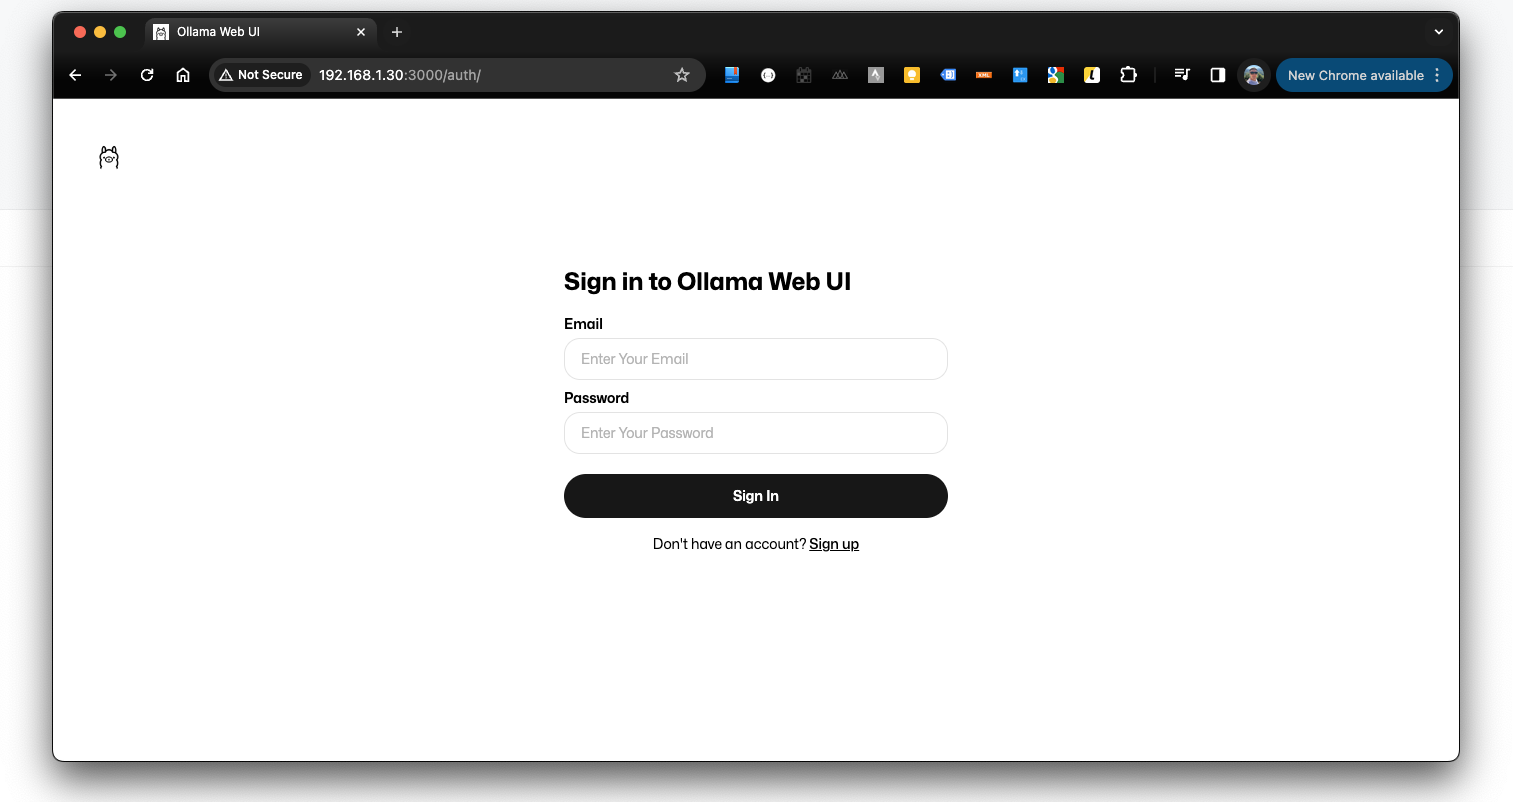
From this point on, the Ollama Web UI should be accessible at the static address you specified during the container setup. Your link should look something like:
http://192.168.1.30:3000It's important to note that the service will be available on port 3000.
Open your browser and register. The first registered user will automatically become an administrator.
Here's how the interface will look after logging in. It should be quite familiar to all ChatGPT users.
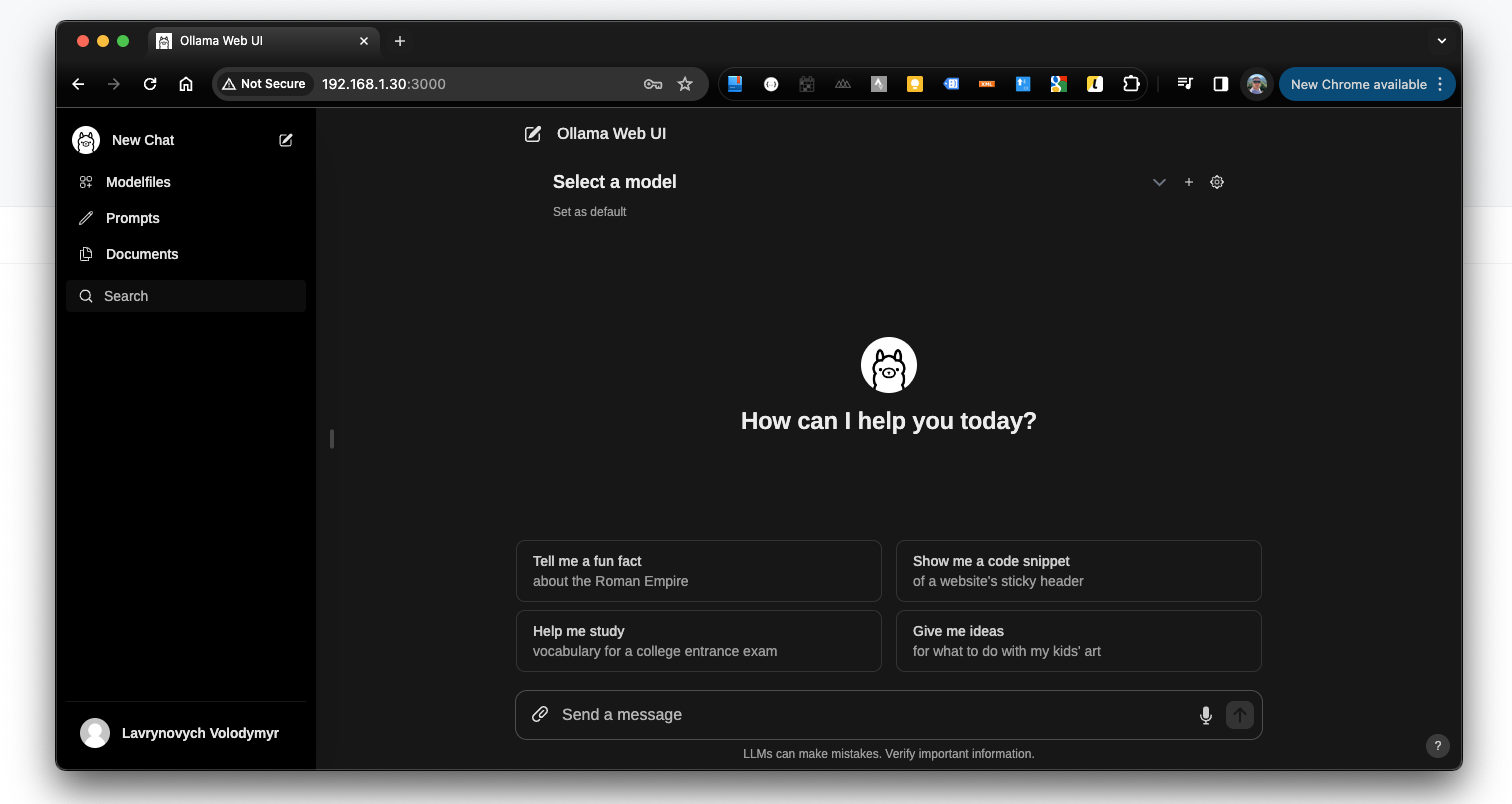
But for now, we don't have any AI models to chat with. Let's move on to installing models.
Model Installation
In the library at https://ollama.com/library, you can find numerous models for various tasks. I recommend taking your time to explore them.
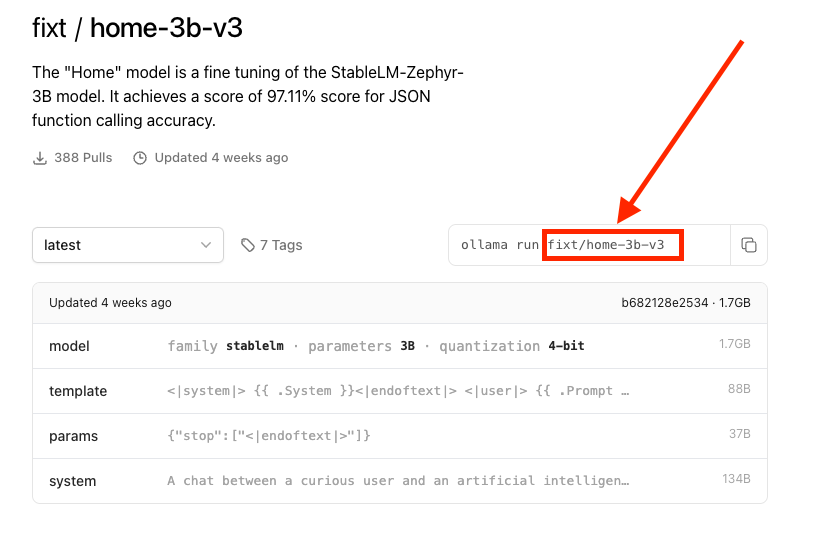
As an example, I'll demonstrate how to add new models using the home-3b-v3 model, which is designed for managing Home Assistant.
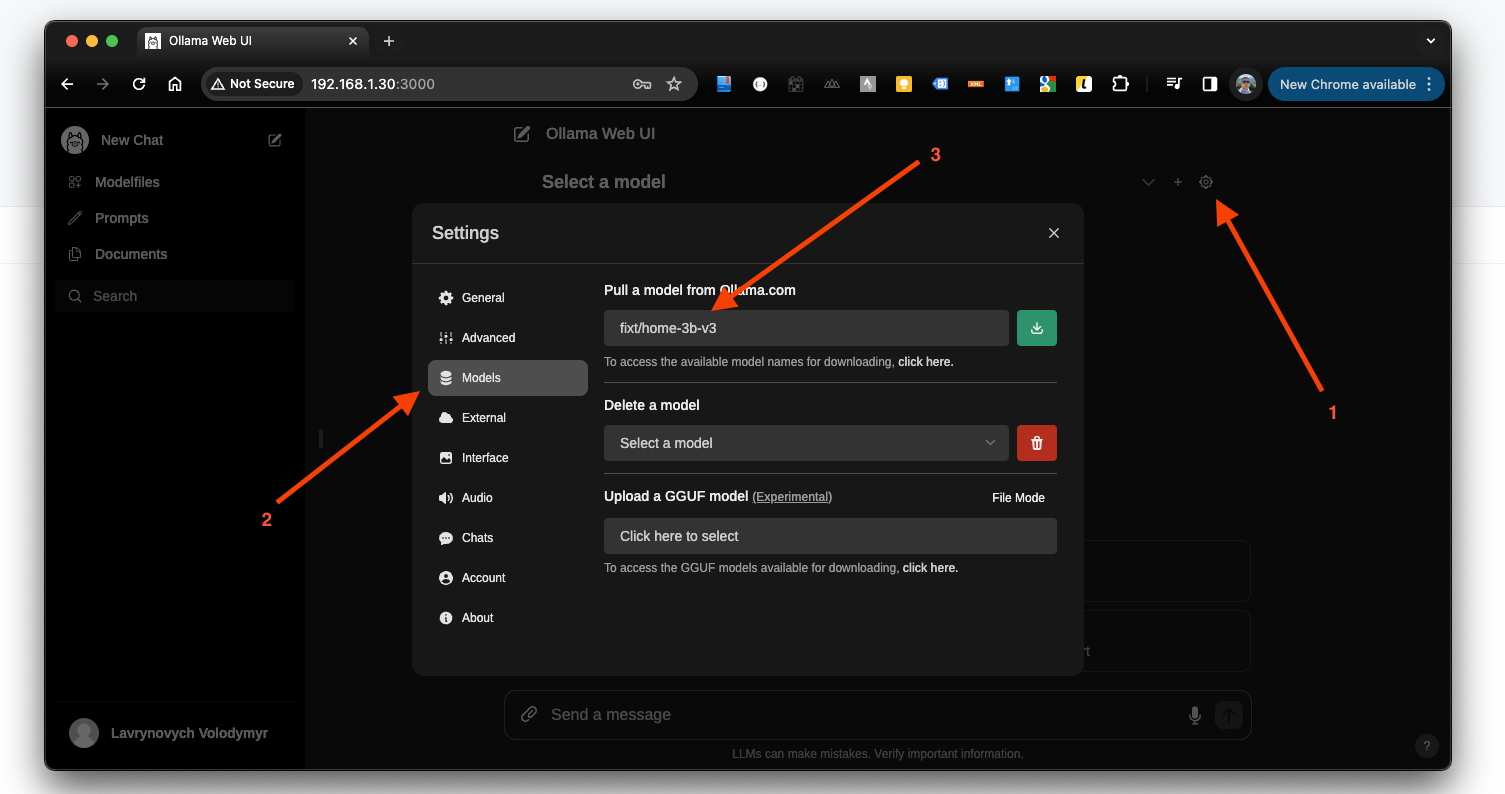
First, we search for the desired model in the library and open it to familiarize ourselves. On the model's page, we see the installation code, from which we only need the last part, namely the model's name. In my case, I'll copy everything highlighted in red.
Next, I return to the web interface and click on the settings button. Then, in the dialogue window, I select the section with models, paste the name, and click the green button to download. This will take some time, and you'll see the progress of the download.
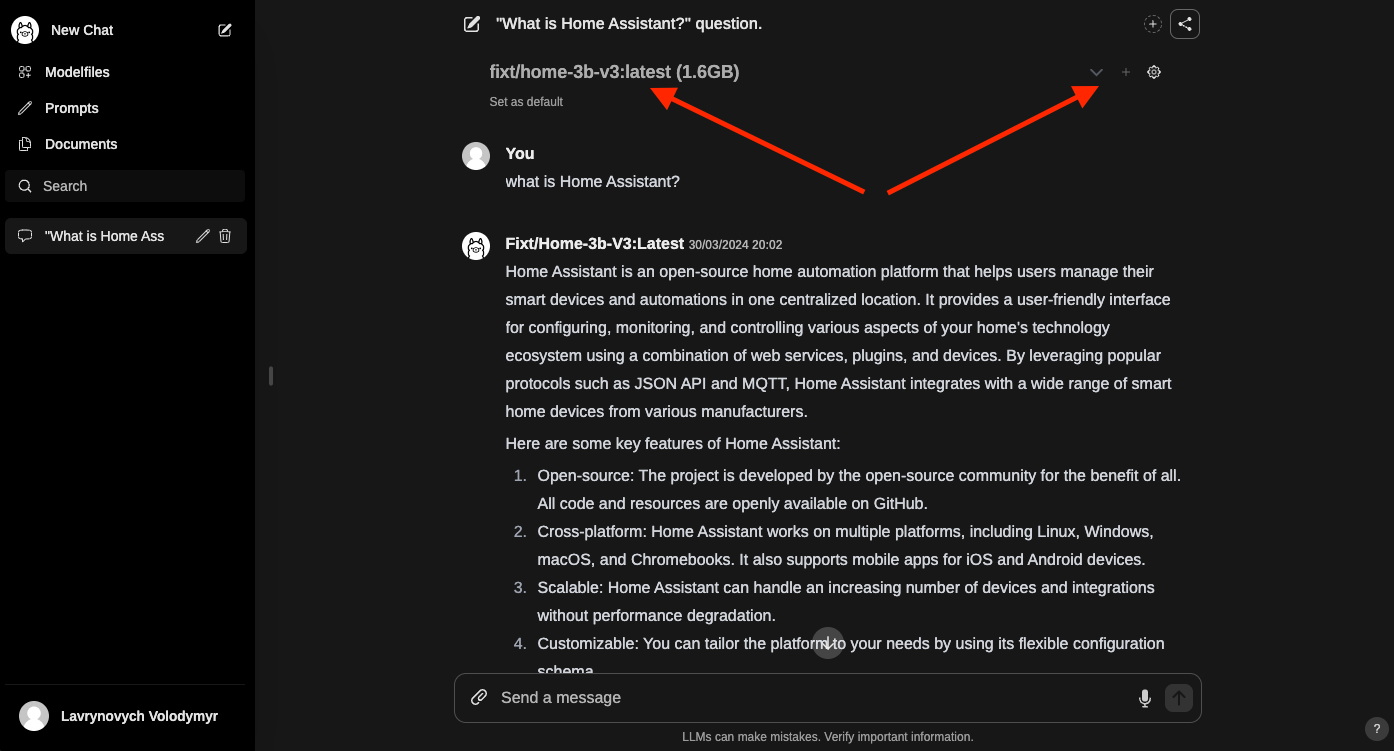
Once the model is ready, we close the window and select our model from the dropdown menu. Then, we can start the dialogue.
Here are a few models that I've added myself.
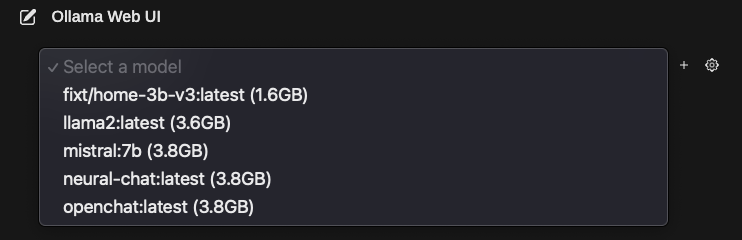
The links to some of them are provided below:

Summary
With a dedicated server and sufficient resources, we can launch a private artificial intelligence within our local network, which will operate without any limitations. A powerful server or an expensive graphics card is not necessary for this. This example demonstrates that people today have learned to run AI on almost anything for their personal needs, whether big or small tasks. Of course, the speed of response will greatly depend on the power of your hardware, but if you're running it for personal use rather than business, the waiting time should be satisfactory.
Personally, I needed all this for managing a smart home with Home Assistant.
Ollama Web UI offers deep customization capabilities and access control. You can limit registration to just family and friends or open it to public access. The fact that it's not just a console version or API, but a full-fledged web application, makes it easy and convenient to use.