Self-Hosting Your Blog: Installation and Setup (Part 2) - Ghost
This guide covers everything you need to know to set up a Ghost blog in a Proxmox VE container, including purchasing a domain, installation, configuration, troubleshooting, and basic steps to get it up and running.

Introduction
Hello. In the previous part, we worked on the foundation for our blog, specifically:
- Chose the hardware
- Installed Proxmox VE
- Prepared an LXC container with Linux Ubuntu 23.10
All of this is detailed here:
 Volodymyr Lavrynovych
In the second (current) part, we will focus on installing the blog and everything related to making it publicly accessible. For this, we will need to register a new domain name, install the blog, and use a tunnel to provide users on the internet with access to your local server. But let's go step by step.
Domain Name Purchase
Choosing a domain name that is both suitable and short is quite a science, which I don't want to delve into right now, as I often choose randomly myself. For instance, my current blog is hosted at the domain https://lavr.site. Do you think I spent a long time choosing it? No.
You heard correctly. The burden of choosing a domain name falls heavily on you. I will only guide you through the technical side of things in a separate publication. Here, I will outline the steps that will help you handle the purchase of a domain name for your future blog.
Volodymyr Lavrynovych
Installing a Ghost Blog
Let's return to our container in Proxmox from the previous part.
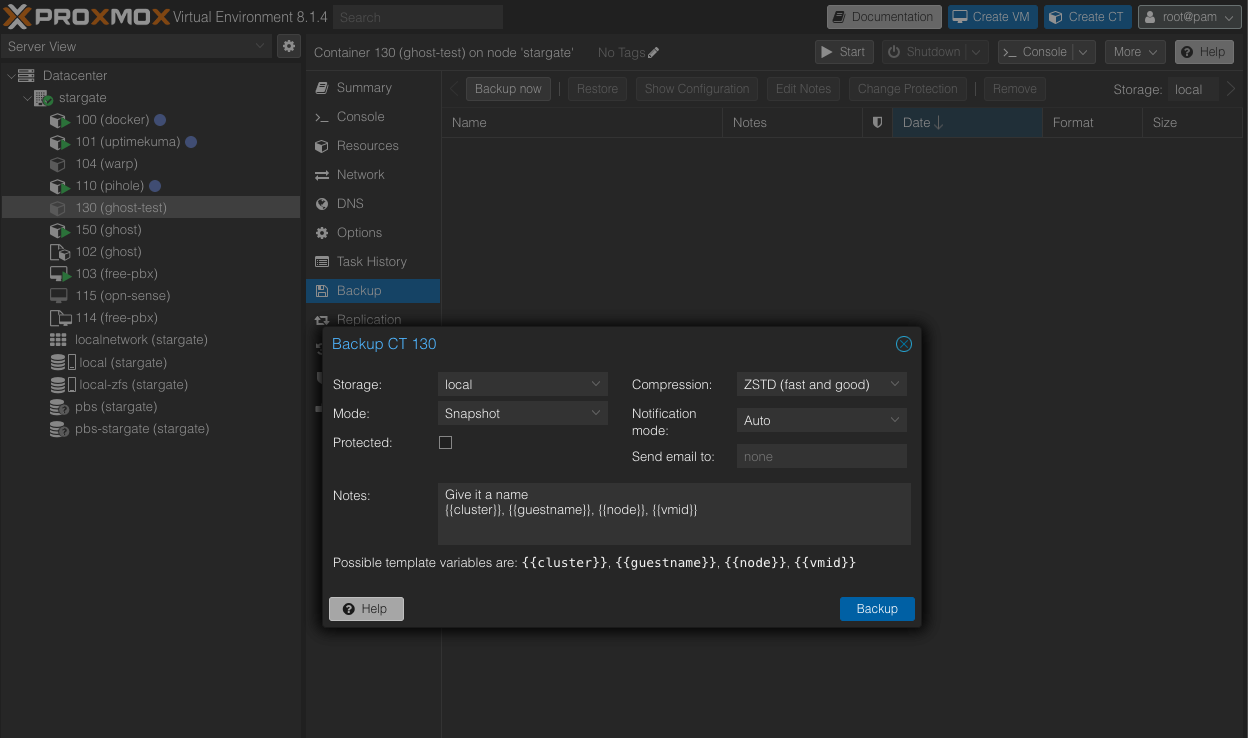
Create a Backup
The first thing I recommend is to create a backup of the existing container. Alternatively, you can convert the current container into a Proxmox template and launch a new container from that template. However, a backup will be sufficient. In case of any issues, you will have a good starting point with a clean system.
Follow the Step-by-Step Installation Guide
Now, you need to open the container through the console at the point where we previously left off. Enter the root login and your password to see a similar output in the console.
Welcome to Ubuntu 23.10 (GNU/Linux 6.5.11-8-pve x86_64)

 * Documentation:  https://help.ubuntu.com
 * Management:     https://landscape.canonical.com
 * Support:        https://ubuntu.com/pro
Last login: Sat Mar  9 19:59:21 UTC 2024 on tty1
root@ghost-test:~#
From this point onward, you will need to follow all the steps of the official installation and setup guide for Ghost blog on Ubuntu. Everything is clearly outlined there.

Follow the instructions and complete all steps:
- Create a New User
- Update Packages
- Install Nginx
- Install MySQL
- Install Node.js
- Install Ghost-CLI
- Install Ghost by following the prompts in the console
Ghost Installation
The challenge in the process will be paying attention to details. The setup step with ghost install will be the most interesting. Here's an example of how I configured my blog:
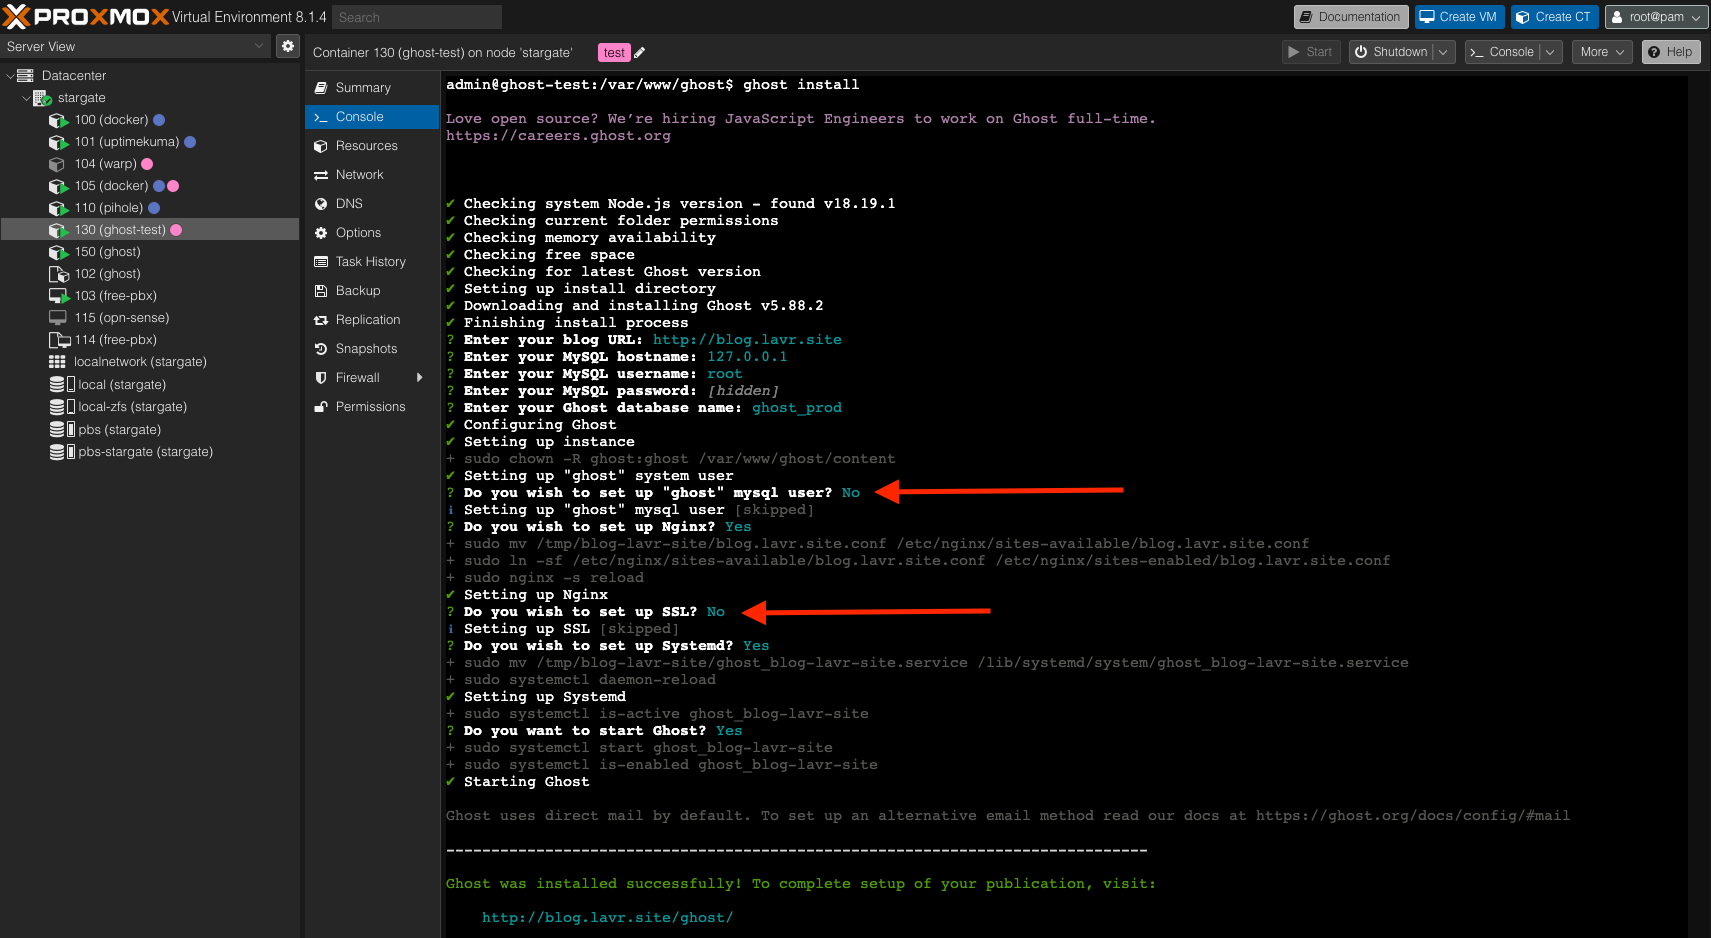
But don’t expect everything to work immediately as indicated at the end in green. That would be too simple. Your server is at home, and the domain registration service knows nothing about it. Don’t rush to try opening your blog just yet.
Configuration Notes
- Blog URL: You will need to specify the domain name you purchased. For example, I use
http://blog.lavr.site, which means using a subdomain. It’s best to decide right away which name to use:lavr.siteorblog.lavr.site. You can choose any name you prefer instead ofblog. Once you purchase a domain, you also own all subdomains—*.lavr.site. - MySQL hostname: Set this to
127.0.0.1as this is how your database is accessed locally. - MySQL username: It is important to continue using the root user and its associated password.
- Ghost database name: Come up with a unique name of your choice.
Your Configuration
For ongoing use and maintenance of your blog, it's useful to remember important parameters such as:
- The directory where the blog is located
- Passwords for the root and admin users
- The port on which the blog is running
- The name of the database and other details, especially if you created a different database user
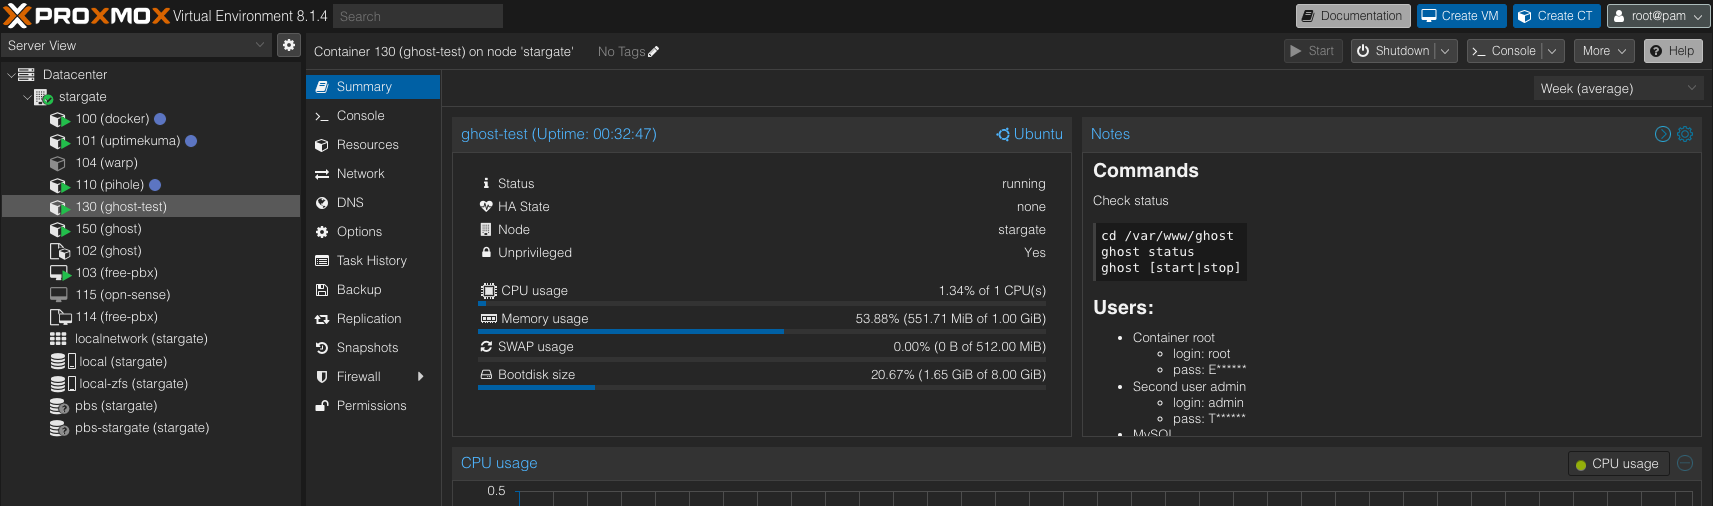
You can also use the ghost status command to view most of these parameters.

Logins and Passwords
Regarding logins and passwords, I stored them in a relatively simple but convenient format.
Container
- login: root
- pass: E******
Admin
- login: admin
- pass: T******
MySQL
- login: root
- pass: E******
This way, you’ll know where and which login and password to use in the future. Don’t overlook such notes, as you won’t be returning to the console frequently, and such details are easily forgotten.
Consider this as advice: I add all notes directly to the container in Proxmox. Only I have access to it
Useful Commands
As we smoothly transition to the point where you might need to revisit your blog's settings, for example, to update it, it’s helpful to remember some useful commands, such as the following:
# to quickly jumt to your blog folder
cd /var/www/ghost

# to check the status
ghost status

# to start or stop the blog
ghost start # or stop
I strongly recommend reading more about Ghost commands in the official documentation or keeping this link handy
Later you can check out How to update Ghost blog.
Cloudflare Setup
At this stage, I again recommend creating a new backup in Proxmox.
As much as it might be tempting to avoid complications, you’ll need to deal with them here. The Cloudflare platform is quite extensive and has an overwhelming number of settings. We don’t need all of them. I’ve outlined the necessary steps for you in a separate article. Grab some coffee and cookies — this will take some time.

Once you've started the tunnel and reached the step of adding resources, as described in the above article, you just need to correctly fill in the information about the Ghost blog.
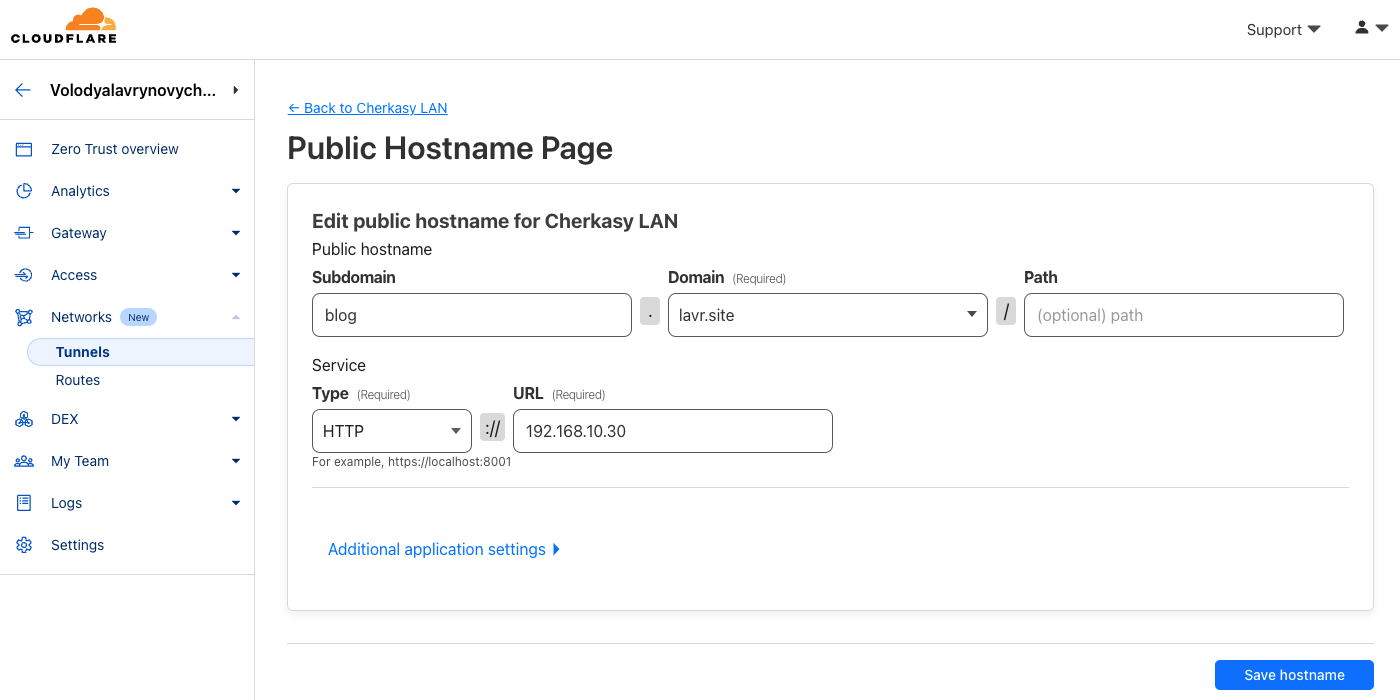
In the Domain field, select your purchased domain (in my case, it's lavr.site). In the blog configuration, we specified the URL as blog.lavr.site. Therefore, in the Subdomain field, enter blog.
In the Type field, select HTTP, and in the URL field, enter the IP address of your container with the blog. Use the address you manually specified during the network setup in previous steps.
After saving the settings at this step, you can go and check if the blog is working at your address.
What to Do If the Blog Isn’t Working
This can happen if you were inattentive in previous steps. There were many details to consider, so let’s go through them now.
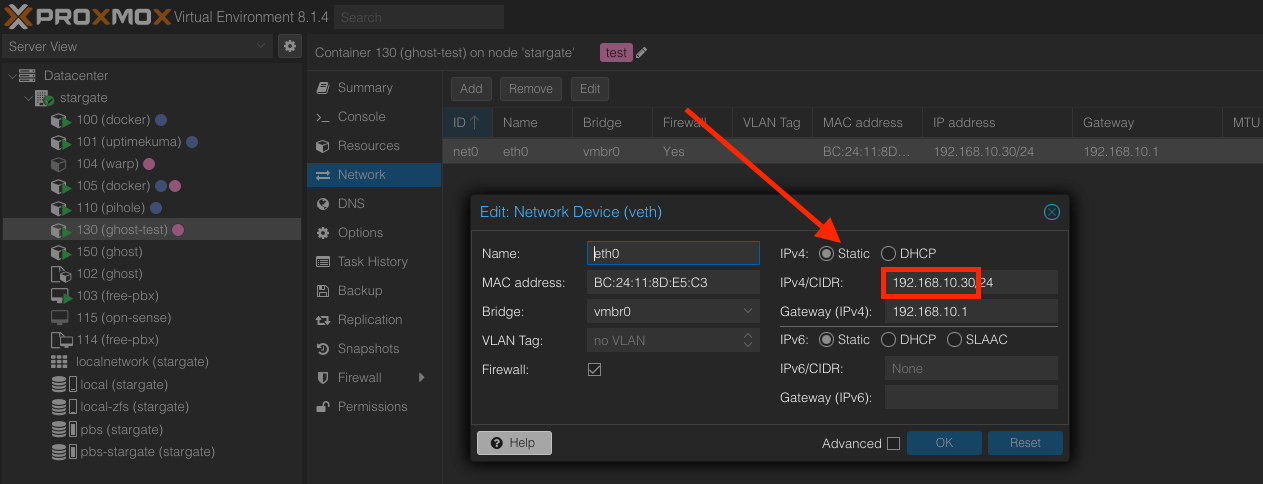
Check Network Settings
I would start with the basics—network settings. Make sure you specified the correct IP address.
Check the Blog Status
As mentioned earlier, the ghost status command should indicate whether the blog is running. It’s especially useful to check this if you’ve restarted the container.
Check the Cloudflare Tunnel Status
It has happened in my experience that the tunnel needed an update and stopped working. I had to delete the old tunnel in Docker, copy the new startup command, and execute it. This takes about 5 minutes at most.
Check if the Server is Working
This might seem silly, but when working remotely with a Proxmox server, issues can arise, such as the server being disconnected from the network (due to pets, children, or active housemates), or power outages, and so on. Now you are responsible for its stable operation. If you can't access the blog, you’ll need to address such issues like a true system administrator.
Quick Overview
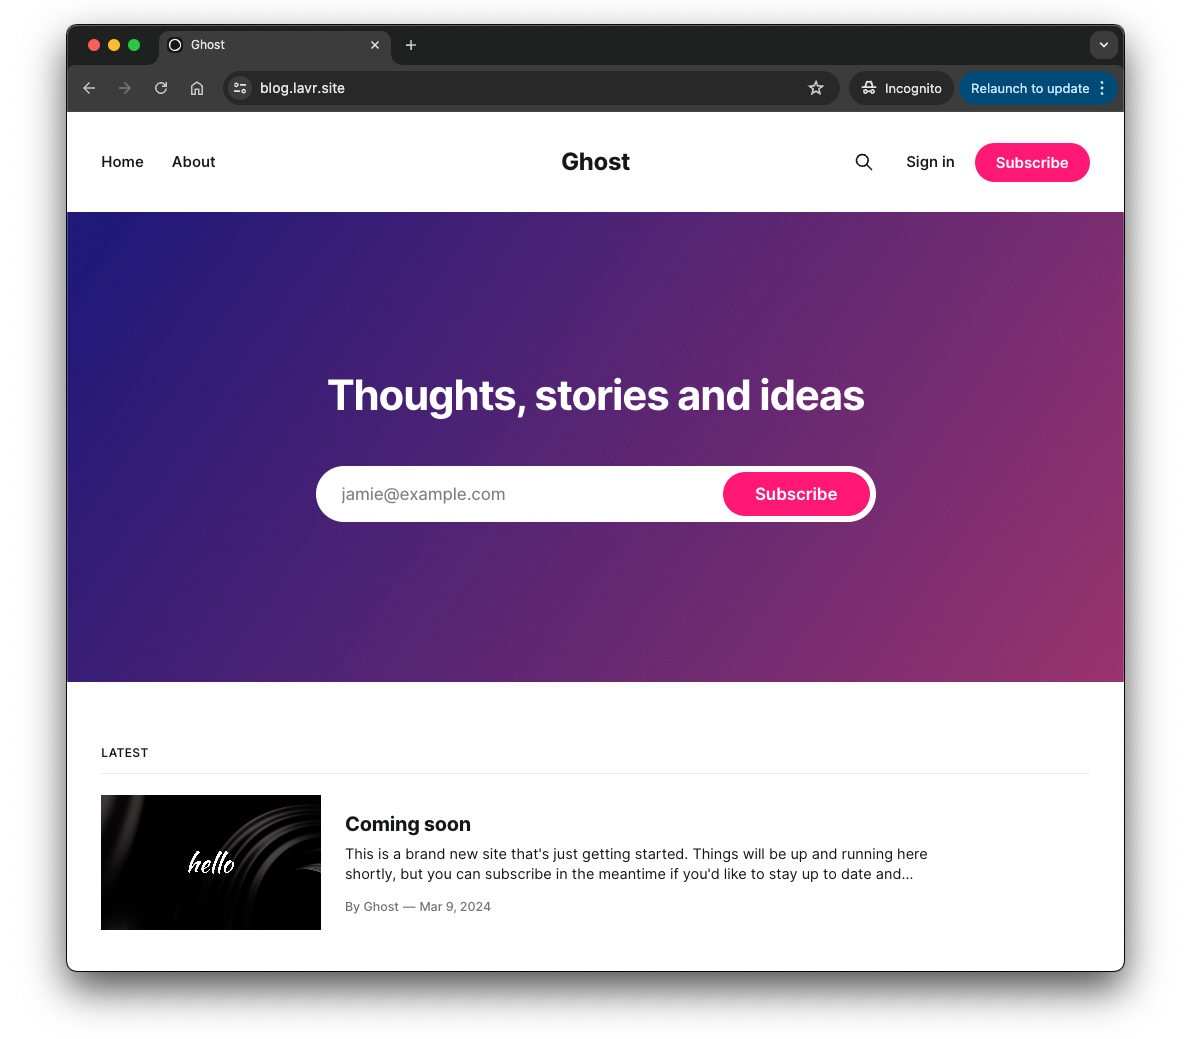
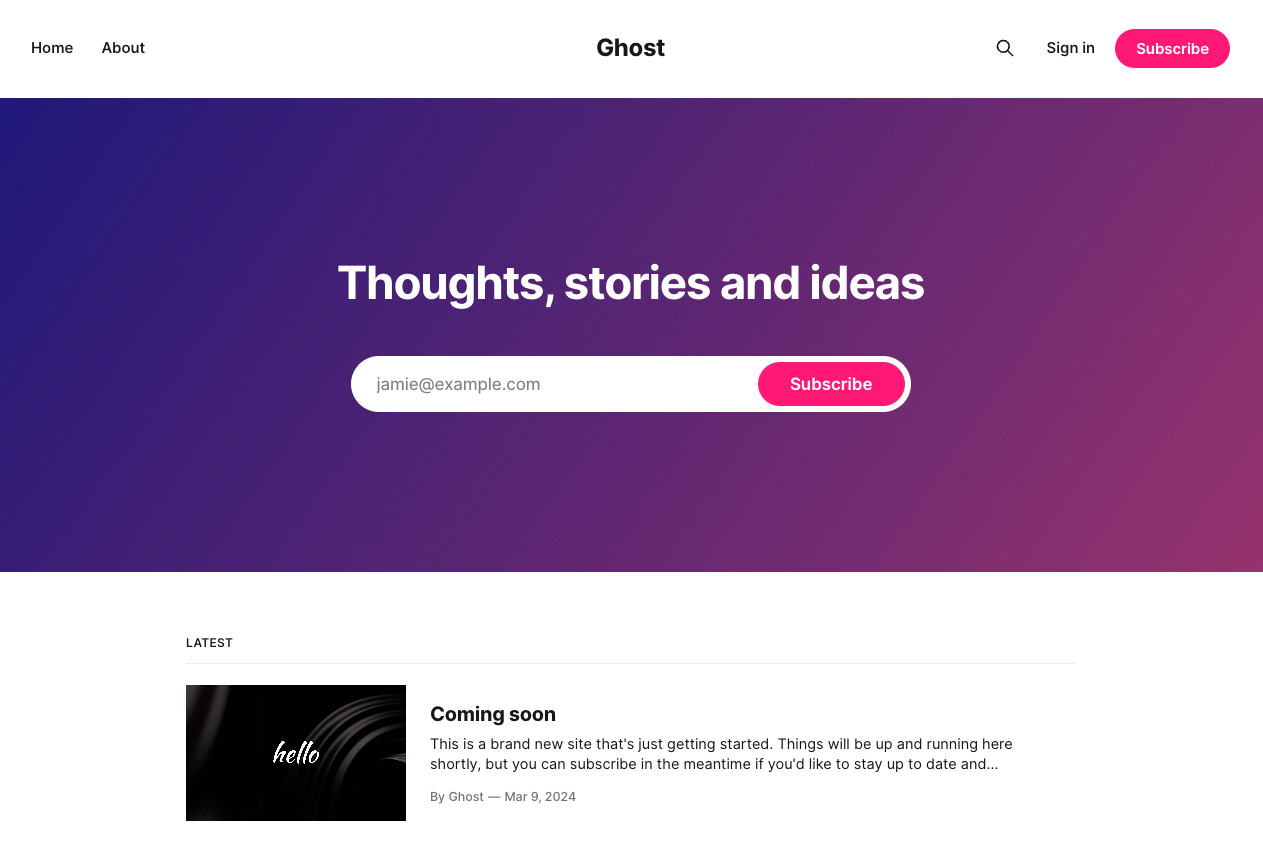
So, you’ve got everything set up and the blog is working. What’s next?
Firstly, you will see the standard appearance of the blog with a single "Coming soon" post. This is what your users will see. The blog is quite empty and will require a lot of work. Secondly, the "Subscribe" button won’t work until you set up email integration. By the way, I’ve completely disabled it on my own blog, and I would recommend doing the same in most cases.
Administration
As the owner, author, and editor of the blog, you have other access options. Add /ghost to the end of your URL in the browser’s address bar to get to the admin page, so it would be https://blog.lavr.site/ghost. This is where you will manage your blog.
On your first login, you’ll need to complete the registration process.
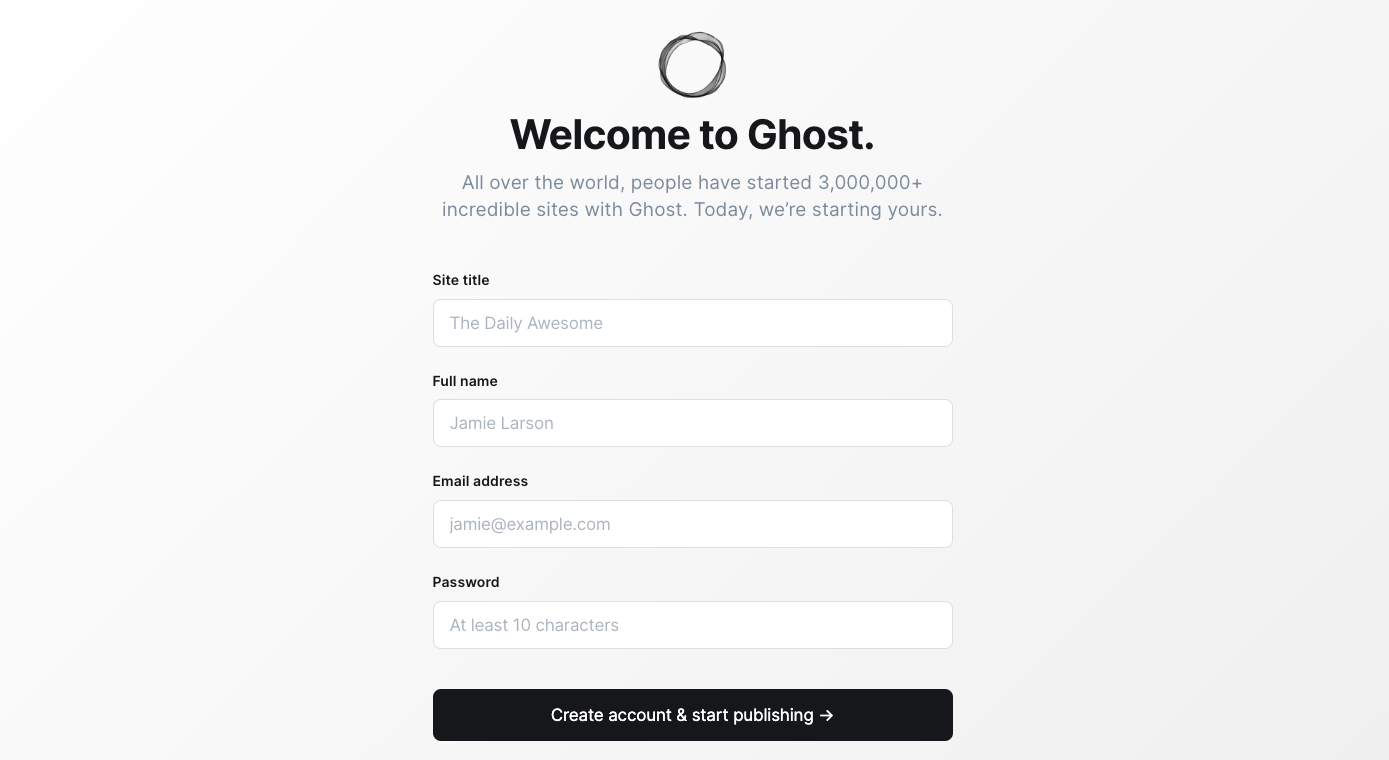
After logging in, you'll be greeted by the Welcome page. It will guide you through some initial settings step by step. This will be a great start for your new blog!
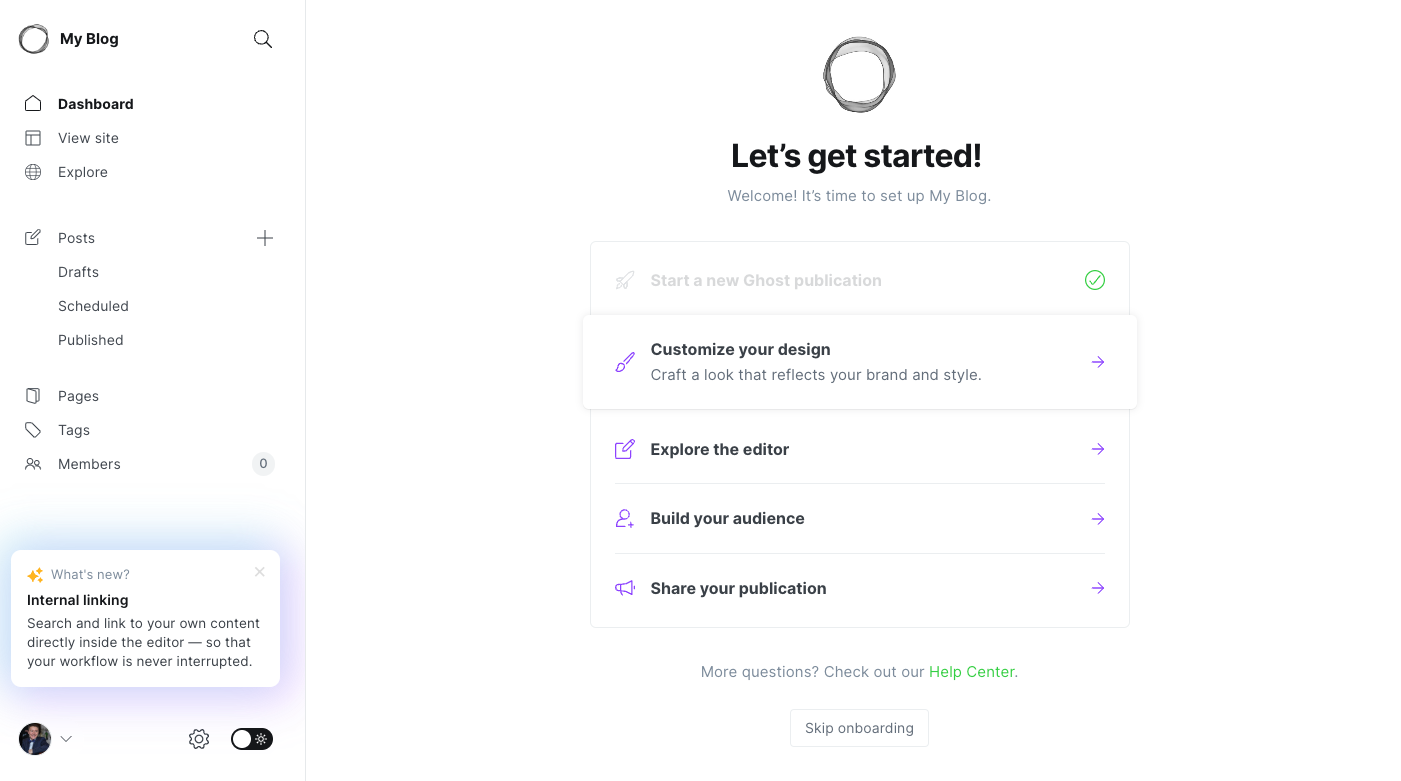
At this stage, the installation and setup are formally complete.
Tips for Working with Ghost
Here’s a quick rundown of what I would definitely do with my blog:
Set Up Backups
From time to time, you’ll need to either update the blog itself or change some important settings. Before making any major changes, manually create backups. You can also schedule automatic backups. I’ve already described such an approach with my Synology NAS.
Volodymyr Lavrynovych
It’s important to have a separate backup location, ideally outside your home, to reduce risks in case of emergencies like theft or fire.
Don’t be afraid to make extra backups. It’s better to have them and not need them than to start everything from scratch.
Add Google Integrations
In addition to having your blog up and running, it's important to track certain metrics and analyze visitor data and search queries to improve traffic and promotion. I’ve already covered this a bit here:
Volodymyr Lavrynovych Volodymyr Lavrynovych
Customize Your Blog
Your blog is your personal island on the internet. Make it cozy and unique. It should stand out not only for its content but also for its design.
Add various integrations that Ghost offers in its arsenal: Ghost Integrations.
On the Financial Side
I want to point out separately that the cost of hosting a server with your blog at home will quickly pay off. In this article, I discussed how Ghost offers its own hosting and various package options.
Volodymyr Lavrynovych
So, we get the functionality of the Business plan, which costs $199/month, but you are responsible for its stability. This means that the 99.9% uptime SLA is entirely on your shoulders. Also, you don't have the support team that Ghost offers.
In the first part, I mentioned that I purchased an old energy-efficient server for $65 as a one-time expense. We also need to account for the domain purchase at $1/year and, of course, electricity costs.
When comparing my actual expenses to the full $199/month package, the advantage is immediately noticeable. But how does it compare to the cheapest offer at $9/month?
Let’s do the math: ((65 + 1) / 9 = 7.33)
This means that after just 8 months of operation, I will have covered the cost of the server. Given that the server is mine permanently and can perform other useful functions at home, ongoing expenses will only include electricity and domain renewal—minimal costs. So, by the ninth month of running your blog at home, you’ll start saving at least $9 per month, which can then be invested in promotion and advertising.
Conclusion
No one said it would be quick and easy, and it really isn't. I want to congratulate you on completing an important milestone—launching your own blog. But there’s still a lot more work ahead—customizing its look and functionality, writing and publishing content, promoting and expanding your blog, and building your audience.
As the owner of a self-hosted blog (whether at home or in an office), with full control, you’ll need to learn a bit of everything. You’ll have to be a system administrator, DevOps, designer, editor, and SMM specialist all rolled into one. Now everything is in your hands. This is a benefit as it will likely be more cost-effective, but there are drawbacks too. It will take some time to acquire new skills, which, in my opinion, will only be beneficial.
I hope you found this journey interesting and gained new experience, and that you enjoy managing your blog. May it run smoothly!
To achieve success, stop chasing money and chase your dreams. — Tony Hsieh
Thank you all! See you possibly on the pages of your own blog!
Socat as an Alternative to Nginx (Optional)
I found a good alternative to Nginx for those who, for "religious reasons," do not want to use it—Socat. I tried it, and it works.
To switch from Nginx to Socat, you need to perform three steps:
- Remove Nginx
- Disable the Ubuntu Firewall (ufw) or reconfigure it
- Install and configure Socat
Of course, knowing this makes it easier not to install Nginx in the first place, but you can easily find information online about how to stop and remove it. With Ubuntu Firewall (ufw), it's a bit more complex, but here is a well-written guide: How to Set Up a Firewall with UFW on Ubuntu.
sudo ufw disable

# and to check the state
sudo ufw status
We do this to allow us to open and control our ports independently.
Configuring Socat
If the previous steps were relatively trivial, I want to provide more detailed commands for configuring Socat.
# install socat
sudo apt-get install socat

# verify socat
sudo socat TCP-LISTEN:80,fork TCP:127.0.0.1:2368

# go to system
cd /etc/systemd/system/

# create new service file
sudo nano /etc/systemd/system/socat-port-forward.service
Paste the following text into the nano editor
[Unit]
Description=Socat Port Forwarding
After=network.target

[Service]
ExecStart=/usr/bin/socat TCP-LISTEN:80,fork TCP:127.0.0.1:2368

[Install]
WantedBy=multi-user.target
After creating the service file, set the permissions and start it
# enable as service and start
sudo chmod 644 socat-port-forward.service
sudo systemctl enable socat-port-forward
sudo systemctl start socat-port-forward
ghost status command.