Styling of tags - Ghost


Hello. Last time we edited the theme files of our blog to display all tags of a publication instead of just one, as it was before.
 Volodymyr Lavrynovych
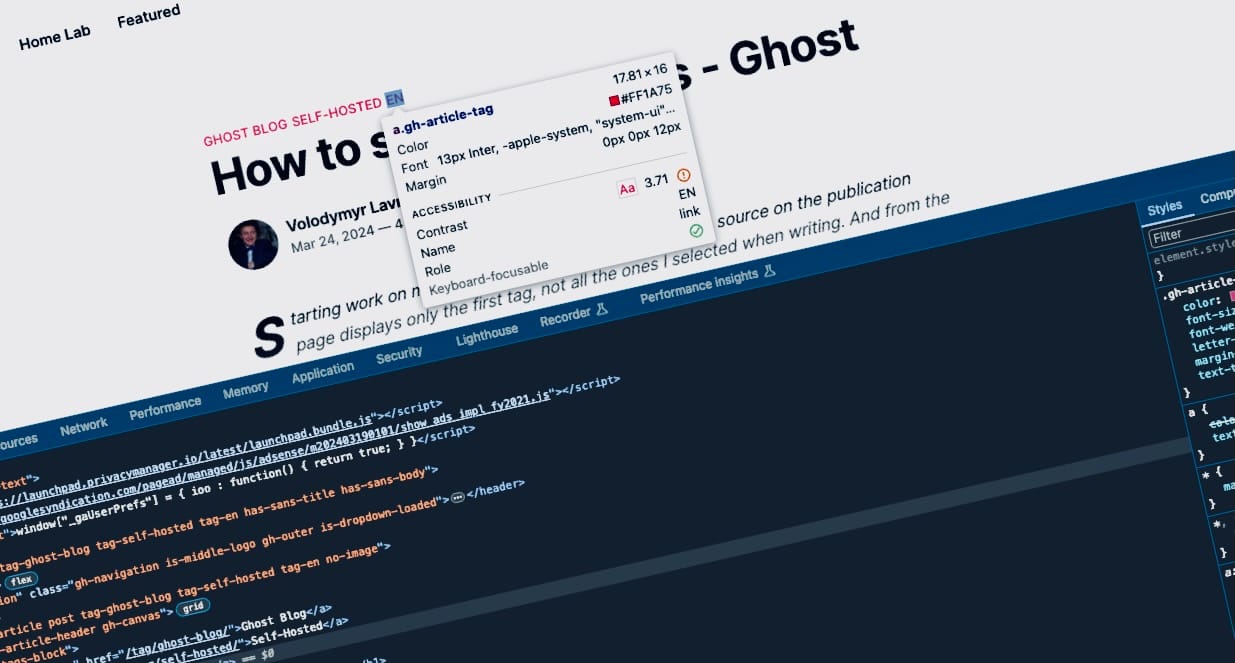
Now it's time to style them a bit to our liking.
I still like the idea of highlighting the first (primary) tag. Just after the last tag change, there are many, and they are the same. Let's fix that.
I'll show you once again what we're dealing with.

How many tags do you think are there? 6 or 4? Indeed, with the recent changes, we've lost a bit of readability.
I prefer the classic style of tags with a hash symbol (#) in front, like #SELF-HOSTED. This hash symbol can solve the problem of visual separation of tags. I've also tried using commas , and slashes /, but they tend to clutter visually rather than help.
Now, moving on to the code, I want to point out that I didn't just add a separate class "gh-tags-block" to the tag block in the previous article for no reason. It will serve as the foundation for writing our styles; we'll rely on it, and it will also allow us to limit the scope of our changes.
<div class="gh-tags-block">
  <a class="gh-article-tag" href="/tag/self-hosted/">Self-Hosted</a>
  <a class="gh-article-tag" href="/tag/homelab/">Home Lab</a>
  <a class="gh-article-tag" href="/tag/en/">EN</a>
  <a class="gh-article-tag" href="/tag/featured/">Featured Posts</a>
</div>
Adding #
All the magic will now happen thanks to this class. We're describing a rule where for all tags <a> inside a block with the class .gh-tags-block, we add something before them using ::before. And as for what exactly, we can describe it with the content parameter, specifying there a hash symbol or any other symbol or text.
.gh-tags-block a::before {
    content: '#';
}
How to read this? You can read from left to right and vice versa. For instance, in an element with the class gh-tags-block, for all tags <a>, we will be adding a hash symbol # before their content. In fact, the class serves as an isolator from external styles, or more accurately, external from our styles.
I tried making separators, as I mentioned earlier, after the tags. You might need this code example, but I don't like it.
.gh-tags-block a::after {
    content: ' / ';
}
Highlighting the first tag
To highlight the first tag, I decided to make it slightly bolder, and to prevent one color from blending in, the idea came up to mute all other tags with a gray color.
To add style only to the first tag <a> among all in our block with the class .gh-tags-block, we should use :first-child, and to style all others, we use the construction :not(:first-child). We write two new styles similar to the previous method.
I'm making the first tag thicker, and all others will be gray.
.gh-tags-block a:first-child {
    font-weight: bold;
}

.gh-tags-block a:not(:first-child) {
    color: #737373;
}
Code Injection
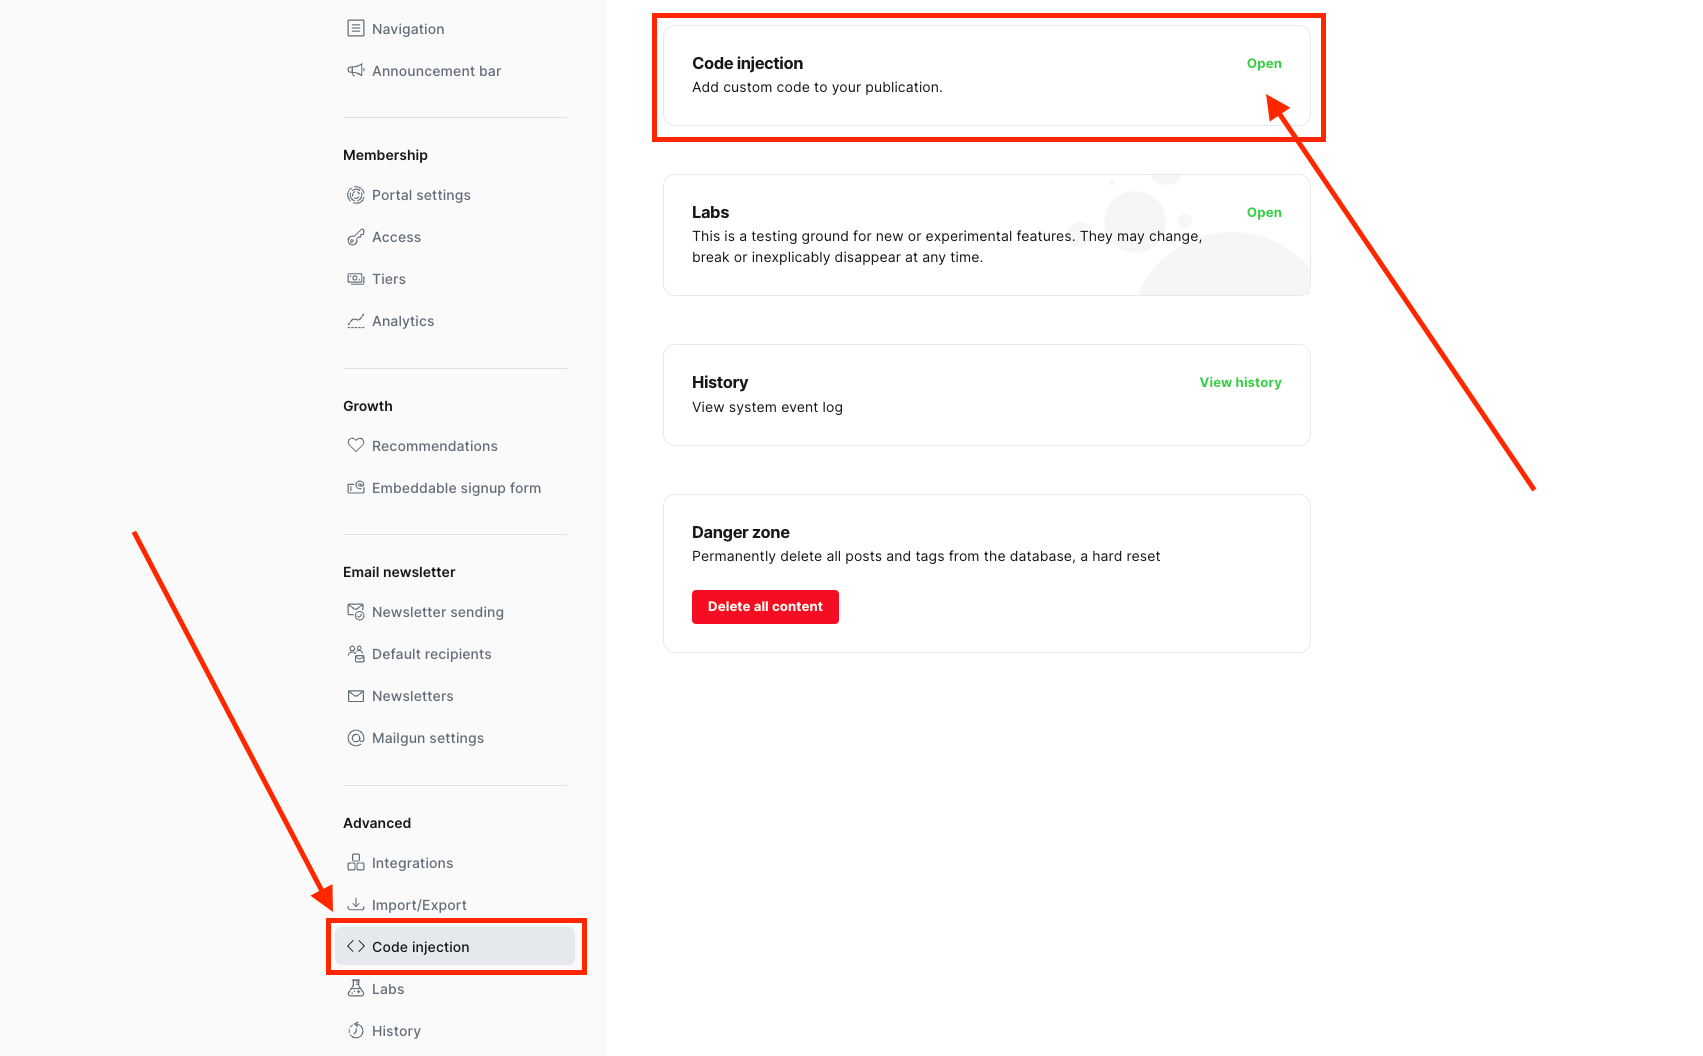
Now let's put everything together and go to the settings of your blog as an administrator. In the left menu, look for "Code Injection" and click on the "Open" button.
In the "Site header" tab, at the very bottom, you need to add your code. For convenience, I'll divide everything into blocks with comments. As you can see, I have both Google AdSense and Google Analytics, about which I told you earlier.
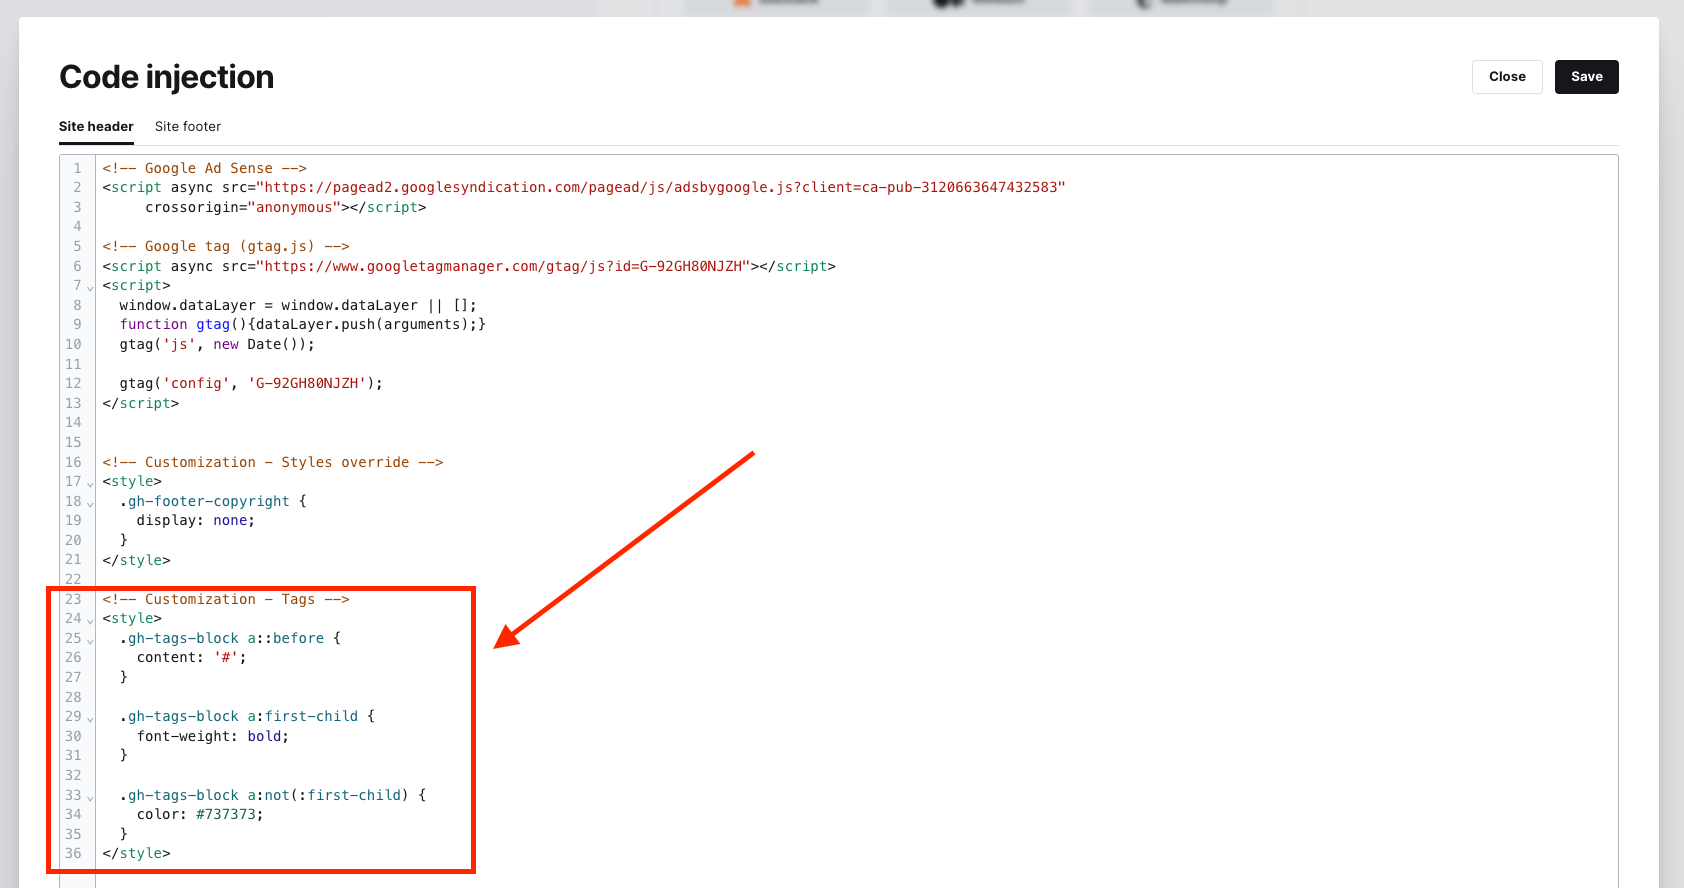
So let's wrap the styles in the <style> tag, add it at the very bottom, and press Save. The final script will look like this.
<!-- Customization - Tags -->
<style>
  .gh-tags-block a::before {
    content: '#';
  }

  .gh-tags-block a:first-child {
    font-weight: bold;
  }

  .gh-tags-block a:not(:first-child) {
    color: #737373;
  }
</style>
After successfully saving, let's quickly check the result.

Simple styles added through the administration page and a full list of tags look much better than before.
Perhaps not perfect and a bit rudimentary, but quick and effective - the main tag is emphasized, and the others are present without being obtrusive.
I think maybe making the other tags lighter could have been a good idea, but that's something you can experiment with on your own.
Good luck with customizing your blogs! I hope it was simple and helpful.