Table of Contents (TOC) v2 for your blog - Ghost
I talk about how I improved the first version of my TOC written for Ghost posts. Added language and multi-level support. Fixed some issues and greatly improved the code structure. It is almost perfect!

<toc title="Table of Contents" collapsible="true" show-text="Open" hide-text="Close" border-color="#000" bg-color="ivory"></toc>. Read more hereTypeError: Cannot read properties of null (reading 'appendChild') at TOC.onLoadIntroduction
Hello. Using the previous version, I decided that creating a duplicate of such a script for each publication would be too much. So today, let's simplify the previous script a bit more and use it slightly differently.
The previous version explained the process of automating content creation itself. You can familiarize yourself with the idea and compare existing options here.
 Volodymyr Lavrynovych
Update
The previous script consisted of three things:
- Tag <toc> - it marked the place for adding the table of contents
- Styles
- JavaScript
Overall, the changes will be minor. And the first thing I started with was moving the title and making it a separate parameter of the tag itself, and now it should look like this:
<toc title="Table of Contents"></toc>Accordingly, I removed a small settings object from the code, which improved the readability of the JavaScript code. Consequently, the addTitle method has changed.
Additionally, I completely moved the creation of styles to the script side. This is handled by the new addStyles method.
Support for multiple languages
And now I can solve my problem even more easily because previously I had to prepare either two different templates for each language - Ukrainian and English - or constantly change the title name in JavaScript, which I did.
Having the title attribute in the updated version allowed me to separate the <toc> tag itself and the styles from the script - both logically and physically.
Script deduplication
Fighting script duplication was a significant concern for me. With each new template insertion, the script and style were repeated, cluttering up the codebase. Regardless of where a new publication was stored in the database, it inevitably contained a copy of the script. This issue weighed heavily on my mind, as I foresaw it worsening over time.
I was aware that the script relied on document.addEventListener('DOMContentLoaded', () => {...}), which meant that if it were added to the footer of the blog, it would execute every time the page loaded. Since the Ghost blog reloads everything from scratch when switching to another page, it's not a Single Page Application (SPA), which actually worked to my advantage.
So, the solution I came up with was to include both the styles and the script in the footer of the blog. Having full control over the title using the title attribute, I saw no reason not to separate them.
It's worth emphasizing that consolidating the script in one location and only placing the <toc> tag in publications offers a significant advantage. Any subsequent changes to the script or styles will automatically apply to all publications, eliminating the need to manually update each one. Even after writing 20 articles, I found myself needing to revisit older posts to make modifications.
Now I'll tell you what you need to do next.
Connection
To understand, I've sketched a diagram.
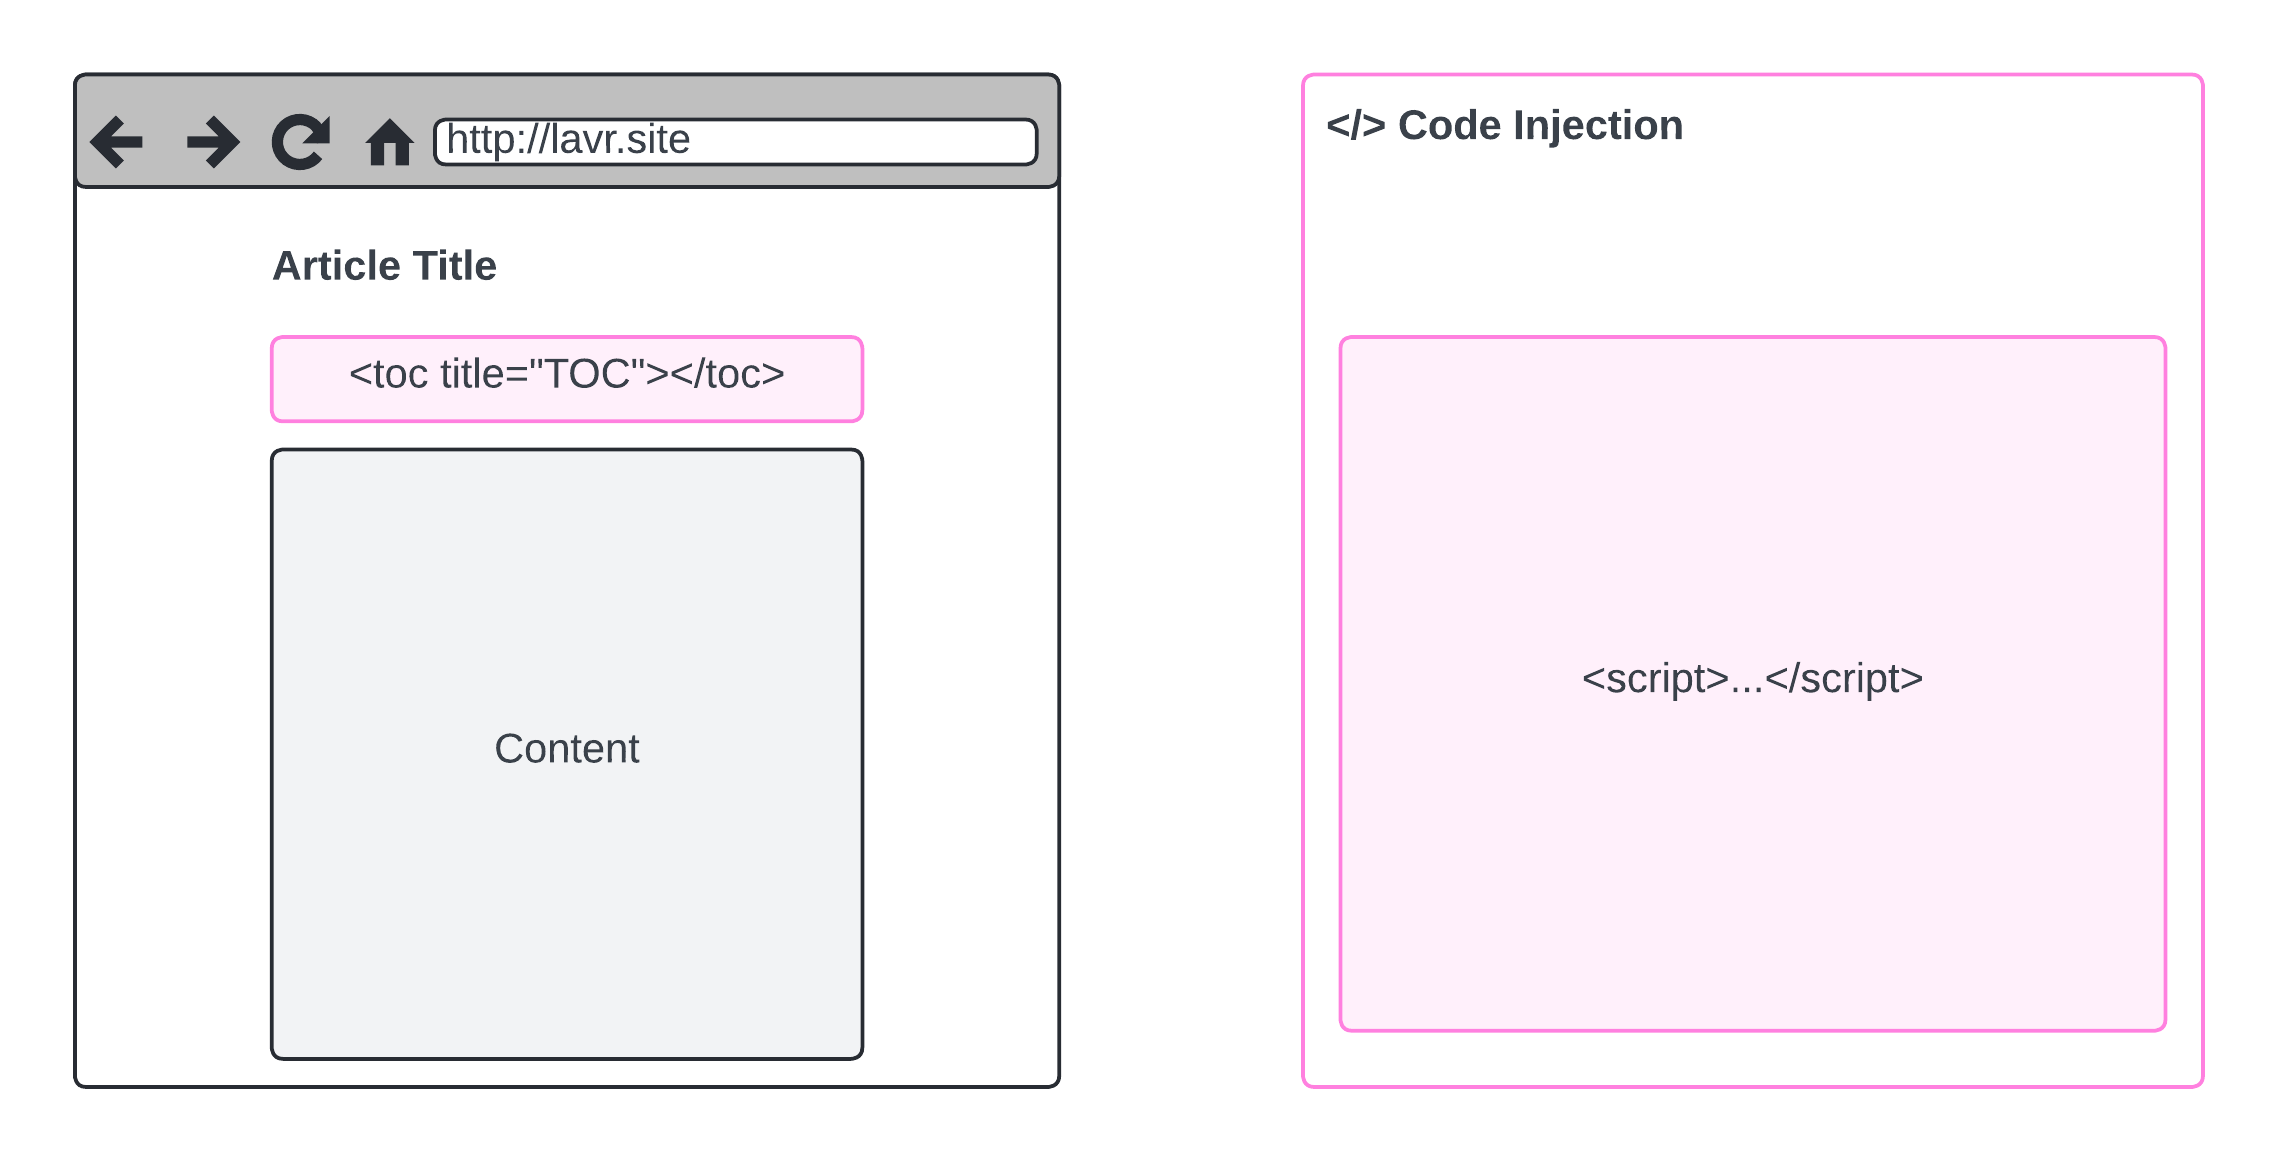
On the left, we see that in each publication, HTML code will now be added in the same way. However, unlike the previous version, we only need to add the <toc> tag itself as a container for the table of contents component. Here's an example.
<toc title="Table of Contents"></toc>On the right side, I attempted to illustrate that using Code Injection, we need to add a script. Yes, it will be quite a bit of text in your footer section, but everything will always be located locally for you, ensuring stability under any circumstances.
Code Injection
By the way, read about Code Injection itself in the official documentation.

We've also used it before, here it is:
Volodymyr Lavrynovych
I simplified everything to just adding the script to the footer section. Copy the entire content of the script along with the <script> tag and paste it at the very bottom of the footer section.
Save the changes and return to editing your posts. Now, for convenience, you need to create a template.
How to Use?
I highly recommend creating templates for all the languages you use. You can learn more about snippets in Ghost here:

Step 1. Creating a Template
As the author of your blog, in any post, add an HTML element and copy the <toc> tag into it.
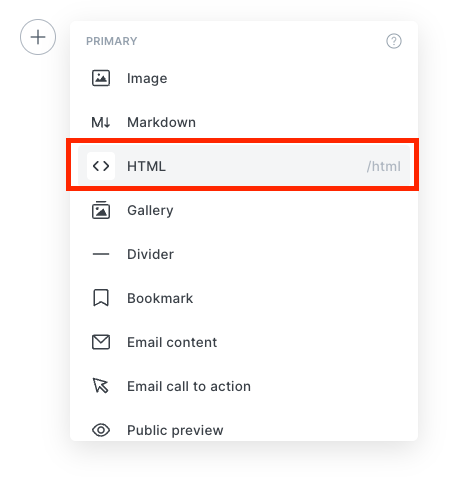

Click outside the HTML element

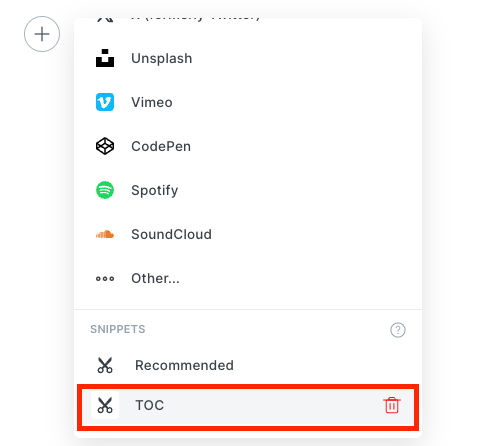
And save it by adding a name like TOC (Table of Contents).

Step 2. Usage
With the template named TOC, all we need to do is open the post where we need the table of contents and insert it just like we added the HTML element, but now we need to look for TOC at the bottom of the list.
Everything is ready! Now, after publishing or previewing, you will see the table of contents generated based on your content. The main thing is not to forget to add your snippet each time at the beginning or wherever it is convenient for you.
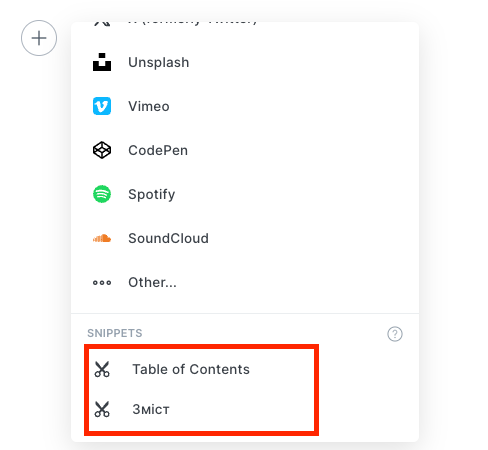
For my own needs, I created snippets for different languages.
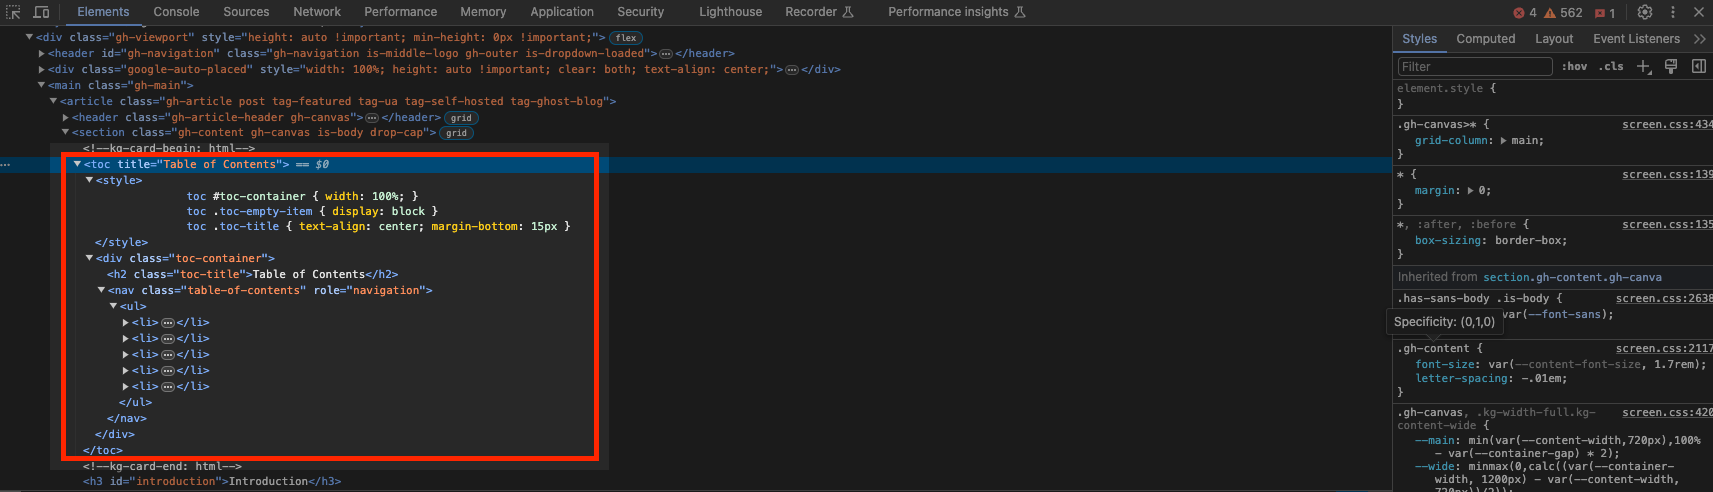
What happens in the footer?
If you were curious (like me) about what magic happens after the script is executed, I specifically want to show you that styles were added to the <toc> tag using the addStyles method, and after that comes the .toc-container itself, which contains the title and links to the sections in the <nav> block. Each <li> tag represents a separate item. I didn't open them because there is a lot of text; take a look for yourself.
Conclusions
The updated version has several advantages compared to its predecessor:
- Changing the style and the script itself can be done in one place, which is convenient and affects all previous publications at once.
- The content of publications is not cluttered with a large script, and the template is now significantly smaller - we are talking exclusively about the size necessary to store the publication in the database.
- Changing the title of the table of contents is now easier - in fact, we deal with only one line.
- Styles were added as part of the script - without changing the functionality of adding the script to your blog, it has become simpler.
If I haven't convinced you yet, I don't know what you're looking for. Meanwhile, while you are considering options, I am already successfully using all this in my blog.